Learning how to hang shelves is really about matching the load, the wall, and the fastener. Get those three things right, and the project is straightforward; get them wrong, and even a shelf that looks perfectly level can sag or pull loose later. This guide walks through the decisions that matter, from choosing hardware to finding studs, setting the layout, and testing the shelf once it is on the wall.
What matters before you drill
- Studs are the best support for shelves in drywall, and in many US homes they are 16 or 24 inches on center.
- Shelf style changes the hardware: floating shelves, brackets, and adjustable standards all load the wall differently.
- Deep shelves create more leverage, so a shelf that holds books or pantry items needs stronger support than one used for décor.
- Drywall anchors are a backup, not a default; use them only when the wall type and weight rating make sense.
- A level and a careful layout matter more than speed. Most crooked shelves start with bad marks, not bad screws.
- Test with a light load first before you trust the shelf with heavy items.
Choose the shelf system that fits the load
I start every shelf job by deciding what the shelf will actually do. A decorative display shelf for framed photos is a different project from a kitchen shelf holding glass jars or a garage shelf carrying tools, and the hardware should reflect that difference. The most common systems are floating shelves, visible bracket shelves, and adjustable standards with brackets; each has a clear strength point and a clear limit.| Shelf type | Best for | How it is supported | Trade-off |
|---|---|---|---|
| Floating shelf | Clean-looking décor, light to medium storage | Hidden wall bracket or rod system | Looks sleek, but the installation has less forgiveness |
| Bracketed shelf | Books, pantry goods, utility storage | Visible brackets screwed into studs or rated anchors | Brackets are visible, but the system is usually stronger and simpler |
| Standards and brackets | Closets, garages, adjustable storage | Vertical metal standards screwed to the wall, with movable brackets | Flexible and practical, though not the cleanest-looking option |
A shelf standard is the vertical rail that carries adjustable brackets, and it is a smart choice when storage needs may change later. For heavier use, I prefer a visible bracket or standard system over a minimalist floating shelf because the support is easier to inspect and easier to overbuild. Once the shelf style is clear, the wall itself decides what hardware makes sense.
Check the wall before you drill
The wall behind the finish surface matters as much as the shelf. In drywall, the best possible attachment is into a wood stud, because studs are the structural framing members inside the wall. In many US homes, studs are spaced either 16 or 24 inches on center, which means center to center; if you find one stud, the others are often easy to locate by measuring outward from it.- Drywall over wood studs is the easiest case. This is where most shelf brackets and floating shelf backplates belong.
- Drywall over metal studs needs more caution. Some fasteners work well in metal, but not every shelf system is designed for it.
- Plaster and lath can crumble if you rush the drilling. I use a slower touch and a proper anchor made for brittle walls.
- Brick, block, or concrete needs masonry anchors and the right drill bit. Standard drywall hardware does not belong here.
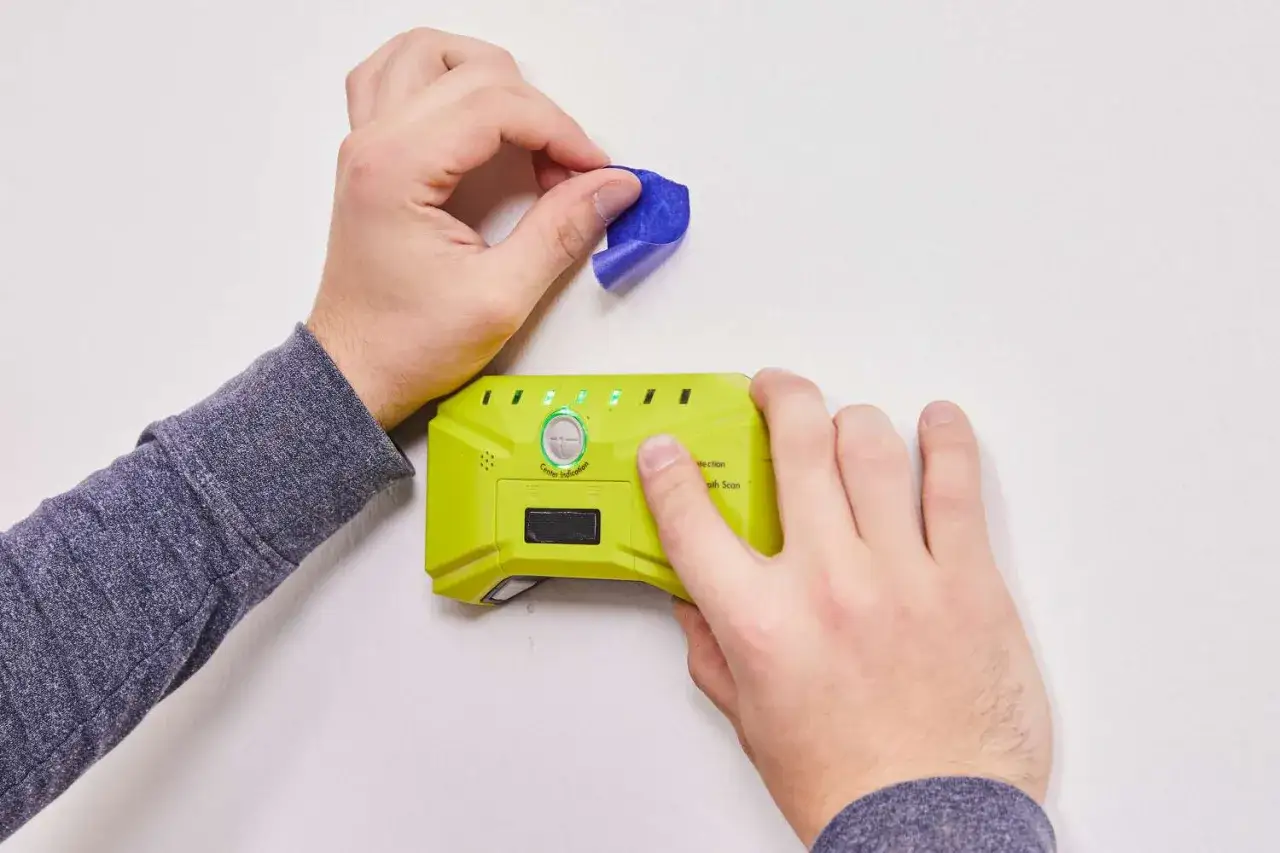
I also check for electrical boxes, switches, outlets, and plumbing before I put a bit into the wall. A stud finder with live-wire detection is worth using near those areas because it reduces the chance of drilling into something hidden. If a wall gives you conflicting signals, I confirm the stud location in more than one spot instead of trusting a single beep. With the wall identified, the next job is simple: map the shelf position so the holes land exactly where they should.
Measure the layout so the shelf lands cleanly
This is the part that saves the most frustration later. I hold the shelf or bracket in place, use a level to make sure the line is truly horizontal, and then mark the wall lightly with pencil or painter’s tape. A laser level is useful when I am installing more than one shelf, because it keeps the spacing consistent without repeated re-measuring.
For spacing, I use starting points instead of rigid rules. Above a desk or console, 10 to 14 inches of clearance usually feels comfortable. Above a countertop, 14 to 18 inches is often enough to keep the shelf functional without crowding the work surface. Between shelf rows, I usually allow 10 to 12 inches for décor and 12 to 16 inches for books, pantry items, or anything taller. The deeper the shelf, the more leverage it puts on the screws, so a 12-inch shelf deserves more support than a narrow display ledge of the same length.Two small details matter here. First, I mark the center of each stud rather than guessing at the edge, because screw placement is more reliable in the center. Second, I leave room for trim, outlets, and the items I actually plan to store. A shelf can be technically installed in the right place and still be awkward if the clearance is wrong, so careful marking is what makes the rest of the job feel easy.
Mount the shelf step by step
Once the layout is marked, the installation becomes a sequence of controlled steps. A pilot hole is the small starter hole that keeps a screw from wandering and helps prevent wood from splitting, and I use one whenever I am driving into a stud or following an anchor’s instructions. Plumb means perfectly vertical; level means perfectly horizontal. Those two ideas sound basic, but they are the difference between a shelf that looks intentional and one that always feels slightly off.
- Hold the shelf, bracket, or backplate against the wall and confirm the line is level.
- Mark the screw locations clearly, then remove the hardware and recheck the marks before drilling.
- Drill pilot holes where the hardware calls for them, using the correct bit size for the screw or anchor.
- Drive the fasteners until they are snug, not crushed. Over-tightening can damage drywall or strip the threads in wood.
- Install the shelf itself, then check the level again after tightening the final screws.
- Test the shelf with a light load first before putting the full weight on it.
Floating shelves usually add one extra move: the hidden backplate goes on first, then the shelf slides over it and locks in place with set screws. Standard-and-bracket systems are simpler, because the standards go up first and the brackets hang on afterward. If the shelf is meant to carry real storage weight, I slow down here and check the fit twice, because the final half-inch of alignment is where most mistakes show up. If the stud is missing where you need it, the anchor decision matters more than the shelf style.
Use the right anchor when a stud is out of reach
When I cannot land on a stud, I choose the anchor based on the wall material and the real working load, not the optimistic number printed on the package. A useful rule is to treat the published rating as a ceiling, not a promise; many manufacturers also recommend using only about 25 percent of the total rated capacity in real use. That matters because shelves are not point loads. A stack of books or a row of dishes puts stress on the wall differently from a single picture frame.
| Fastener | Best use | Typical published capacity | My take |
|---|---|---|---|
| Wood screw into stud | Most shelf installs in drywall | Depends on screw size and stud quality | The best option whenever you can hit framing |
| Self-drilling drywall anchor | Light décor and small shelves | Often around 25 to 75 lb | Useful for light loads, but not my first choice for storage |
| Hollow-wall anchor or molly bolt | Medium loads in drywall | Often around 95 lb | Stronger than basic plastic anchors, especially when installed carefully |
| Toggle bolt | Heavy loads in hollow walls | Often around 150 to 265 lb | The strongest drywall option when a stud is impossible |
| Masonry anchor | Brick, block, or concrete | Varies by anchor type | Necessary on masonry walls; drywall hardware is not interchangeable |
I pay attention to one more thing: multiple anchors do not automatically create safe capacity equal to their combined ratings. Spreading the load over more points helps, but only if the wall material and fastener type can actually share that load. For heavy books, cookware, or storage bins, I would rather move the shelf to a better spot than trust a weak anchor arrangement. Once the support is sorted out, the last big risk is not the hardware anymore; it is the small mistakes that make a shelf fail later.
Avoid the mistakes that make shelves sag later
Most shelf failures are predictable. They happen when the installer assumes the shelf itself is stronger than the wall support, or when the shelf is loaded as if every fastener were working at maximum strength all the time. I see the same problems again and again, and they are all preventable.
- Using the wrong screw length leaves too little bite in the stud. I want enough screw engagement to hold after the drywall and bracket are accounted for.
- Skipping the level check makes the shelf look crooked even if the fasteners are solid. Tighten slowly and verify twice.
- Over-tightening into drywall crushes the wall face and weakens the hold. Snug is enough when the anchor is seated properly.
- Trusting decorative floating hardware for heavy storage is a bad trade. Hidden hardware can be strong, but only if it is designed for the weight.
- Loading heavy items at the front edge creates more leverage than people expect. Keep the heaviest items close to the wall and near the support points.
- Ignoring wiring and plumbing can turn a simple project into a repair job. If the wall location is uncertain, I stop and verify before drilling.
When a shelf is deep, long, or meant for daily use, I treat it as storage hardware, not decoration. That mindset changes the installation choices in a good way: stronger fasteners, better placement, and less reliance on luck. Once those mistakes are out of the way, the last check is whether the shelf still feels solid after a light real-world load.
The final checks I make before loading the shelf
Before I call the job finished, I press lightly on both ends of the shelf and watch for movement. There should be no rocking, no twisting, and no visible pull-away from the wall. If anything shifts, I fix that before adding weight, because a shelf that moves under hand pressure will usually move more once it is loaded.
- Check that every screw is fully seated and that no bracket hole is floating loose.
- Confirm the shelf is still level after tightening the last fastener.
- Load the shelf gradually, starting with a few light items instead of the heaviest objects first.
- Place dense items near the supports rather than at the farthest front edge.
- Recheck the shelf after a day or two if it will carry anything important.
A shelf that survives those checks is usually ready for normal use, and it will stay that way much longer if the load is matched to the wall from the start. That is the real trick behind a clean, durable installation: choose the right shelf system, anchor into the right structure, and test it before you trust it. When those steps line up, the shelf stops feeling like a risky wall project and starts behaving like reliable storage.