PVC, or polyvinyl chloride, is one of the easier plumbing materials to cut, but the joint still depends on a straight, clean end. The practical answer to how to cut PVC pipe depends on the pipe size, the tool you have on hand, and whether you need a quick trim, a solvent-weld joint, or a stack of repeat cuts for a plumbing run. In this guide, I focus on the methods that actually work in U.S. home plumbing, plus the cleanup steps that keep the fitting from fighting you later.
The cleanest PVC cuts come from the right tool and a square setup
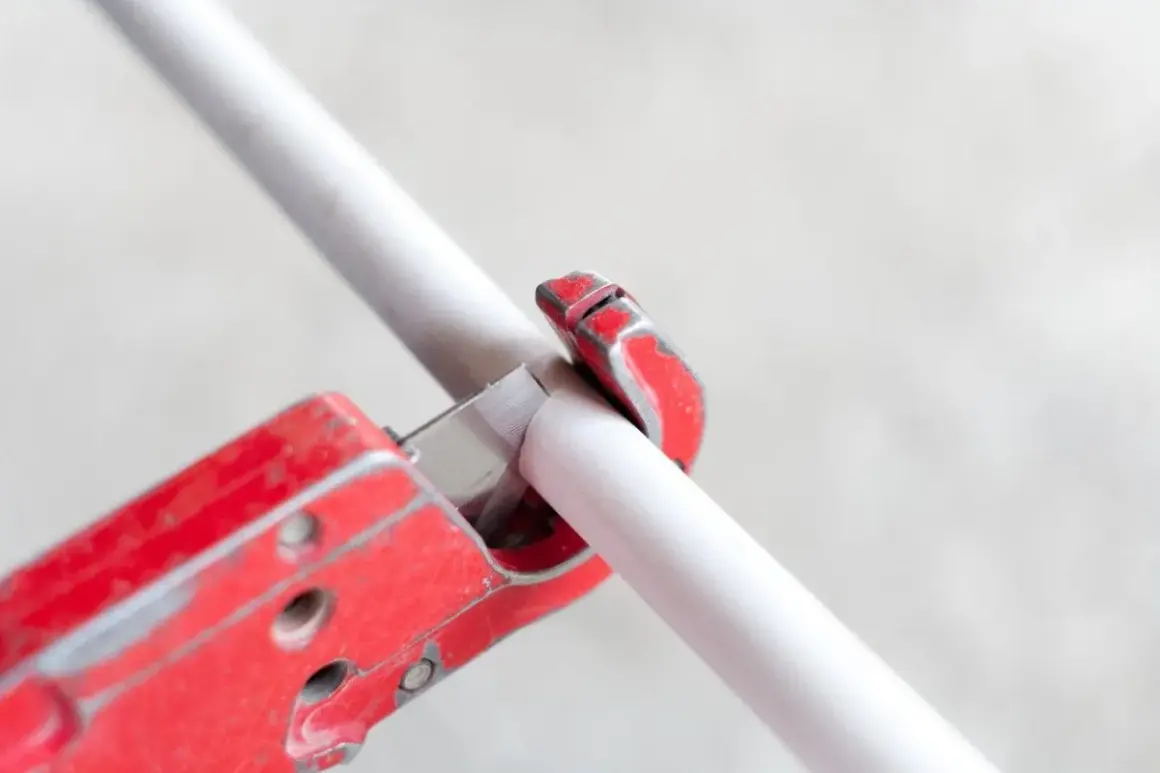
- Ratcheting cutters are the cleanest handheld choice for smaller pipe sizes.
- Hacksaws work well for one-off cuts and awkward jobs where a cutter will not fit.
- Miter saws are best when you need fast, repeatable cuts on a bench.
- Oscillating tools help in tight spaces, but they usually leave a rougher edge.
- Deburring is not optional if you want the fitting to seat properly.
- Clamping and marking matter as much as the blade itself.

Choose the cutting method that fits the pipe and the workspace
Home Depot’s guide frames it the same way I do in practice: use a hacksaw for a few cuts, ratchet-style cutters for smaller pipe, and a miter saw when you need speed and repeatability on a bench. That is still the right mental model, because the best tool is the one that keeps the cut square without making the setup harder than the job.
| Tool | Best for | Why I use it | Tradeoff |
|---|---|---|---|
| Ratcheting PVC cutter | Small, straight cuts on pipe up to about 1 1/2 inches | Fast, quiet, and usually the cleanest handheld option | Not ideal for larger pipe or cramped angles |
| Hacksaw | One-off cuts and odd jobs | Cheap, versatile, and easy to find in any toolbox | Slower and more likely to leave burrs |
| Miter saw | Repeat cuts on a bench or larger batches | Very square cuts and high speed | Needs a secure setup and proper eye and ear protection |
| Oscillating multi-tool | Tight spaces and in-place repairs | Reaches awkward spots other tools cannot | Expect a rougher edge and more cleanup |
For most homeowners, the real choice is between a handheld cutter for smaller pipe and a saw for everything else. Once that decision is made, the next job is layout, because a good cut starts before the blade touches the pipe.
Measure and mark so the cut stays square
The pipe only fits well if the end stays square. I start by measuring from the fitting I am joining to, then I account for insertion depth before I mark the cut line with a sharp pencil or fine marker. If the mark is wrong, the rest of the job is just expensive guessing.
- Wrap paper, painter’s tape, or a hose clamp around the pipe to carry the mark all the way around.
- Clamp the pipe in a vise, miter box, or another solid support so it cannot roll.
- Keep your hands clear of the cut line and wear eye protection, because a slipping blade on PVC is avoidable.
- If the pipe is already installed, check the blade path before you start so you do not hit a wall, cable, or fitting.
A straight layout matters because a crooked end can prevent the fitting from seating fully and can leave stress in the joint. Once the mark is right, the actual cutting is faster and a lot less fussy.
Use the tool the job actually needs
Ratcheting cutter for fast, clean small-diameter cuts
For smaller pipe, a ratcheting cutter is my first choice when the cut is accessible. It is fast, makes a neat edge, and usually leaves less cleanup than a saw. I still mark the pipe all the way around first, because a cutter is only as accurate as the line it follows.
Hacksaw for flexible, low-cost cutting
A hacksaw is the universal backup. It takes more effort, but it works on almost any common PVC size and fits places where a cutter does not. I use a fine-tooth blade, ideally around 14 TPI or lower, and I slow down near the end so the pipe does not tear when the last fibers give way.
Miter saw for repeatable bench work
When I have several cuts to make, the miter saw is hard to beat. It gives a square, consistent cut and speeds up a whole project. I use a plastic or composite blade instead of a standard coarse wood blade, and I keep the pipe supported so it cannot twist as the blade comes through.
Read Also: Loose Flush Lever? Fix Your Toilet Handle Fast!
Oscillating tool for tight spaces
For a pipe already glued in place or buried in a cramped cavity, an oscillating multi-tool can be the least awkward answer. It is not the prettiest cut, but it reaches where a full saw will not, which matters more than perfection when access is the real problem. I treat that kind of cut as rough work first and cleanup work second.
No matter which tool I pick, I treat the edge as unfinished until the burrs are gone. That cleanup step is what separates a cut that merely looks acceptable from one that actually seals well.
Deburr the edge before you glue anything
Every cut leaves a lip, fuzz, or burr. That small ridge is easy to ignore and easy to regret, because it keeps a pipe from sliding cleanly into a fitting and can trap debris at the joint.
PlumbingSupply makes the point plainly: the edge should be square and free of burrs before primer and cement go on. I do the same thing every time, usually with a deburring tool, a utility knife, or a quick pass of fine sandpaper.
- Scrape the outside edge lightly to remove chips.
- Break the inside edge with a small chamfer so it does not shave material off the fitting.
- Dry-fit the joint after cleanup to confirm the pipe seats fully and stays aligned.
- Wipe away dust before primer and cement go on.
If the fit feels forced before glue, I do not assume cement will solve it. It will only lock in the problem, and that is a bad trade in plumbing.
Common mistakes that turn a simple cut into a bad joint
- Cutting too fast and letting the blade wander.
- Skipping the clamp and letting the pipe roll.
- Using a coarse wood blade that tears the plastic instead of slicing it.
- Leaving burrs inside the pipe, where they are harder to see.
- Measuring from the wrong point and ending up short after the fitting is dry-fit.
- Forcing a misaligned pipe into position instead of recutting it.
The biggest mistake I see is treating the cut as the end of the task. In plumbing, the cut is only successful if the pipe still fits, seats, and glues cleanly afterward. That is why I pay more attention to setup and cleanup than to speed.
The habits that make the cut hold up in the fitting
If I am doing a simple repair on Schedule 40 PVC, I start with the smallest tool that can make a square cut, then I clean the edge immediately. That keeps the work quiet, accurate, and easy to fit in a crawl space or under a sink.
For tight or awkward plumbing, I switch to a compact saw or oscillating tool instead of forcing a full-size blade where it does not belong. If the line is pressurized, hidden behind finished surfaces, or part of a code-sensitive repair, I slow down and verify the plan before I cut.
A good PVC cut is not just straight. It is square, deburred, and ready to accept primer and cement without stress.