What matters most before you order cabinets
- Measure the room first, then compare cabinet sizes to the space, not the other way around.
- Record wall lengths, window and door openings, soffits, floor transitions, and ceiling height in inches.
- Use the smallest width and height anywhere the wall is not perfectly square or level.
- Check base, wall, pantry, and replacement door measurements separately, because each one uses a different reference point.
- Standard sizes are helpful, but they are only a sanity check. Site measurements win every time.
- Leave room for appliances, fillers, door swings, and landing areas before you lock in the plan.
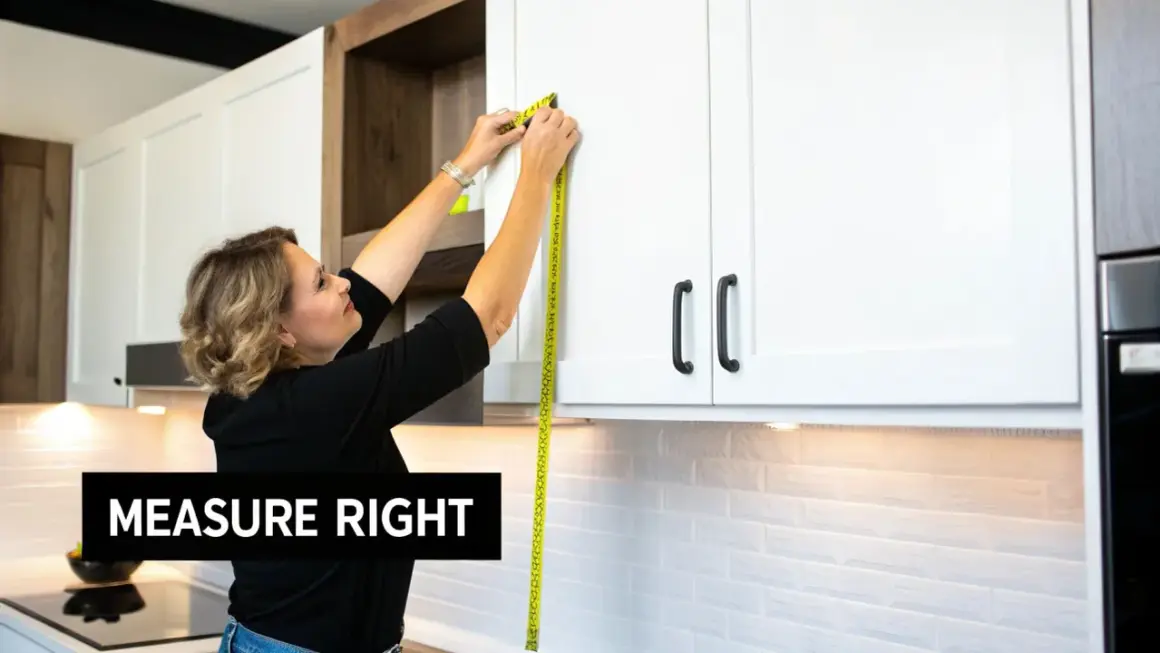
Measure the room before you think about cabinet sizes
The most useful cabinet measurements start with the kitchen shell itself. I measure clockwise around the room, write down each wall length in inches, and mark every opening, because a kitchen that looks square often is not. Take horizontal measurements at about 36 inches high as well, since walls can bow and that gives you a better sense of whether a long run of cabinets will need fillers or scribe work.
From there, record the vertical numbers that can change the plan: floor to ceiling, floor to windowsill, windowsill to top of window, and the distance from the top of the window to the ceiling. If the flooring is changing, measure to the finished floor height, not the subfloor, because even a small change can affect base cabinet and appliance fit. I also note soffit depth and height, plus the location of vents, outlets, and any plumbing lines, because those details often decide where a cabinet can and cannot go. To estimate rough cabinet footage, divide the total wall inches you can actually use by 12, but treat that as a planning number only, not a finished design.
Once the room is mapped, the next step is measuring the cabinet pieces themselves, because base units, uppers, pantry towers, and replacement doors each use different reference points.
Measure each cabinet type with the right reference points
Cabinet dimensions are easy to misread if you use the wrong edge as your starting point. I always separate the job by cabinet type, because the height, width, and depth questions are not identical for a base run, a wall cabinet bank, or a simple door replacement.
Base cabinets
For base cabinets, measure the available width along the floor line or countertop line, then confirm the depth from the wall to the front edge of the planned cabinet run. In the U.S., a standard base cabinet is usually 34 1/2 inches high before the countertop, which becomes about 36 inches high with a typical top, and most are about 24 inches deep. Widths commonly run from 12 to 48 inches. If the cabinet will hold a sink, check the plumbing rough-in and remember that sink bases often have an open back or a false front.
Wall cabinets
Upper cabinets are measured against the space above the counter and under any soffit or ceiling obstruction. A common installation leaves about 18 inches between the countertop and the bottom of the wall cabinet, while wall cabinets themselves often range from 12 to 42 inches high and 12 to 24 inches deep. I pay close attention to range hoods, microwave openings, and refrigerator clearances here, because a cabinet that technically fits can still block ventilation or look cramped in the finished room.
Tall and pantry cabinets
Tall cabinets need a full-height measurement from the finished floor to the ceiling or soffit, plus enough width for the cabinet body and any side fillers. Standard pantry cabinets often fall between 84 and 96 inches tall, with widths commonly from 12 to 36 inches and depths around 12 to 24 inches. These units are where people most often forget door swing and transport clearance, so I like to check the path from the delivery point to the installation area before I get attached to a size.
Read Also: DIY Floating Shelves - Build Strong, Sag-Proof Shelves
Replacement doors and drawer fronts
If you are not replacing the whole cabinet, measure the opening differently. For framed cabinets, measure the opening from the inside edge of one stile to the inside edge of the other, then from the inside edge of the bottom rail to the inside edge of the top rail. That opening measurement matters more than the outside cabinet size, especially when the new door uses an overlay hinge. A common overlay is 1/2 inch, but hinge specs vary, so I would never assume the overlay without checking the hardware you plan to use.
After you know which reference point applies, the next question is whether your numbers make sense against standard cabinet dimensions.
Use standard U.S. cabinet sizes as a sanity check
Standard sizes do not replace site measurements, but they help you catch bad assumptions early. If your rough numbers are wildly off from normal cabinet ranges, that is usually a sign that you are measuring from the wrong point, missing a soffit, or forgetting a floor change. This is especially useful in stock cabinet planning, where you are working from available sizes rather than a fully custom build.
| Cabinet type | Common U.S. size range | Why it matters |
|---|---|---|
| Base cabinets | 34 1/2 inches high before countertop, about 36 inches with countertop; about 24 inches deep; 12 to 48 inches wide | Confirms counter height, aisle space, and whether a sink or appliance base will fit |
| Wall cabinets | 12 to 42 inches high; 12 to 24 inches deep; 12 to 36 inches wide | Helps you check the space above the counter, hood, or refrigerator |
| Pantry cabinets | About 84 to 96 inches high; 12 to 36 inches wide; 12 to 24 inches deep | Useful when you need tall storage but only have one narrow wall available |
As a practical rule, if the plan calls for a standard 36-inch counter height, upper cabinets usually sit roughly 18 inches above the countertop. That spacing is comfortable in many kitchens, but it can shift if you have taller backsplashes, a range hood, or an unusual appliance stack. Standard numbers are a guide, not permission to skip the tape measure.
Once the common sizes are in view, the real layout test is whether the space still works around sinks, appliances, corners, and fixed building features.
Leave room for appliances, corners, and other fixed obstacles
A kitchen rarely measures like a clean rectangle. I always mark the fixed points first, then fit the cabinets around them. That includes the centerline of the sink, range, dishwasher, refrigerator, windows, doors, ducts, and electrical outlets, because those items define the openings that cabinet boxes can actually occupy.
- Sink area: leave at least 24 inches of landing space on one side of the sink and 18 inches on the other if the room allows it.
- Refrigerator area: plan for at least 15 inches of countertop landing space beside the refrigerator or within reach of the front.
- Dishwasher area: keep the dishwasher close to the sink, and preserve enough standing space beside it so the door does not trap traffic.
- Cooking area: allow space beside the range or cooktop for setting down hot pans and trays.
- Aisles: aim for about 42 inches in a one-cook kitchen and about 48 inches where two people work at the same time.
- Corners and fillers: note blind corners, filler strips, and end panels early, because they absorb the odd inches that stock cabinets cannot.
This is also the stage where I check for soffits, HVAC runs, and plumbing that may force a shorter cabinet or a shifted run. A wall that looks free on paper can become unusable once a vent, a pipe, or a deep soffit enters the picture, so the fewer surprises you leave for installation day, the better the layout will hold up.
The mistakes that create bad fits
Most cabinet measurement problems are not dramatic. They are small misses that add up, and they are preventable if you slow down for the final pass. The mistakes I see most often are easy to name and easy to avoid.
- Measuring only once instead of checking the same span at two or three points.
- Using the wrong edge, especially when measuring framed cabinet openings or window trim.
- Ignoring the smallest number in a width or height that changes from one side to the other.
- Forgetting the finished floor when tile, wood, or underlayment will change the final height.
- Overlooking overlay and hardware when replacing doors or drawer fronts.
- Skipping door swing and appliance clearance, which can make a technically correct layout annoying to live with.
- Assuming walls are square, which is how end panels and filler strips get forgotten until install day.
One thing I recommend every time is taking photos of the room after measuring. That sounds simple, but it helps catch a missed vent, an outlet, or a strange wall return that was easy to overlook while you were focused on the tape. From there, it becomes much easier to turn measurements into an order-ready plan.
Turn raw measurements into an order-ready plan
When the numbers are on paper, I redraw the room once more before I trust the layout. A basic sketch on graph paper works fine. Label each wall, number the openings, write all dimensions in inches, and note the centerline of every fixed feature. Then place cabinet widths on the sketch and see what is left at the ends and corners. If the leftover space is awkward, that is usually a sign that the design needs a filler, a different cabinet width, or a custom piece.
- Draw the room outline and label each wall.
- Write wall lengths, window sizes, door sizes, and ceiling height in inches.
- Mark sinks, ranges, refrigerators, vents, and outlets by centerline.
- Note soffits, floor transitions, and any planned flooring changes.
- Lay in cabinet widths and check whether the plan still leaves sensible clearances.
- Compare the total run to your rough linear footage number, then adjust before ordering.
I also keep one final note on the plan: whether the cabinets are stock, semi-custom, or fully custom. That matters because stock sizes are less forgiving, while custom work can absorb odd measurements much more cleanly. If the room is irregular, the smartest choice is often not forcing a standard size to behave like a custom one.
The last checks I make before I place the order
Before I send a cabinet order, I recheck three things: the finished floor height, the narrowest usable opening, and the clearance around every fixed appliance. Those are the numbers most likely to change the outcome, and they are also the easiest to verify with one last tape measure pass.
If you are buying assembled cabinets, measure the route into the house, too. A cabinet that fits the wall can still get stuck in a doorway, stair turn, or hallway corner, and that is a problem you want to discover on paper, not in the middle of a delivery. If anything in the room is out of square, I would rather solve it with a filler strip or a custom width than hope the installer can make it disappear.
Clean measurements do not just help the cabinets fit, they make the whole kitchen feel deliberate. If you treat the room as the primary measurement and the cabinet catalog as the secondary one, the final layout has a much better chance of fitting, functioning, and looking right the first time.