A loose flush lever is usually a small plumbing repair, but it matters because it can lead to weak flushing, a running tank, or a handle that eventually falls apart. I break it down into three parts: the lever hardware, the chain, and the flapper connection. Once you know which one is failing, the fix is usually quick, inexpensive, and well within reach for most homeowners.
What you need to know before opening the tank
- Most wobbling handles come from a backed-off locknut, a slipped chain, or a bent or cracked lever arm.
- On many toilets, the tank-lever nut is reverse-threaded, so it tightens counterclockwise instead of clockwise.
- The chain should have slight slack; too tight, and the flapper may not seat, too loose, and the flush may feel weak.
- If the shaft is cracked, the handle keeps drifting loose, or the arm hangs down on its own, replacement is usually the cleaner fix.
- A basic replacement lever typically costs about $10 to $30 in the U.S., with specialty styles costing more.
What a loose flush handle usually means
When a toilet lever feels wobbly, I assume the problem is mechanical before I assume it is serious. In most cases, the handle itself is fine, but the retaining nut has loosened, the plastic washer has worn, or the chain has pulled the arm out of position. If the handle wiggles only a little and still flushes normally, that usually points to a simple adjustment. If it feels sloppy, hangs low, or fails to return to neutral, the part may be bent or cracked.
There is a useful distinction here: a loose handle can be a symptom, not the root cause. A chain that is too tight can hold the lever under tension, while a chain that has slipped off can make the handle feel dead even though the hardware is intact. A corroded tank lever, mineral buildup around the hole in the tank, or the wrong replacement part can all create the same shaky feel. The best fix starts with identifying which of those conditions you actually have.
| What you notice | Likely cause | Best next move |
|---|---|---|
| Handle wobbles but still flushes | Locknut has backed off | Snug the nut and test again |
| Handle feels loose and flush is weak | Chain is too loose or disconnected | Reset the chain and check slack |
| Handle stays down or hangs crooked | Bent arm, worn bushing, or wrong lever | Replace the assembly |
| Handle loosens again after tightening | Cracked plastic or damaged threads | Install a new lever |
Once the symptom makes sense, the repair becomes much easier, which is why I always inspect the tank hardware before I reach for a replacement part.
Check the tank hardware before you tighten anything
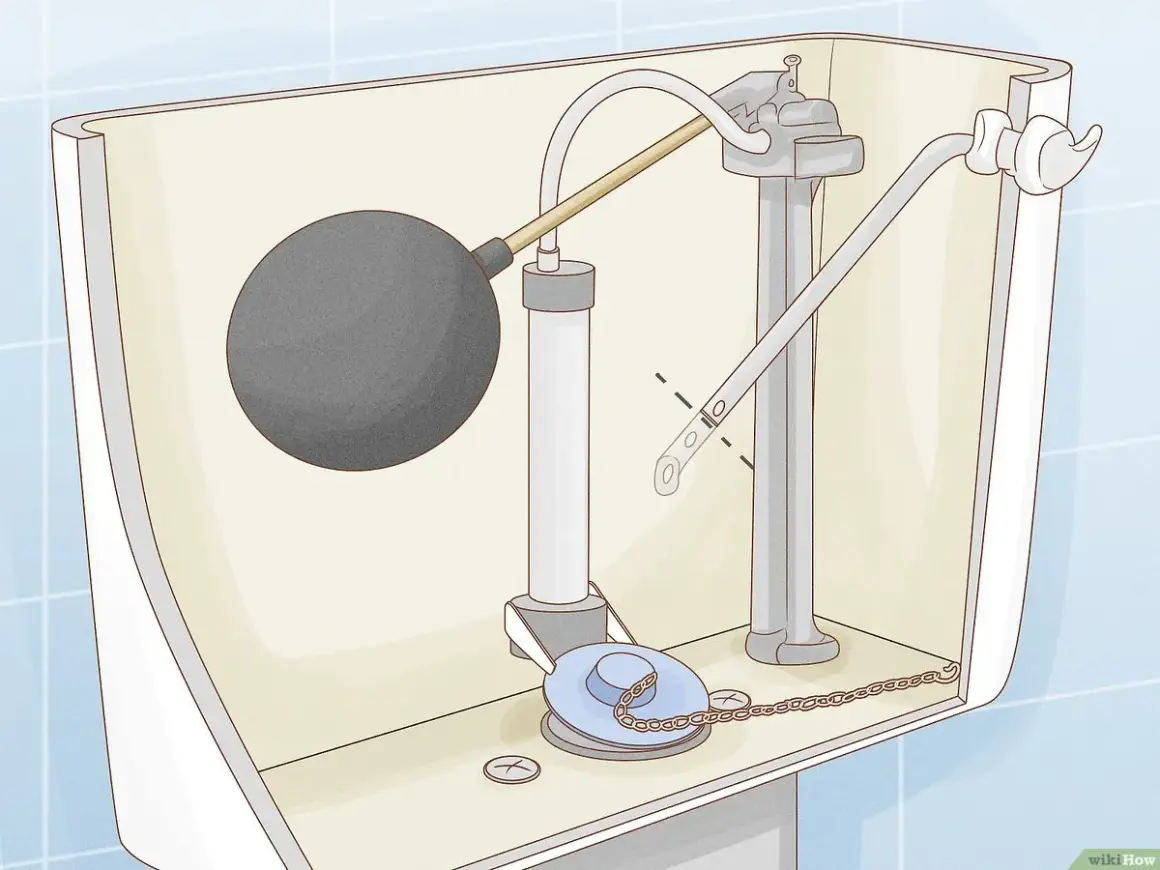
I like to start with the lid off and the tank empty, because it makes the failure obvious. Turn off the water supply, flush the toilet, and sponge out the remaining water if you plan to remove the lever or work closely around the flapper. Then inspect the handle from both sides of the tank wall. You are looking for a cracked shaft, a washer that has split, a nut that is barely hanging on, or an arm that no longer sits level when it rests.
- Remove the tank lid carefully and set it somewhere safe.
- Look at the handle from outside the tank and the nut from inside the tank.
- Check whether the arm is bent, rubbing the porcelain, or pulled off-center.
- See whether the chain is connected and whether it has obvious slack or tension.
- Confirm that the handle returns to a neutral position when you let go of it.
If the handle is hanging down on its own, I usually stop there and plan on replacement. That behavior often means the lever is the wrong type, installed at the wrong angle, or too worn to stay aligned. A tank lever should rest naturally and move freely, not droop under its own weight. With that diagnosis in hand, the actual tightening step is much more precise.
How to tighten the lever without cracking the tank
This is the part where a little caution saves a lot of trouble. On many toilets, the locknut is reverse-threaded, so it tightens counterclockwise and loosens clockwise. Kohler points this out in its tank-lever instructions, and it is the detail people miss most often. If you force the nut the wrong way, you can strip the threads or put unnecessary stress on the porcelain.
- Hold the handle steady from the outside of the tank.
- Reach inside and turn the locknut in the correct direction for your model.
- Tighten only until the handle no longer wobbles, not until it feels clamped hard.
- Make sure the arm still moves freely and does not scrape the tank wall.
- Flush once by hand before replacing the lid.
I usually tighten in small increments and stop sooner than I think I need to. Overtightening is a real mistake here because it can crack a plastic nut, distort the washer, or even damage the tank if you lean too hard on the hardware. If the handle still has play after a gentle snug-down, that is a sign the real issue is probably wear, not looseness. At that point, the chain and flapper connection deserve attention next.
How to reconnect the chain so the flush actually works
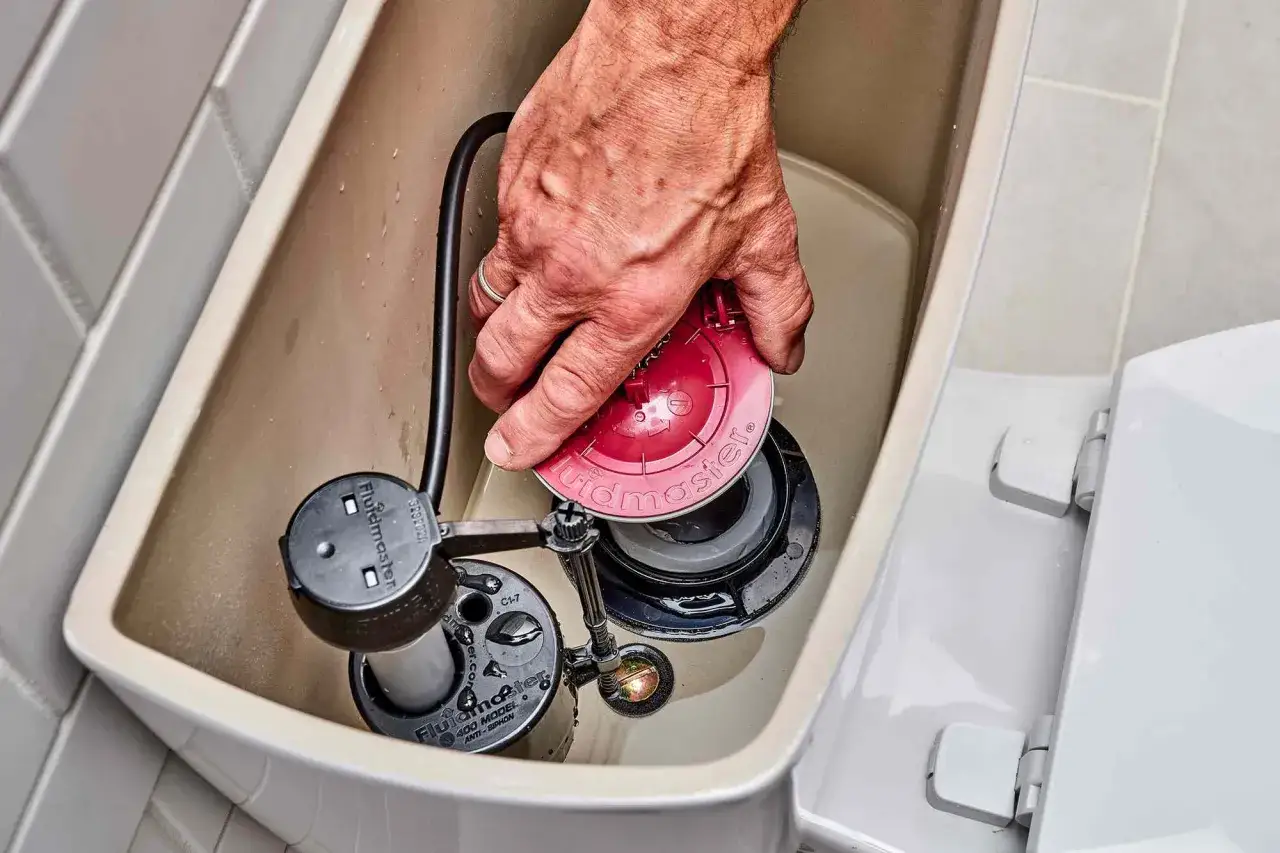
A flush handle can feel loose even when the lever is fine if the chain is not set correctly. If the chain is disconnected, reattach it to the arm or flapper hook and make sure it rises and falls without binding. If the chain is too tight, the flapper may stay slightly open and the toilet can run. If it is too loose, the handle may move but fail to lift the flapper far enough for a full flush.
Fluidmaster’s installation guidance leaves about 1/2 inch of slack in the chain as a practical starting point, and that matches what I aim for in most standard tanks. I want enough slack that the flapper can seal completely, but not so much slack that the lever has to travel a long way before it lifts anything. After reconnecting the chain, flush the toilet several times and watch the movement from start to finish.
- The chain should lift cleanly without snagging on the overflow tube.
- The flapper should open fully, then settle back flat when the handle is released.
- The handle should spring back to rest instead of staying under tension.
- The tank should stop running within a few seconds after each flush.
If the toilet still flushes weakly, the chain length may be correct but the flapper itself may be worn or warped. That is the point where I stop blaming the handle and start thinking about replacement parts.
When replacement makes more sense than another adjustment
There is a line between a repair that is worth tuning and one that is already worn out. If the lever only needed a snug locknut, that is the cheapest win you can get. If the handle keeps drifting loose, the arm has visible corrosion, or the shaft is cracked around the tank hole, replacement is the better investment. In the U.S., a basic replacement lever usually runs about $10 to $30, while decorative metal levers, top-mount styles, and specialty flush controls can land closer to $30 to $60.
| Option | Best for | Typical time | Typical cost | Main drawback |
|---|---|---|---|---|
| Tighten the existing lever | Minor wobble, intact hardware | 5 to 10 minutes | Free | Won’t help if parts are worn |
| Reset the chain | Weak or inconsistent flush | 5 to 15 minutes | Free to a few dollars | Only works if the lever is sound |
| Replace the lever assembly | Cracked, corroded, or misaligned hardware | 10 to 20 minutes | $10 to $60 | Requires a correctly matched part |
| Call a plumber | Broken tank parts, leaking tank, or repeated failures | Varies | Often $75 to $150+ for a service call | More expensive for a simple issue |
I also pay attention to fit. Standard side-mount levers are common, but some toilets need front-mount, top-mount, or brand-specific parts. If I have to fight the part into position just to make it work, that is usually a clue it is the wrong replacement. The next step is not more force; it is a better match.
The checks I make before putting the lid back on
Before I close the tank, I always run a short checklist. It takes less than a minute and prevents most repeat problems. I want the lever to return to center, the chain to move without tension, and the flapper to seal fully after release. If any of those three things is off, the toilet is telling you the repair is not done yet.
- Flush the toilet 3 to 5 times and watch the lever return to rest each time.
- Listen for rubbing, scraping, or chain slap inside the tank.
- Confirm the flapper seals cleanly and the tank stops running.
- Check that the handle does not rotate farther than it should.
- Leave the lid off for a few minutes if you want to catch a slow leak or a creeping chain issue.
What I like about this repair is that it rewards patience more than strength. A lever that is tightened properly, paired with the right chain slack, usually stays solid for years. If the handle still wanders loose after that, the lever assembly itself is telling you it is ready to be replaced rather than adjusted again.