Cement board only works when it is installed as part of a complete tile assembly. The mortar underneath it is there to fill voids, support the panel, and keep the floor flat enough for tile, while the mortar above it has to suit the tile itself. I break down the right thinset for cement board, how it differs from the bond coat used on top, and the mistakes that turn a solid floor into a repair job.
The mortar under cement board is a support bed, not a glue line
- Underlayment mortar fills low spots so the board sits in full contact with the subfloor.
- Fasteners hold cement board in place, while the mortar supports it.
- For many U.S. installs, a modified thin-set or mortar that meets ANSI A118.4, A118.11, or A118.15 is the common starting point, but the board instructions always win.
- Cement board does not add structural strength or fix a bouncy floor.
- The mortar you use under the board is not always the same mortar you want for the tile above it.
What the mortar under cement board actually does
The underlayment layer is easy to misunderstand. I treat it as a bedding coat, not an adhesive in the usual sense. Its job is to eliminate tiny air pockets and irregularities between the subfloor and the cement board so the panel is fully supported once the fasteners go in.
That matters because cement board is rigid. If it spans dips or voids, the board can flex slightly between fasteners, and that movement is what eventually shows up as cracked grout or a loose tile edge. James Hardie says the board should be bedded in mortar and then mechanically fastened, which is exactly the logic I follow on real jobs: mortar for support, screws or nails for clamp force.
What it does not do is make an undersized floor structure acceptable. If the joists are too flexible, the subfloor is damaged, or the floor is out of level by a serious amount, thin-set will not rescue it. That distinction matters, because choosing the right mortar starts with understanding what the layer is actually responsible for, and that leads directly to product selection.
How I choose the right mortar for the job
When I pick a mortar for cement board work, I start with the substrate and the board manufacturer, not with whatever bag happens to be on sale. The labels that matter most are the ANSI standards, because they tell me how the mortar is formulated and where it is meant to perform.
| Mortar type | What it means | Best use | What to watch |
|---|---|---|---|
| ANSI A118.1 unmodified thin-set | Cement-based mortar without polymer modification | Simple installs where the board or tile system allows it | Less forgiving on demanding substrates |
| ANSI A118.4 or A118.11 modified thin-set | Polymer-modified mortar with better bond and flexibility | Common choice for cement board over wood subfloors and for tile over board | Still needs the right trowel, coverage, and cure time |
| ANSI A118.15 improved modified mortar | Higher-performance version of modified thin-set | Large-format tile, denser porcelain, or more demanding assemblies | Costs more and is not always necessary |
In practice, I usually reach for a modified mortar unless the system says otherwise. USG Durock’s current installation guidance, for example, allows latex-fortified mortar for floor installations over wood-based substrates, while HardieBacker specifies unmodified or acrylic-modified thinset between the board and subfloor. The bigger point is not the brand, it is the match between the mortar, the board, and the substrate.
One more caution: construction adhesive is not the same thing as thin-set mortar. It can create ridges, trap voids, and leave the board sitting on high spots instead of a continuous bed. That mistake is common, and it usually shows up later as a floor that sounds hollow in patches or tiles that crack for no obvious reason. Once the mortar choice is settled, the installation sequence becomes the part that decides whether the panel is actually supported.
The installation sequence that keeps panels fully supported
The right mortar does not help much if the board is set badly. The sequence matters because cement board needs to go into fresh mortar, be seated fully, and be fastened while the bed is still workable.
- Check that the subfloor is clean, dry, and free of loose fasteners or debris.
- Confirm the floor structure meets the deflection requirement for tile, which is typically L/360 for ceramic and porcelain, and L/720 for natural stone.
- Dry-fit the panels first so joints can be staggered and edge gaps stay consistent.
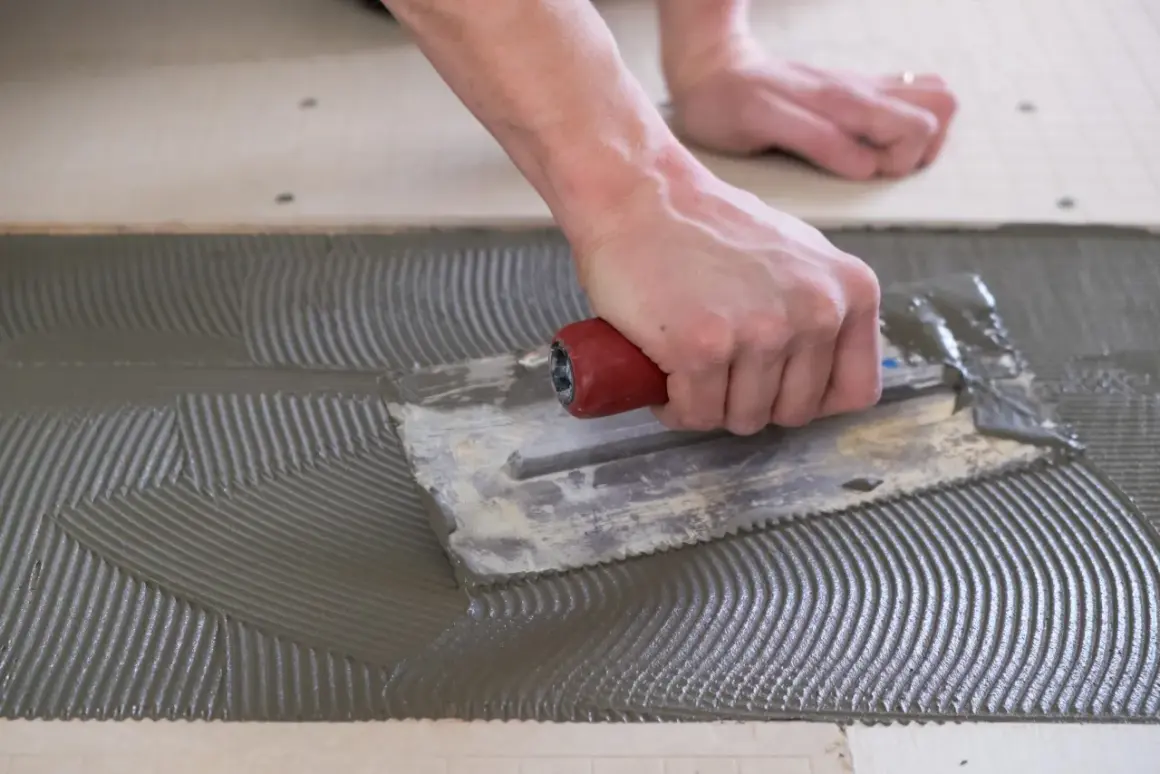
- Spread mortar with the trowel size specified by the board maker, often a 1/4 inch square-notch on floors.
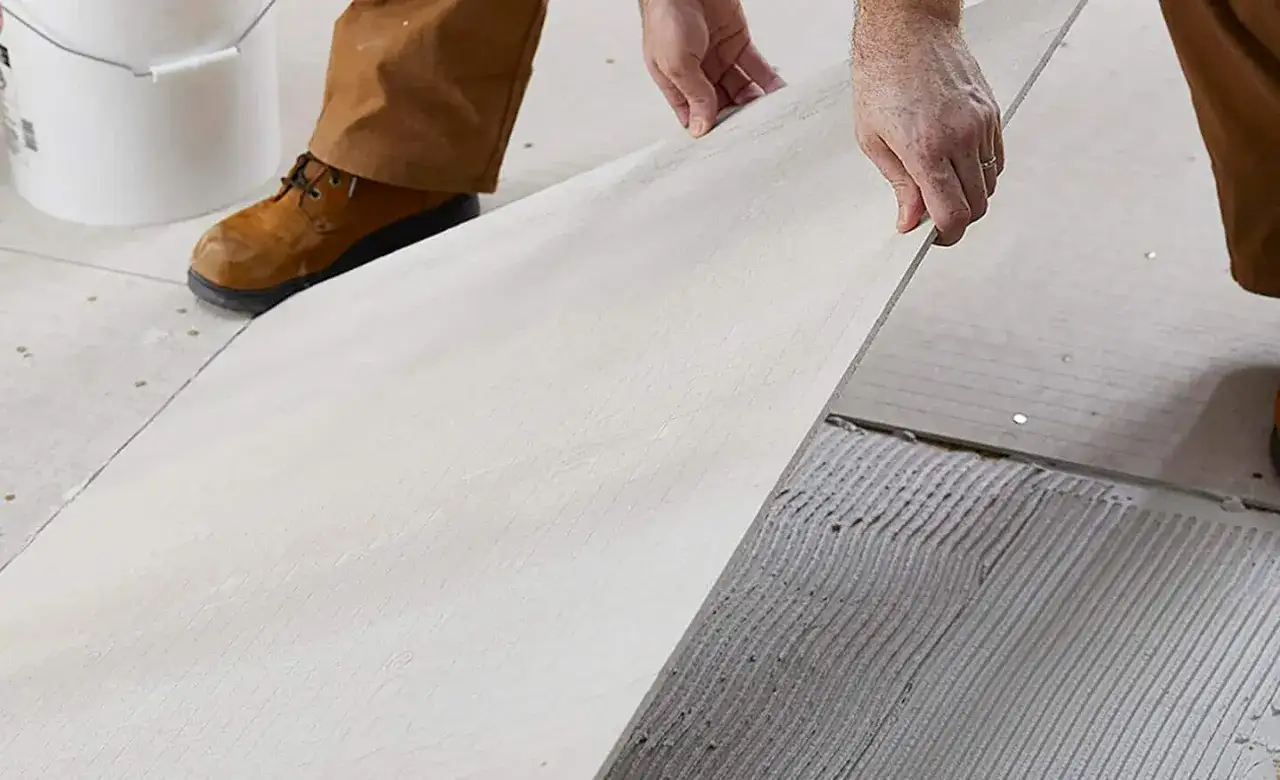
- Lay each sheet into the wet mortar and press it down with a slight sliding motion to collapse the ridges.
- Fasten the panel immediately with the required screw or nail pattern, commonly around 8 inches on center.
- Keep panel joints from lining up with subfloor joints, and embed alkali-resistant mesh tape in mortar at the seams.
I like to think of the mortar as a leveling bridge, not a cushion. It should fill the space under the board, not create a thick soft layer. If you can rock the panel, hear hollow spots, or see the fasteners drawing the board down unevenly, something is wrong. The cleanest installs are the ones where the panel becomes boring once it is screwed off, because the assembly is uniformly supported. From there, the most expensive mistakes usually come from what installers do, or skip, in the details.
Common mistakes that cause failures later
Most cement board failures are not dramatic. They start as small installation shortcuts that look harmless on day one and become expensive after the tile is set. These are the mistakes I see most often.
- Skipping the mortar bed under the board because the panel “seems solid enough.”
- Using construction adhesive instead of a proper bedding mortar.
- Overdriving screws or nails so the board is no longer in firm contact with the subfloor.
- Letting four board corners meet at one point.
- Aligning cement board seams directly over subfloor seams.
- Leaving gaps un-taped or using the wrong mesh tape.
- Assuming cement board makes a weak floor structurally stronger.
The biggest one, in my view, is the assumption that fasteners alone can flatten the panel. They cannot. They can hold the board down, but they cannot replace a proper mortar bed. A board that is clamped to a hollow spot is still spanning a hollow spot. Once those mistakes are out of the way, the next question is how the tile itself changes the mortar decision.
What changes when you set tile on top
The mortar under cement board and the mortar over it are related, but they are not always interchangeable. Under the board, I want support and contact. Over the board, I want a bond that matches the tile size, weight, and moisture exposure.
| Tile situation | Mortar direction | Why it matters |
|---|---|---|
| Ceramic tile | Modified thin-set is the usual default | Good balance of bond strength and workability |
| Porcelain tile | Modified or high-performance modified mortar | Porcelain is dense and less absorbent, so bond quality matters more |
| Large-format tile | Nonsag or large-and-heavy-tile mortar | Helps maintain coverage and reduce lippage |
| Natural stone | Often a high-performance mortar, usually white for light stone | Helps reduce staining risk and supports heavier pieces |
| Wet areas | Use a mortar approved for the full assembly, not a premixed adhesive | Moisture exposure changes the rules |
This is where I slow down and read the datasheet. Some tile systems, membranes, and specialty boards change the mortar requirement enough that a generic “one bag fits all” approach becomes a bad bet. If the tile is large or the room is exposed to frequent moisture, I want the mortar label, the board instructions, and the setting material all pointing in the same direction. That is also why cement board is not the right answer everywhere.
When cement board is the wrong substrate
Cement board is useful, but it is not universal. I would not use it as a quick fix for every floor, and I would not assume it belongs on every base. HardieBacker, for example, says its board is not designed for use over concrete, so I would not force that application just because the product is familiar.
I also avoid cement board when the structure underneath is already out of tolerance. If the joists are too flexible, the subfloor is badly damaged, or the room needs actual crack isolation rather than just a tile backer, a different system may be smarter. In those cases, an uncoupling membrane or a substrate-specific repair can be the better move.
- Use cement board when you need a stable tile backer over a suitable wood subfloor.
- Do not use it to compensate for structural movement.
- Do not confuse it with waterproofing unless the whole system is designed that way.
- Do not assume the same mortar works for every board, tile, and membrane combination.
That leads to the final checks I make before I open the bag, because those are the checks that keep a small tile project from becoming a floor failure later.
The checks I would make before mixing mortar
If I were standing in a room about to install cement board, this is the checklist I would want answered before the first trowel pass:- The subfloor is flat enough, clean, and firmly fastened.
- The joist structure meets the tile deflection requirement.
- The board manufacturer approves the exact mortar being used.
- The fastener schedule is set before the first panel goes down.
- The seams will be taped with alkali-resistant mesh and embedded in mortar.
- The tile mortar above the board matches the tile type and the room conditions.
If those points are clear, the installation usually becomes straightforward. The mortar under the board does one job, the mortar above it does another, and neither one can make up for a weak floor structure. When that is understood up front, cement board becomes what it is meant to be, a dependable, unglamorous layer that lets the tile do its job well.