Laminate flooring sits in a practical middle ground: easier than tile, less forgiving than people expect, and very dependent on the condition of the room underneath it. In a flat, dry, rectangular room, the job is manageable for a careful DIYer. In a crooked hallway with moisture or a messy subfloor, the same project can turn into a weekend of corrections before the first plank even clicks in.
I want to answer the question the way homeowners actually need it answered: how hard the install really is, what raises or lowers the difficulty, what tools and prep matter, and when it makes more sense to call a pro. If you get the setup right, laminate is one of the more approachable flooring projects; if you skip the setup, it becomes a floor repair story instead of a flooring upgrade.
What matters most before you start
- Most click-lock laminate is a moderate DIY project, not a specialist-only job.
- A flat, dry subfloor matters more than raw skill; bad prep is where most failures start.
- Acclimation and expansion gaps are not optional if you want the floor to stay stable.
- Simple rooms can be finished in a weekend, but trim work, leveling, and transitions stretch the timeline.
- DIY saves money fastest on clean, rectangular rooms; complicated layouts can erase the savings.
The real difficulty level for most homes
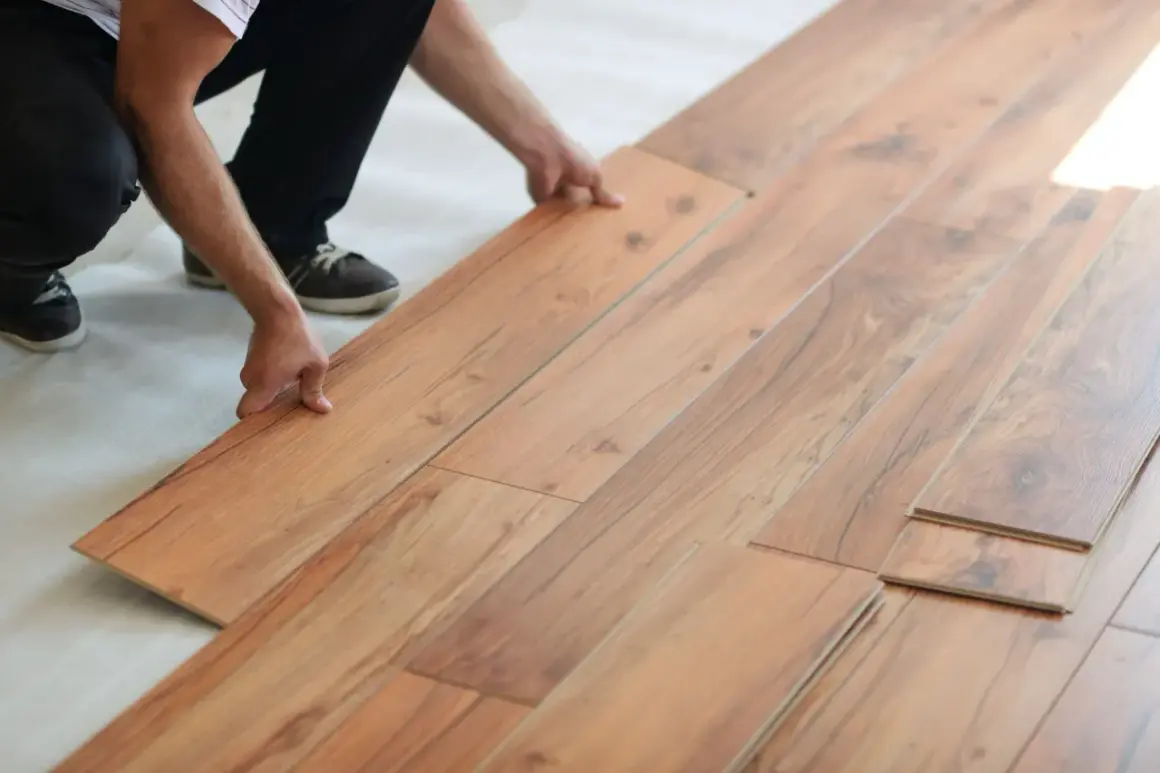
I would not call laminate hard to install in the same way I would call tile hard to install. There is no mortar, no grout, and usually no permanent glue. Most modern planks click together and float over the subfloor, which makes the hands-on work more approachable than many homeowners expect.
That said, the installation is only easy when the room is ready for it. The first row has to be straight, the joints have to stay tight, and the floor needs room to expand and contract at the perimeter. If those basics are wrong, the problem is not the product itself; it is the setup.
For a square bedroom or office with a sound subfloor, I would rate the job as beginner-to-intermediate. For a basement, a long hallway, or a room with multiple doorways, it moves toward intermediate pretty quickly. That shift is why some DIYers finish with a clean result and others end up prying boards back up twice.
The next question is obvious: what exactly makes one install feel simple while another turns frustrating?
What makes one room easy and another frustrating
The room matters as much as the flooring. A simple rectangle with minimal trim gives you long, predictable runs. A room full of corners, vents, cabinets, and transitions forces more cutting, more measuring, and more chances to drift off line.
| Room condition | Why it changes the job | Difficulty |
|---|---|---|
| Flat subfloor | Keeps the locking edges supported and reduces squeaks or bounce | Low |
| Long, narrow layout | Makes alignment harder because small errors repeat fast | Medium |
| Multiple doorways or transitions | Requires careful trimming and clean threshold work | Medium to high |
| Basement or concrete slab | Raises moisture-control concerns and often needs a barrier | High |
| Out-of-square walls | Forces you to decide where to hide the cut and how to keep the pattern balanced | High |
Subfloor flatness
Flatness is the detail people underestimate. A common benchmark is about 1/8 inch of variation over 6 feet, though the product instructions should always win. If the floor dips or crowns more than that, laminate can flex, click joints can loosen, and the finished surface may feel hollow or noisy underfoot.
Moisture exposure
Laminate is far more moisture-sensitive than many homeowners realize. Even water-resistant products need the right underlayment, cleanup habits, and room conditions. In basements or on concrete, moisture control becomes part of the install, not an afterthought.
Read Also: Clean Vinyl Plank Flooring - Get a Streak-Free Finish!
Transitions and trim
Door jambs, baseboards, and threshold strips are small details with a big impact. They are also where many first-time installers slow down. If the cut work around trim looks rough, the floor will look rough even if the boards themselves were laid correctly.
Once you see how much the room shape matters, the next step is to prepare the space so the flooring has a fair chance to succeed.
The prep work that changes everything
I usually tell homeowners that laminate installation starts before the first plank comes out of the box. Home Depot recommends letting unopened boxes sit in the room for at least 48 hours, and that advice is still worth following in 2026. It helps the planks settle into the room’s temperature and humidity before you lock them together.
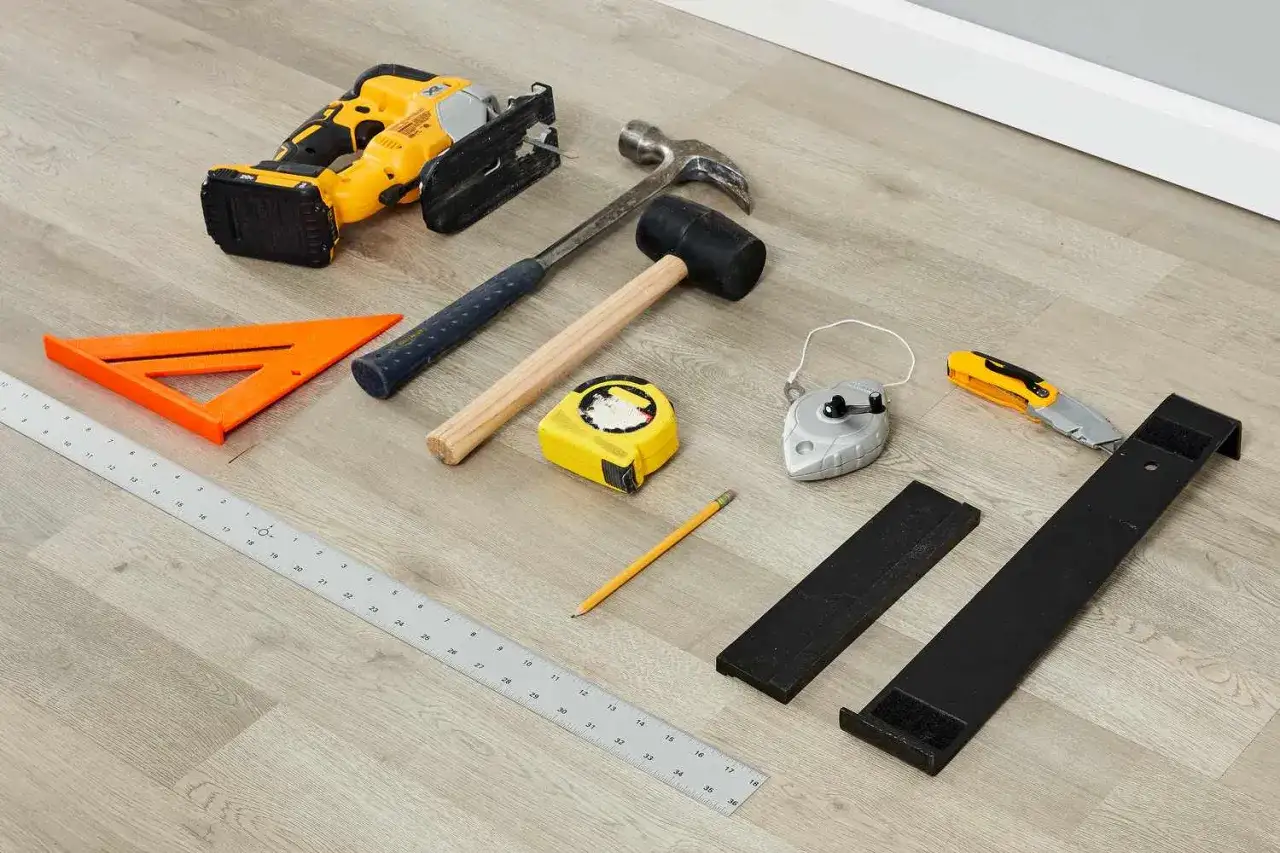
That acclimation period is only one part of prep. You also need the right tools, the right underlayment, and a room that is cleared and measured before you begin. A basic install kit usually gives you the essentials: spacers, a tapping block, a pull bar, and sometimes a mallet. I add a tape measure, chalk line, utility knife, jigsaw or saw for cuts, and a straightedge for checking the floor.
- Check the subfloor first and fix dips or high spots before laying anything down.
- Use underlayment that matches the product; if the planks already have attached padding, do not stack another soft layer underneath.
- Add a moisture barrier where needed, especially over concrete or in damp areas.
- Plan for waste; I usually keep 5% extra for simple rooms and closer to 10% when the layout has lots of cuts.
- Measure doors and transitions before you start so you are not surprised by a trim conflict halfway through the job.
Good prep does not just make the job faster. It removes the problems that force people to tear out boards later. From there, the install itself becomes much more manageable.
A step-by-step install flow that keeps the floor straight
Once the room is ready, I treat the install as a sequence of checks rather than one big task. That mindset keeps mistakes from snowballing.
- Clean and inspect the subfloor. Vacuum debris, scrape away bumps, and confirm the surface is flat enough for the product.
- Plan the layout. Decide which wall will carry the straightest visual line and where the cut boards will fall so the room looks balanced.
- Lay the underlayment. Tape seams as required and keep the material flat so the floating floor does not shift.
- Set the first row carefully. A crooked starter row will telegraph through the whole floor, so I check it twice before moving on.
- Leave the expansion gap. Most systems need about 3/8 inch at walls and fixed objects, but follow the manufacturer’s spec if it differs.
- Stagger end joints. This helps the floor look natural and avoids weak repeated seam lines.
- Cut slowly around obstacles. Door casings, vents, and irregular corners are where rushed work shows up later.
- Finish with trim and transitions. Reinstall baseboards or quarter-round so the expansion space stays hidden but still functional.
For a straightforward room of roughly 150 square feet, a careful DIYer can often finish the actual install in a long day, but prep, trimming, and cleanup usually push it into a weekend. That is normal. The job is less about brute force and more about patience and alignment.
The floor is technically in place at this stage, but that still leaves the practical question of whether DIY is the best use of your time and money.
When DIY is a smart move and when it is not
The cost gap between doing it yourself and hiring out the labor can be meaningful. In 2026, a common installed-cost estimate for laminate runs about $6.91 to $11.81 per square foot, while material-only budgets often start around $1 to $5 per square foot. That spread is attractive, but it is only worth chasing if the room is simple enough that you can preserve a clean finish.
| Scenario | DIY fit | Why |
|---|---|---|
| Small bedroom or office | Strong yes | Simple layout, few transitions, predictable cuts |
| Open living area | Usually yes | Still manageable if the subfloor is flat and the run is planned well |
| Basement over concrete | Maybe | Moisture control and flatness checks raise the stakes |
| Hallways, closets, and tight angles | Mixed | Many cuts and awkward seams can slow the job down fast |
| Rooms needing leveling or door trimming | Often no | The prep work can become the hardest part of the project |
I think DIY makes the most sense when the room is dry, mostly square, and free of big height changes at the thresholds. If the project already includes leveling compound, subfloor repair, or extensive trim work, a pro can be cheaper in the long run because the floor is more likely to go down correctly the first time.
That leads to the part I would never skip, even on a simple room: the small checks that protect the finished floor after the last plank clicks in.
What I would double-check before snapping in the first row
The last mistakes are usually the quiet ones. They do not look dramatic during installation, but they show up later as squeaks, gaps, or a floor that moves more than it should. I would double-check five things before I call a laminate job done.
- Expansion space around every fixed edge, including pipes, cabinets, and door frames.
- Compatibility between underlayment and plank design, especially if the flooring already has attached padding.
- Humidity and room temperature, because a stable interior environment helps the floating floor stay stable.
- Waste pieces from the start of each row, which can sometimes be reused to stagger joints without weakening the pattern.
- Final transitions and thresholds, because a neat seam at the doorway makes the whole installation look intentional.