A drop and lock flooring system can save a lot of labor, but only when the subfloor, room conditions, and layout are right. In this guide I walk through how the locking mechanism works, where it makes sense, how to prep the room, and the mistakes that usually cause gaps, squeaks, or seams that refuse to stay tight.
The main checks that keep a floating floor stable
- Flatness matters more than speed. A common target is 3/16 inch in 10 feet, or 1/8 inch in 6 feet, unless the product says otherwise.
- Expansion space is not optional. Many systems need about 1/4 inch around walls, columns, and fixed trim.
- Room conditions have to be controlled. Many products call for about 65-85 F and 35-55% relative humidity before and during installation.
- Acclimation still matters for many products. A 48-hour conditioning period is common, but the product manual wins if it says something different.
- Seams need to be staggered. A good rule is about 6 inches between end joints from row to row.
- Subfloor moisture can end the project early. Concrete, basement slabs, and old flooring all need a moisture check before anything goes down.
What the locking system actually does
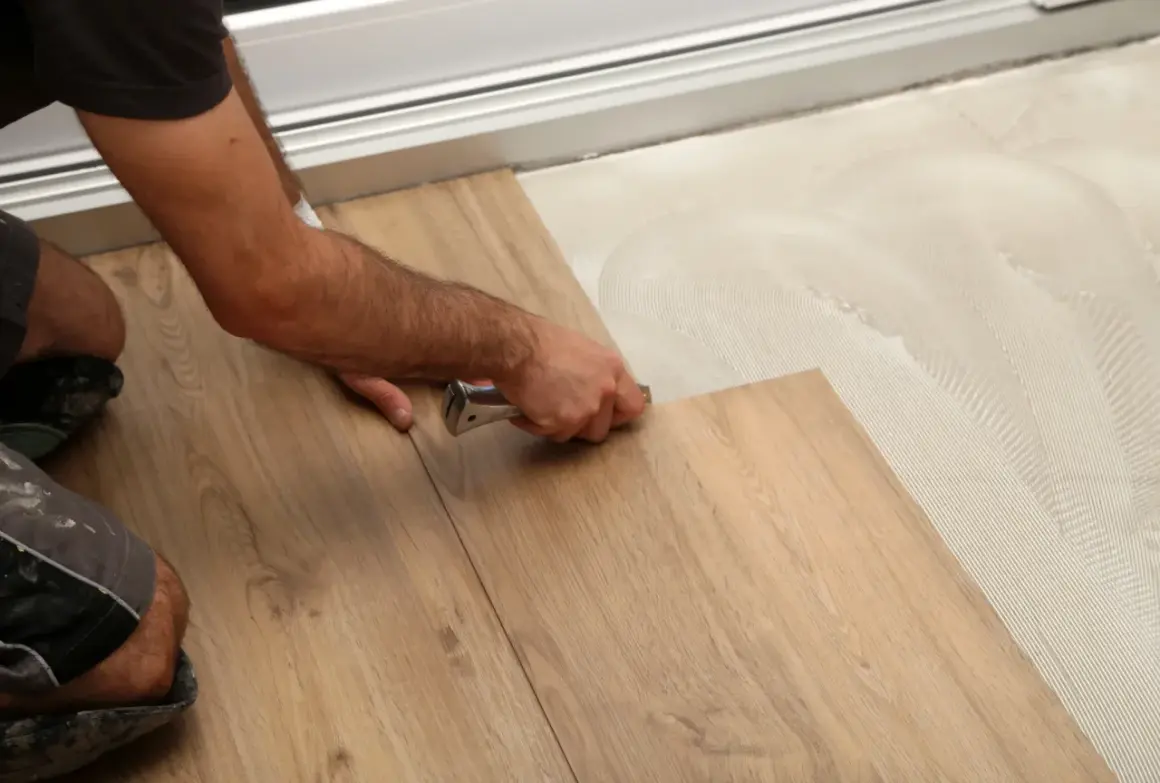
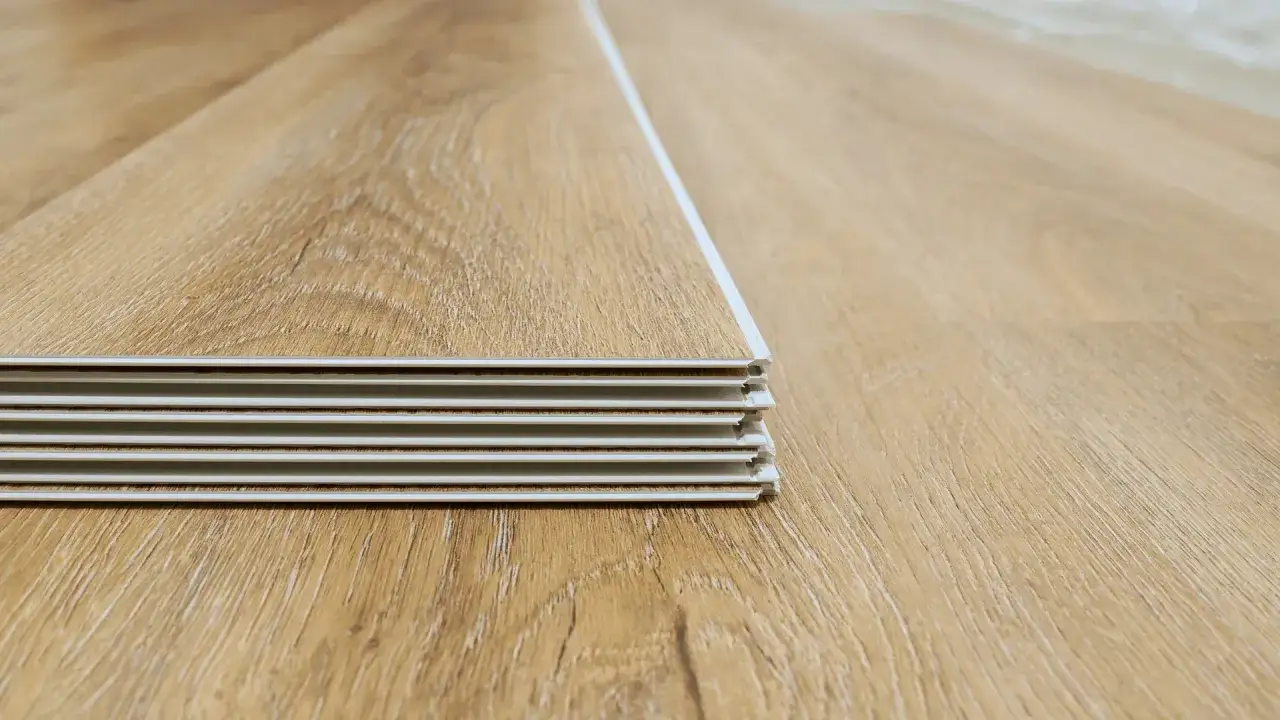
This is a floating installation method, which means the floor locks to itself instead of being glued or nailed to the subfloor. Most systems work the same way: the long edge goes in at an angle, the short edge drops down, and the joint clicks into place when the profile fully engages.
I like this method when I want a fast remodel with less mess, especially in homes where a full tear-out would waste time. It is common in laminate, rigid-core vinyl, and some engineered wood lines. The big advantage is speed, but the tradeoff is simple: the floor can only perform as well as the surface below it.
That is why I never treat it as a casual snap-together job. The locking profile is precise, and the room has to be ready to support it. Once that is clear, the next question is whether the room itself is a good candidate.
Where it works best and where I would be cautious
Some rooms are a natural fit for this method. Others need more caution, better moisture control, or a different installation approach altogether.
| Space | Fit | What I look for |
|---|---|---|
| Bedrooms and living rooms | Strong fit | Usually dry, stable, and easy to lay out with long straight runs. |
| Kitchens | Usually good for LVP, cautious for laminate | Spills are normal, so edge sealing, cleanup, and product rating matter. |
| Bathrooms | Only with the right product | I want a product approved for wet areas and a plan for edge moisture. |
| Basements | Good only after testing | Concrete moisture and flatness decide whether the floor will stay stable. |
| Sunrooms and 3-season rooms | Cautious | Large temperature swings can stress joints and expansion gaps. |
| Long hallways | Possible, but inspect the layout | Long continuous runs may need transitions or expansion breaks. |
What to prepare before the first plank goes down
I always start by measuring the room carefully and planning for waste. Ten percent extra material is a realistic baseline, and I usually push that to 12-15% in rooms with lots of angles, closets, or tricky cuts. It is cheaper to order a little extra than to stop halfway through a room because you ran short.
- Check flatness. A common manufacturer target is 3/16 inch in 10 feet, or 1/8 inch in 6 feet.
- Check moisture. Concrete and basement slabs need a real moisture test, not a guess.
- Condition the room. Many products want 48 hours in a climate-controlled space before installation.
- Keep temperature and humidity steady. A common range is 65-85 F and 35-55% relative humidity.
- Undercut jambs and trim. This lets the flooring slide underneath cleanly instead of butting into visible edges.
- Confirm underlayment rules. Some products include pad, some need separate underlayment, and some do not want extra layers at all.
- Plan the layout. I want a straight starting wall, staggered end joints, and enough room for expansion at every fixed obstruction.
One detail I would not skip is material sorting. Open several boxes and mix the planks so color variation looks natural across the floor. That matters more than people expect, especially in larger rooms where repeated patterns are easy to spot. With the room ready, the installation itself becomes much more predictable.
How I would install it step by step
The exact steps vary by brand, but the workflow is consistent. I treat the first row as the most important part of the entire job, because every mistake there gets copied across the room.
- Dry-fit the room. I check the layout, identify the straightest starting wall, and decide where the border cuts will land.
- Prepare the perimeter. Spacers go against the wall so the floor can move later without pinching.
- Start the first row straight. If the first line wanders, every row after it will wander too.
- Lock the planks gently. I angle the long edge, drop the short edge, and use only the pressure the manufacturer allows.
- Check each joint. A joint that is not fully seated now usually becomes a gap later.
- Stagger the seams. I aim for about 6 inches between end joints from one row to the next.
- Cut border pieces carefully. The last row should fit with the same expansion space as the first row.
- Finish the trim correctly. Baseboard or shoe molding goes to the wall, not through the floor.
If the product allows a tapping block or pull bar, I use it lightly and only as directed. Forcing a joint is a sign something is off, usually a crooked row, debris in the groove, or a surface that is not flat enough. I would rather stop and fix the cause than pound harder and damage the locking edge.
After the last plank is in, I inspect the floor from several angles and walk it slowly. That is when problems show up: a proud edge, a hollow-sounding area, or a seam that never fully closed. Even then, small oversights can undo good work later.
The mistakes that usually cause gaps and noise
Most callbacks from floating floors come from the same handful of problems. The good news is that they are preventable if you catch them early.
| Mistake | What it causes | How I prevent it |
|---|---|---|
| Skipping subfloor prep | Hollow spots, bouncing, or seams that separate | Flatten low spots and knock down high spots before the first row. |
| Not leaving expansion space | Buckling, edge pressure, or noisy movement | Keep the gap open at walls, posts, cabinets, and thresholds. |
| Debris in the locking profile | Joints that never fully seat | Vacuum as you go and keep the grooves clean. |
| Forcing crooked rows | Curved seams and visible drift across the room | Reset the line instead of trying to fight it into place. |
| Using the wrong underlayment | Too much flex, poor sound control, or a lock that does not engage well | Match the underlayment to the product instructions, not guesswork. |
| Ignoring moisture | Warping, cupping, or failed joints | Test concrete and fix moisture problems before installation. |
When a floating floor beats glue down
For drop and lock flooring, I prefer floating installs when speed, cleanliness, and future repairability matter. A homeowner can often live with the room sooner, and damaged planks are usually easier to replace later.
| Criterion | Floating click-lock | Glue-down |
|---|---|---|
| Installation speed | Usually faster and cleaner | Slower because of adhesive and cure time |
| Subfloor demands | Still needs flatness, but is often more DIY-friendly | Usually demands even tighter prep and more patience |
| Repairability | Easier to lift and replace sections | Harder to remove without damage |
| Feel underfoot | Can feel slightly more hollow if the underlayment is poor | Usually feels more solid |
| Best use | Most residential remodels, especially when downtime matters | Projects where the product and room conditions justify the extra work |
I still think glue-down has a place, especially in spaces where the manufacturer recommends it or where the floor needs a more fixed feel. But for many homes, the floating system is the practical choice because it balances speed, cost, and serviceability better. After that choice is made, the last pass is just a disciplined inspection.
What I check before I call the job finished
The floor may be installed, but I am not done until I verify the details that protect it over time. These are the checks I would not skip:
- Walk the entire floor and listen for clicks, pops, or hollow spots.
- Check every threshold and transition so the floor can still move as designed.
- Confirm that baseboard and shoe molding are attached to the wall, not pinning the floor down.
- Inspect the perimeter gaps before trim hides them.
- Keep the HVAC running so temperature and humidity stay stable after installation.
- Save a few extra planks from the same batch for future repairs.
A well-installed floating floor should feel calm underfoot, not springy or noisy. If I keep the surface flat, the room conditioned, and the first row straight, the rest of the job usually falls into place without drama.