A good shingle roof detail is less about the shingles themselves and more about the edges, flashings, and transitions that keep water moving the right way. I’m breaking those parts down in practical terms so you can see what matters, what usually fails first, and what deserves attention during a repair or reroof. The goal is simple: help you read a roof the way a careful contractor does, starting with water control instead of appearance.
The parts that decide whether a shingle roof performs or leaks
- Edges matter first because drip edge and starter strips control how water leaves the roof and enters the gutter.
- Walls, chimneys, and penetrations need flashing, not sealant alone, to stay watertight.
- Valleys carry the heaviest water load and deserve a cleaner, more durable detail than the field shingles.
- Underlayment and ridge caps add backup protection, weather resistance, and ventilation support.
- Gutters only work well when the roof edge detail feeds them cleanly and they stay clear enough to move water away.
The parts that make a shingle roof work as a system
I think of a roof as a drainage system, not a layer of shingles. The visible shingles are only the top skin; the real performance comes from the layers and accessories that control water at the edges, in the valleys, and where the roof breaks around walls or penetrations.
On a typical asphalt-shingle roof, the important pieces are easy to name but easy to underestimate: the roof deck, underlayment, starter strip, field shingles, ridge cap, drip edge, step flashing, valley flashing, and ventilation components. If one of those pieces is missing or installed in the wrong order, the roof may still look finished, but it stops behaving like a system.
| Component | What it does | What goes wrong when it is weak |
|---|---|---|
| Drip edge | Directs runoff into the gutter and protects the roof edge | Water can wick into fascia or under the shingle edge |
| Starter strip | Locks down the first course and seals the perimeter | Edges lift easier in wind and seal less consistently |
| Underlayment | Acts as a secondary water barrier below the shingles | Minor leaks reach the deck faster |
| Step flashing | Moves water away from roof-to-wall intersections | Leaks show up at siding, drywall, and framing |
| Valley flashing | Handles concentrated runoff where roof planes meet | Water backs up or cuts across exposed seams |
| Ridge cap | Covers the peak and can support venting | Wind can open the top course and water can enter at the ridge |
That is the lens I use on every roof inspection: I am looking for a continuous path for water to leave the roof, not a collection of disconnected parts. Once that logic is clear, the edge details make much more sense.
How the roof edge protects the fascia and gutters
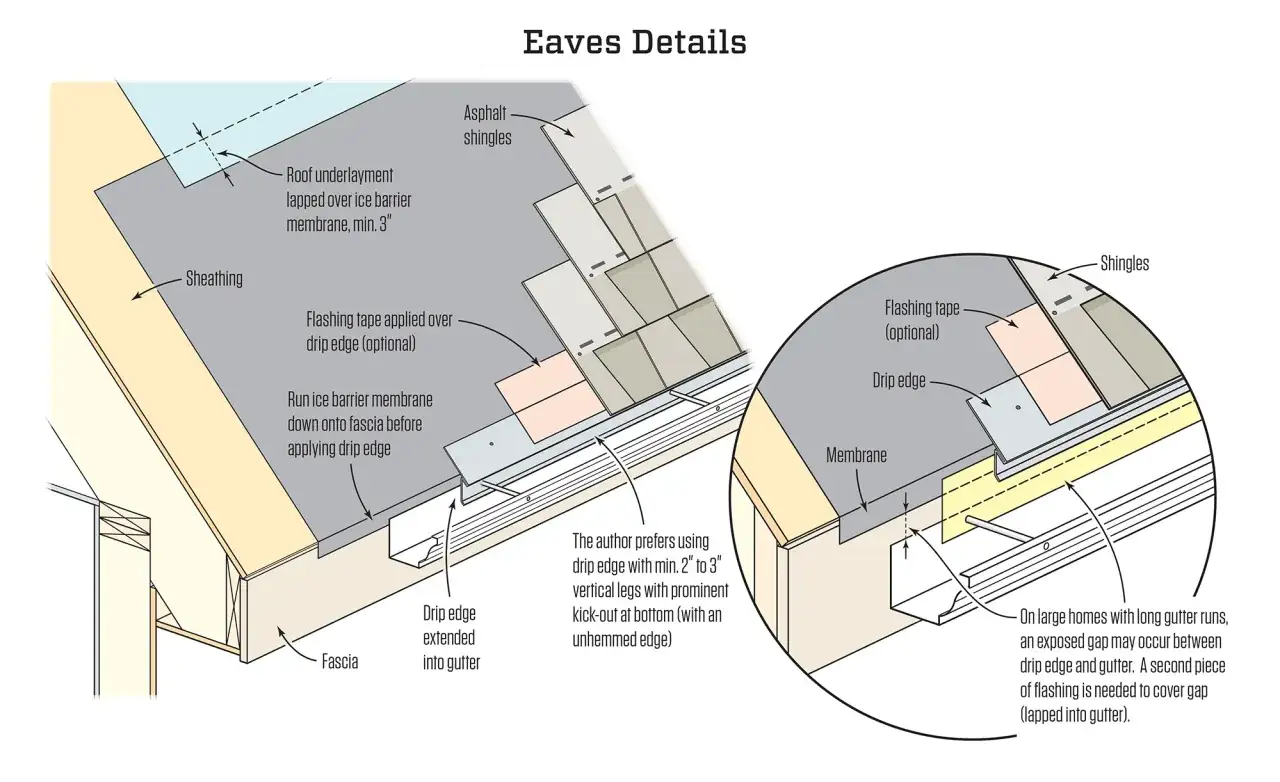
The roof edge is where small mistakes become expensive. If the drip edge, starter strip, and first course are not set up correctly, water can curl back toward the fascia, soak the trim, or spill behind the gutter instead of into it. That is why the perimeter deserves more attention than many homeowners expect.
In current manufacturer-style installation practice, the order matters. Drip edge goes at the eaves before underlayment and at the rakes above the underlayment, and the first course usually overhangs the edge by about 1/4 inch to 3/4 inch. That small overhang is doing real work: it helps water clear the fascia and enter the gutter cleanly.
Starter strips matter too. They are not just filler under the first row. They give the edge course a seal and help resist wind uplift, which is especially important on exposed eaves and rakes in storm-prone parts of the United States.
If the edge looks sloppy, I look for three things immediately: missing metal, crooked overhang, and clogged gutters. Those three problems often travel together. Once the perimeter is sound, the next weak point is usually the roof-to-wall transition.
Where leaks usually start around walls and penetrations
When water gets a chance to turn a corner, it becomes a roofing problem fast. Roof-to-wall joints, chimneys, skylights, vent pipes, and dormers are all places where shingles alone cannot do the job. They need flashing that is layered correctly and tied into the rest of the assembly.
Step flashing is the standard move at a sidewall or dormer. I like to think of it as a sequence of small metal pieces that climb with the shingles, one course at a time, so water is always directed back onto the roof surface. A common benchmark is roughly 5 inches up the wall and 5 inches onto the roof for each piece, with overlap from one piece to the next and no exposed fasteners where water can sit.
At the lower end of a roof-to-wall run, kickout flashing matters more than most people realize. It throws water into the gutter instead of letting it race behind the siding. If that piece is missing, a roof can leak behind the wall even when the shingles themselves look fine from the ground.
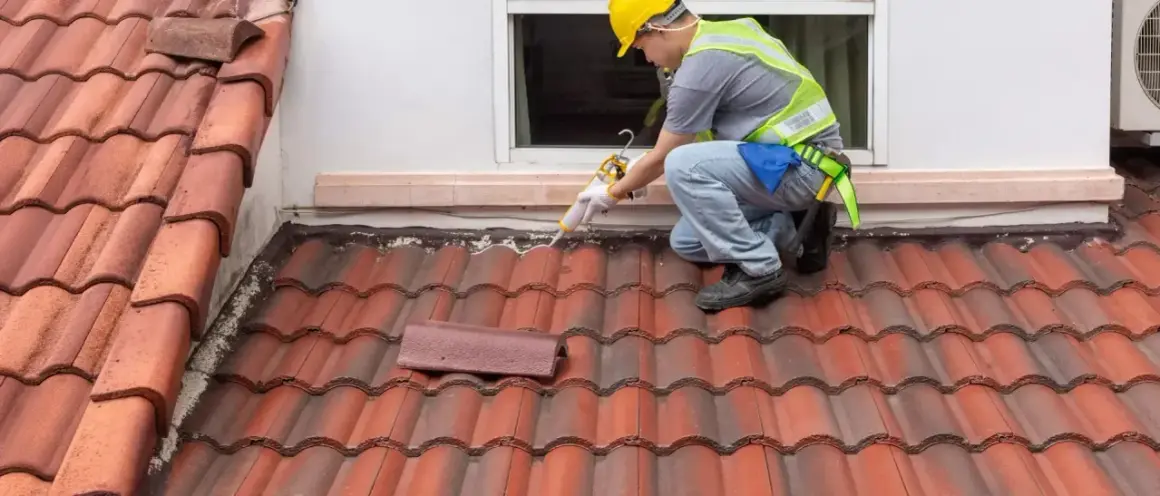
Chimneys add another layer of complexity. Wide chimneys often need a cricket, which is a small saddle that splits runoff and keeps snow, debris, and water from building up on the uphill side. Around pipes and vents, the quality of the boot or flange matters as much as the shingle cut. Caulk can help seal a sound detail, but it cannot rescue a bad one.
That is why I pay more attention to the metal than the shingles at these spots. Once those transitions are right, the valleys become the next critical water path.
Why valleys deserve more respect than the field shingles
Valleys handle a disproportionate amount of runoff because they collect water from two roof planes at once. That means they are not just another visual seam. They are one of the hardest-working details on the roof, and one of the easiest places to get trouble if the installation is rushed.
There are three common valley styles: woven, closed-cut, and open. Each can work in the right setting, but they are not equal in every situation. For architectural shingles, I usually prefer an open valley because the water path is cleaner and the detail is easier to inspect or service later.
| Valley type | Best for | Main tradeoff |
|---|---|---|
| Open valley | Heavy runoff, longer service life, easier maintenance | Visible metal, so the look is less seamless |
| Closed-cut valley | Cleaner appearance on some roof designs | Needs accurate cutting and alignment |
| Woven valley | Certain three-tab layouts and simpler roof forms | Can buckle or trap water on laminated shingles |
Good valley work starts below the shingles. I want to see ice-and-water protection or equivalent valley protection where appropriate, then metal or another approved water-shedding surface, and clean shingle cuts that do not choke the channel. Nails should stay out of the centerline so the valley can do its job without being punctured by a fastener pattern.
In wet climates, snowy regions, or roofs with multiple intersecting planes, valley quality often determines whether the roof feels solid or finicky over time. Once the main drainage path is under control, I turn to the layers that support the whole system from below and above.
Underlayment, starter strips, and ridge caps do more than fill gaps
Underlayment is the backup layer, but it is not a throwaway layer. On asphalt-shingle roofs, NRCA guidance commonly calls for a single layer of No. 15 asphalt-saturated underlayment on slopes of 18 degrees or greater, and two layers for roofs between 14 and 18 degrees. That matters because a roof that is more shallow than expected is slower to shed water, so the hidden layer has to do more work.
Starter strips are just as important as many of the visible shingles people spend time choosing. They help seal the perimeter and support the first course, which is where wind often tries to get under the system. If I see a roof with a compromised starter course, I expect edge-related issues sooner rather than later.
Ridge caps finish the system at the peak. They cover the bend where two roof planes meet and, when paired with ridge venting, help hot air escape from the attic. Ventilation will not fix a leak, but it can reduce heat and moisture stress that shortens shingle life and encourages attic condensation.
One practical mistake I see often is overreliance on sealant. Sealant belongs in a roof assembly, but only as support. The roof should still work if the caulk ages, because the primary waterproofing is supposed to come from overlap, metal, and correct layering. After all, a roof that depends on glue alone is already compromised.
How gutters and roof details work together in heavy rain
Roofing and gutters are usually discussed separately, but they are really one drainage sequence. The roof edge hands water to the gutter, the gutter carries it to the downspout, and the downspout gets it away from the foundation. If any one of those steps is weak, the whole system backs up.
I pay attention to what happens at the edge during the first hard rain after a roof is installed or repaired. Water should clear the shingles cleanly, fall into the gutter, and move toward the downspouts without spilling behind the fascia or overflowing at one end. If I see streaking on the trim, water marks on siding, or gutter overflow in a moderate storm, I assume the edge detail or the gutter system needs correction.
Clogged gutters also change how a roof behaves in winter. In cold climates, backed-up water can freeze at the edge and contribute to ice damming, which pushes water under shingles and into the assembly. In warmer regions, the same backup can still soak the fascia and invite rot, even without snow.
The fix is usually not complicated, but it has to be done in the right order: clean the gutters, confirm the drip edge is continuous, verify the shingle overhang, and make sure water is not bypassing the gutter because of a sag or a bad hanger spacing. Once the roof edge and gutter path are aligned, the roof performs more predictably in bad weather.
The details I would lock in before the shingles go on
If I had to spend money where it actually changes the roof’s lifespan, I would start with the details nobody notices from the street. New metal at the edges, properly layered flashing at walls, sound valley treatment, and a clean gutter path usually pay back faster than fancier shingles or cosmetic upgrades.
When I inspect a shingle roof detail, I want to see a clean water path from ridge to gutter. That means continuous edge metal, one-piece-at-a-time step flashing where needed, a valley treatment that is sized for the runoff, and no dependence on sealant to bridge a bad layout. Those are the details that separate a roof that merely looks finished from one that really works.
- Replace questionable flashing instead of trying to patch rust, bends, or poor laps with caulk.
- Use proper kickout flashing anywhere a roof plane ends against a wall and dumps into a gutter.
- Keep valleys open or otherwise clearly water-shedding when the roof geometry is complex or runoff is heavy.
- Clean and test gutters before you call the roof complete, because a blocked outlet can undo good edge work.
- Watch the attic after installation if you can, especially after the first major storm, to catch weak details early.
That is the level of attention I would want on my own house: practical, not flashy, and aimed squarely at keeping water out. When the details are right, the shingles do their job quietly for years; when they are wrong, the failure usually starts at a seam long before it shows up in the living space.