A roof works only when the parts do their jobs in the right order: the mat inside the shingle, the asphalt and granules on top, and the edge details that send water toward the gutter instead of under the deck. The term shingle construction sounds narrow, but it really covers both how the product is built in the factory and how it is layered, fastened, and sealed on the roof. In this guide, I break down the materials, the assembly sequence, the weak points, and the installation details that most often decide whether a roof lasts or leaks.
Key points to keep in mind before you buy or install shingles
- Most U.S. asphalt shingles use a fiberglass mat, asphalt, and mineral granules; each layer solves a different problem.
- A roof system is more than shingles alone. Underlayment, starter strips, flashing, drip edge, and ridge caps all matter.
- Clean water shedding at the eaves and gutters is a structural issue, not a cosmetic one.
- Laminated and premium shingles add depth and performance, but only when the full system is installed correctly.
- The most expensive failures usually start with simple mistakes: wrong nails, missing edge metal, or bad flashing.
How a modern shingle is built before it ever reaches the roof
Most U.S. residential asphalt shingles start with a fiberglass mat. That mat is saturated with asphalt, then surfaced with mineral granules that protect the binder from sunlight and give the roof its color. The result is a layered composite: strong enough to handle shipping and installation, but thin enough to overlap cleanly.When I explain it to homeowners, I usually say this: the shingle is built to shed water, survive UV, and stay flexible enough to seal to the course below it. If any of those jobs are compromised, the whole roof feels it later.
The core layer
The fiberglass base gives the shingle tensile strength. It keeps the product from tearing when a roofer bends it, nails it, or pushes it into place. In laminated products, manufacturers bond more than one layer together so the roof looks thicker and casts deeper shadows. That extra build is not only about looks; it changes how the shingle resists wind and handles wear.
Asphalt and granules do different jobs
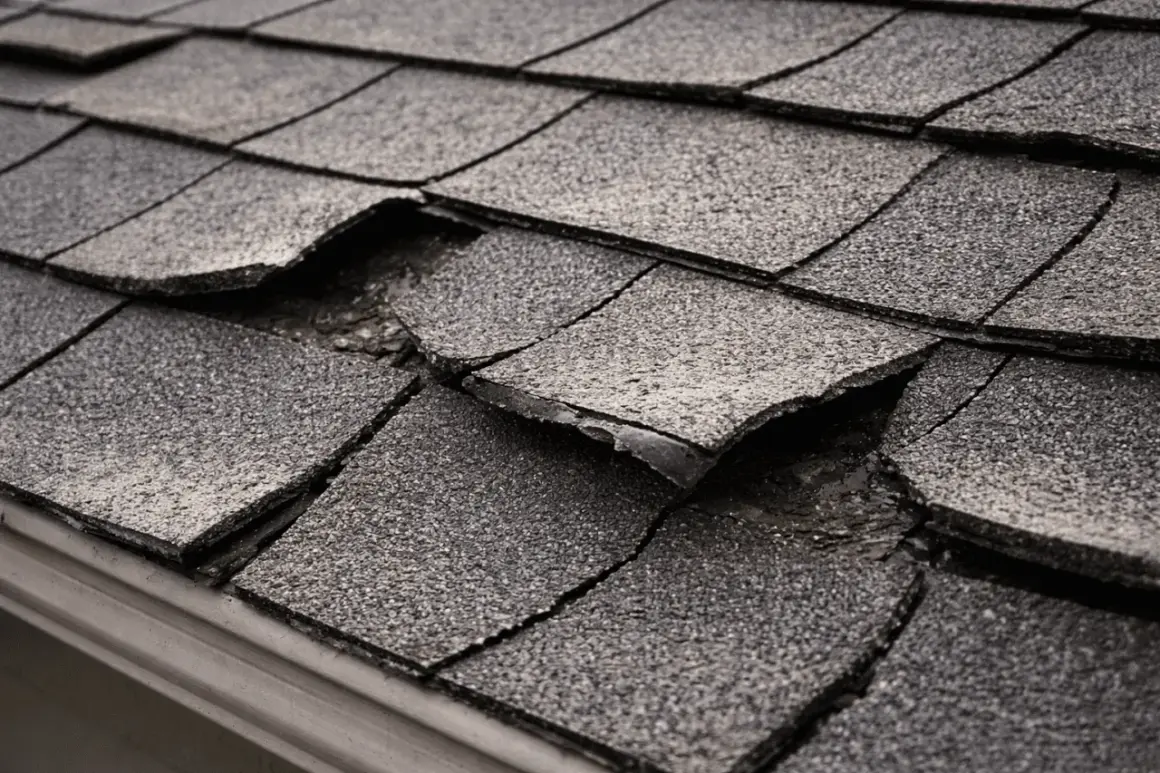
Asphalt is the waterproofing layer. Granules are the armor. They block sunlight, slow aging, add color, and help the roof meet fire-performance requirements. When I see a lot of granules collecting in the gutter, I do not dismiss it as harmless dust. Some loss is normal early on, but heavy shedding or bald patches point to a roof that is aging faster than it should.
Read Also: Asphalt Shingle Coating - Does It Really Work?
Seal strips and cut patterns matter after installation
Many shingles include a self-sealing strip that bonds the courses once the roof warms up. That is why storage, temperature, and correct fastening matter so much: if the seal never engages, wind can get under the tabs. The cut pattern also matters because it sets the exposure, the visible portion of each course, and that exposure controls both the look of the roof and the path water takes down the slope.
Once the product is built, the next question is how those layers are arranged on the house so water never finds a straight shot inward.
How the roof layers fit together on the house
I think of the roof as a sequence, not a surface. Each layer has a specific job, and the shingle only performs well when the layers below it are doing their jobs too. A clean installation usually starts with sound decking and ends with a finished ridge line that is sealed, vented, and flashed correctly.
- Roof deck. The plywood or OSB deck is the structural base. It needs to be dry, flat, and firmly attached. A soft spot under a shingle is not a small problem; it is a warning that the system below has already been compromised.
- Underlayment. Felt or synthetic underlayment adds a secondary weather barrier. On lower-slope or ice-prone areas, I expect a more conservative approach, often with self-adhered membrane at the eaves, valleys, and penetrations.
- Drip edge. This metal flashing finishes the roof edge and helps guide runoff into the gutter line instead of behind the fascia.
- Starter strip. The starter course seals the first row and keeps wind from lifting the edge of the roof.
- Field shingles. These are the visible courses that cover the slope. They must be aligned, fastened in the correct zone, and laid at the proper exposure. Most standard strip shingles use four nails per shingle, while some high-wind or manufacturer-specific installs call for six.
- Flashing and penetrations. Chimneys, skylights, sidewalls, vents, and valleys need their own waterproofing details. Shingles overlap those parts; they do not replace them.
- Hip and ridge caps. The top of the roof finishes with purpose-made pieces that bend over the ridge and keep the peak sealed while allowing ventilation where needed.
The detail I care about most is the first two courses at the eave. If those are wrong, the roof spends its whole life trying to recover from a bad start. That edge work becomes even more important once gutters enter the picture, because the roof does not just need to shed water, it needs to place that water accurately.
Why the roof edge and gutters decide whether water leaves cleanly
The edge is where good roofs become great or fail early. Water should leave the shingle face, cross the drip edge, and fall into the gutter or away from the fascia in a controlled path. If the edge detail is sloppy, the roof can look fine from the street and still soak the wood behind it.
| Detail | What it is supposed to do | What goes wrong when it is wrong |
|---|---|---|
| Drip edge | Direct runoff off the deck and toward the gutter line | Water can wick back to fascia, soffit, or underlayment |
| Starter strip | Seal the first course and block wind at the eaves | Tabs lift at the edge and water can start underneath |
| Gutter pitch | Carry water to downspouts without standing water | Overflow, staining, and splashback during heavy rain |
| Roof overhang | Keep runoff aligned with the metal edge | Water misses the gutter or catches the wind |
In many U.S. code-based assemblies, drip edge belongs at the eaves and rake edges of shingle roofs. If the roof has gutters, I want the water line to land neatly into the gutter opening, not behind it and not across the fascia board. In practice, that usually means keeping the overhang modest and consistent; when no drip edge is used, the overhang is usually kept in the narrow 3/8-inch to 1-inch range rather than left to chance. In colder climates, this detail matters even more because ice dams can force meltwater backward under the first courses.
From there, the next decision is not just technical but visual: the style of shingle changes the way the roof is built, the way it performs, and the way it ages.
How 3-tab, architectural, and premium shingles differ in real use
People often choose shingles by color first, but construction should come first. The shape of the shingle, the number of layers, and the way the tabs are cut affect wind behavior, curb appeal, and how forgiving the roof is during installation. I would rather see a simpler product installed cleanly than a premium shingle installed badly.
| Shingle type | How it is built | What it looks like | Best use | Tradeoff |
|---|---|---|---|---|
| 3-tab | Single-layer strip with uniform tabs | Flat, even, and traditional | Budget-sensitive projects and simpler rooflines | Less depth and usually less visual interest |
| Architectural | Laminated with two or more bonded layers | Thicker, shadowed, and more dimensional | Most U.S. homes | Costs more, but usually gives better durability and curb appeal |
| Designer or premium | Heavier multi-layer build with specialized cuts | Slate-like or cedar-like appearance | Homes where appearance and durability both matter | Highest material cost and often the most demanding install |
The exact wind rating, fire rating, and warranty structure depend on the product line and the accessories that are matched to it. That is why I never judge a shingle by the wrapper alone. The full system matters, and the weather around the house matters just as much.
The roof that makes sense in Florida is not always the one I would pick in Minnesota or on a windy coastal lot, so climate deserves its own say in the decision.
How climate changes the right shingle assembly
Climate does not change the basics, but it changes the emphasis. The best roof in a hot, sunny market needs different attention than the best roof in a snow belt or hail country. I always ask where the roof lives before I decide which details should get the most attention.
- Hot, high-UV regions. Heat and sun accelerate aging, so granule retention, attic ventilation, and color choice matter more than many homeowners expect. Dark roofs can work, but they demand better thermal management.
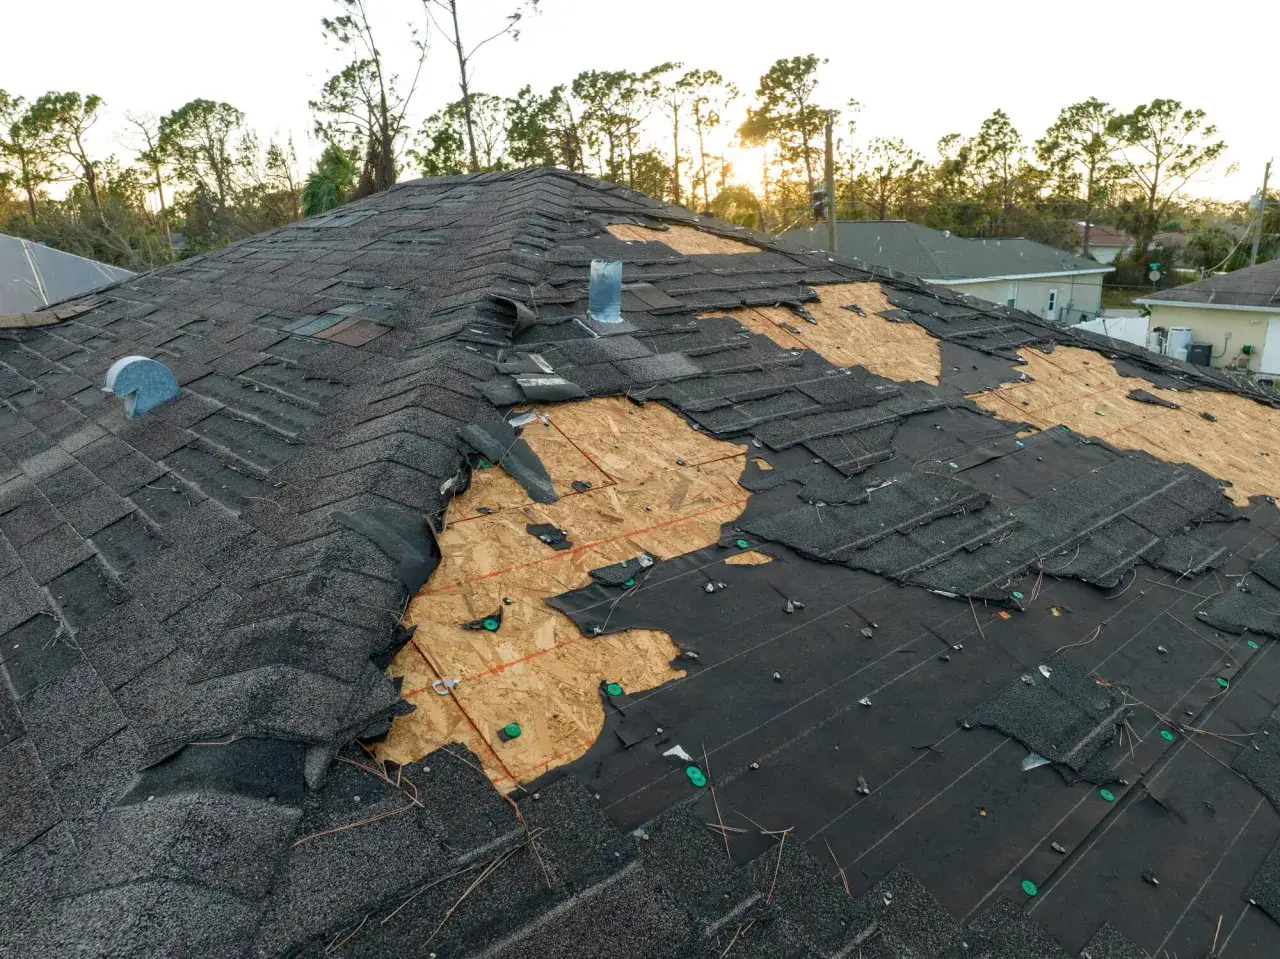
- Wind-prone and coastal areas. Starter strips, seal strips, nail placement, and edge metal matter more because uplift starts at the perimeter. A roof can be otherwise sound and still fail at the edges after a storm.
- Snow and ice regions. Ice-and-water protection, good attic insulation, and clear gutter drainage become critical. If heat escapes into the attic and melts snow at the roof deck, the edge details take the hit.
- Hail-prone areas. Impact-rated products can reduce cosmetic damage and may improve long-term performance, but they are not a substitute for proper installation and flashing.
This is where I see a lot of buyer confusion. People want one universal answer, but roofing is local. The same shingle line can be a smart choice in one state and a weak fit in another if the supporting details do not match the weather. That leads straight to the mistakes that shorten a roof’s life even when the product itself is decent.
The installation mistakes that shorten roof life the fastest
Most premature roof failures are boring in the worst way. They do not come from a dramatic defect; they come from a few ordinary mistakes repeated across a whole roof.
- Wrong nail placement. Nails that are too high, too low, overdriven, or underdriven can weaken the seal and create future leak points. A shingle can look aligned and still be fastened badly.
- Missing starter strips. Skipping the starter row saves time and costs the roof edge its first layer of protection against wind and water.
- Inconsistent exposure. If the courses are spaced unevenly, the finished roof sheds water less predictably and often looks wavy from the ground.
- Weak flashing work. Valleys and wall transitions are not places to improvise. Shingles are part of the flashing system, not a replacement for it.
- Poor ventilation. Hot, stagnant attic air cooks the underside of the roof and can shorten shingle life, especially in warm climates.
- Reusing tired edge metal or rotten decking. A new roof over a weak substrate is a new surface over an old problem. It may buy time, but it does not solve the root cause.
When I inspect a bad roof, I usually find that the shingles themselves were never the real issue. The problem was the way the system was assembled around them. That is why I finish every project by checking the roof the same way I would check it after a storm: from the deck, to the edge, to the attic, and back down to the gutters.
The checklist I use before I call a roof finished
Before I would sign off on a new shingle roof, I would want a few things to be true without excuses. The product line should be matched with its accessories, the edge metal should be continuous, and the flashing should be neat enough that I do not have to hope it is watertight. I would also want the gutters to carry water cleanly after a real rain, not just pass a visual inspection on a dry day.
- Confirm that the shingles, starter pieces, ridge caps, and underlayment belong to a compatible system.
- Check that drip edge is installed at the eaves and rakes and that the gutter line receives runoff cleanly.
- Inspect the first course at the eave for straightness, seal, and proper fastening.
- Look closely at valleys, chimneys, skylights, plumbing vents, and sidewalls, because those are the first places leaks show up.
- Walk the attic if you can. Daylight, damp insulation, staining, or mildew smell tell you more than a brochure ever will.
- Watch the gutters during a heavy rain if possible. Overflow, dripping behind the gutter, or staining on the fascia are clues worth taking seriously.
If you keep the focus on the full assembly instead of the top layer alone, the roof becomes much easier to judge. That is the practical lesson I return to again and again: a shingle roof succeeds when the materials, the edge details, the ventilation, and the drainage path all work together, and that is what I would inspect first on any home I cared about.