A proper grab bar installation can make a bathroom feel instantly safer, but the job only works when the wall behind it can actually carry weight. I focus on the structure first, then the height, reach, and hardware, because those details decide whether the bar feels reassuring or flimsy. This article walks through placement, backing, installation steps, common mistakes, and what the job usually costs in the United States.
What I would check before the first screw goes in
- Structure comes first. A safe handhold needs studs, solid blocking, or another rated fastening system.
- Size matters. A circular bar usually feels best at about 1 1/4 to 2 inches in diameter, with room for your fingers behind it.
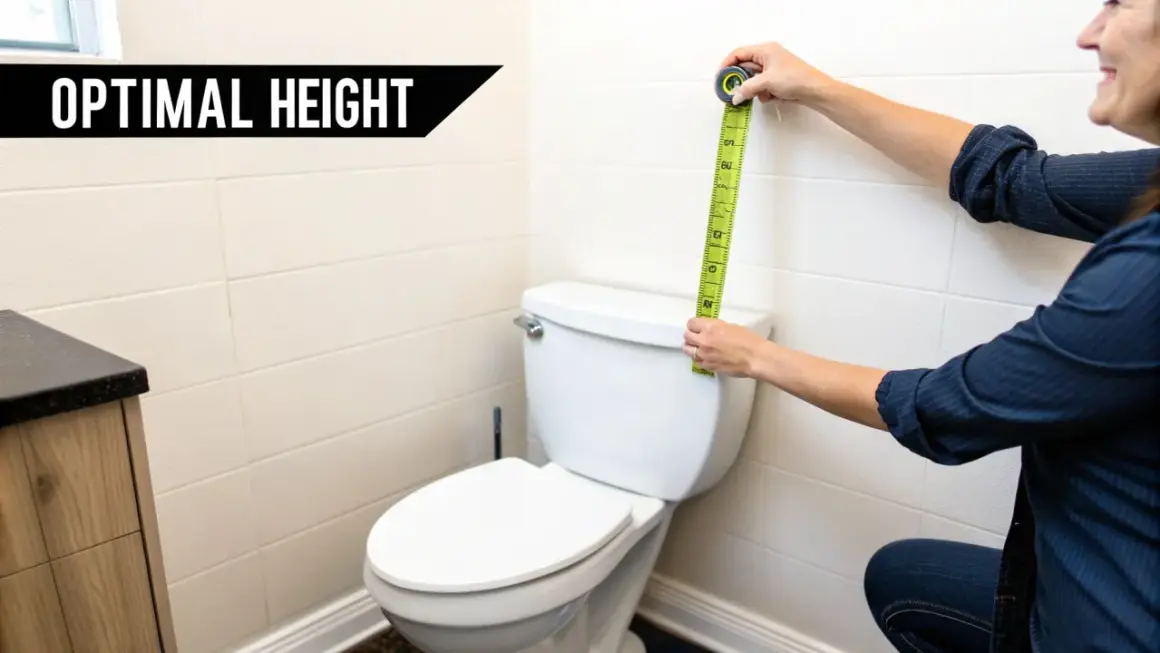
- Height affects confidence. A common benchmark is 33 to 36 inches to the top of the gripping surface.
- Placement should match movement. Toilet, tub, and shower locations each call for a different orientation.
- Finished walls change the method. Tile, fiberglass, and acrylic all need more care than open framing.
- Reinforcement is cheaper than failure. If the wall is open, add blocking now instead of chasing a weak anchor later.
What makes a safe support bar actually safe
I start with the load path. A good bar is not just a piece of metal on tile; it is a handhold that transfers force into framing, blocking, or another rated fastening system. In accessible-design guidance, the usual benchmark is a gripping surface 33 to 36 inches above the finished floor, a circular bar diameter between 1 1/4 and 2 inches, and 1 1/2 inches of clearance from the wall and nearby objects.
Those numbers are practical, not decorative. The diameter fits most hands, the clearance gives fingers room to close, and the height keeps the grip in a natural reach zone for standing, sitting, or transferring. I also care about the finish of the bar itself, because a slick surface in a wet room does not help much if the hand cannot hold it confidently.
| Detail | Practical target | Why it matters |
|---|---|---|
| Diameter | About 1 1/4 to 2 inches for round bars | Large enough to grasp securely without forcing the hand open too wide |
| Wall clearance | About 1 1/2 inches | Keeps knuckles and fingers from pinching against the wall |
| Mounting height | 33 to 36 inches to the top of the gripping surface | Works for a broad range of users and common bathroom movements |
| Fastening | Studs, blocking, or a manufacturer-rated anchor system | The bar is only as strong as the structure behind it |
Once those basics are clear, the next question is where the bar should actually sit in relation to the toilet, tub, or shower.
Where I place bars in real bathrooms
Placement matters because people do not use every wall the same way. I test the motion first: sit, stand, step in, step out, reach for balance. The best location is the one that supports that movement without forcing a wrist twist or an awkward lean.
| Location | Orientation I favor | Why it works | Practical note |
|---|---|---|---|
| Beside the toilet | Horizontal or slightly angled | Helps with both lowering and pushing up | A rear bar and a side bar are the most stable layout when the room allows it |
| Shower entry | Vertical | Gives a natural grip when stepping over a threshold | A shorter bar often works well here because the hand is looking for one reliable landing point |
| Inside a shower | Horizontal or diagonal | Useful for standing balance and seated transfers | Diagonal bars can feel easier to reach for some users, but they should still be anchored like any other support |
| Bathtub wall | Horizontal, with an optional lower bar | Helps with entry, exit, and steadying while standing in the tub | Upper and lower positions solve different movement problems, so I do not treat them as interchangeable |
For toilet zones, a rear bar is typically 36 inches minimum, and the side bar is typically 42 inches minimum with careful spacing from the rear wall. In tubs, the lower back-wall bar usually sits 8 to 10 inches above the tub rim, while the upper bar stays in the familiar 33 to 36 inch zone. I treat those dimensions as useful benchmarks even in homes, because they usually produce a more natural grip than random placement.
That layout only works if the wall can actually hold it, which is where the carpentry matters.
The wall behind the finish matters more than the bar itself
If I can hit studs cleanly, that is my first choice. If the layout misses the framing, I would rather open the wall and add blocking than lean on a weak anchor. Blocking is simply solid lumber or plywood added between studs so the fasteners bite into structure instead of gypsum board.
| Wall type | What I trust | What I avoid |
|---|---|---|
| Drywall over studs | Direct fastening into the stud centerline | Drywall anchors as the main support for a safety bar |
| Tile over backer board | Studs or blocking aligned to the flange | Guessing at stud locations through tile without confirming the framing |
| Fiberglass or acrylic surround | A manufacturer-approved reinforcement system or access to framing | Letting the wall flex while the user loads the bar |
| Open wall during a remodel | Horizontal blocking or a reinforced panel between studs | Closing the wall and hoping a specialty anchor will compensate later |
| Masonry or concrete | Correct masonry anchors with proper embedment | Generic plastic plugs that are not rated for repeated body weight |
When the wall is flexible, the bar feels wrong even if it looks perfect. Acrylic surrounds are a good example: they often seem rigid until someone leans on them, and then the movement shows up immediately. That is why I treat reinforcement as part of the job, not as an optional upgrade.
With the wall plan in place, the install becomes a measuring and fastening job instead of a guess.
How I lay out the bar before drilling
I start with a dry fit, painter’s tape, and a level. The goal is to make sure the handhold lands where the body actually needs it, not where the tile pattern happens to be convenient. I also check for door swing, toilet lid clearance, valve trim, towel bars, and any nearby object that could crowd the grip.
- Measure from the finished floor to the top of the gripping surface, not to the center of the bar.
- Find the stud centers and confirm them before drilling any finish surface.
- Mark the flange holes with tape so the bit does not wander.
- Check the natural reach path by mimicking the movement with your hand before committing to the holes.
- Make sure the bar is level, unless the user specifically benefits from a slight angle.
That last point matters more than people think. A bar can be technically “installed” and still feel awkward if it sits too high, too low, or too far from the path of movement. I want the hand to land on it without thinking.
Once the layout is right, the actual fastening is straightforward, but the surface material changes the tools I reach for.
How I install one on tile, drywall, or fiberglass
The surface changes the tooling, but not the order of work. I still want solid backing, correct measurements, and a final check for movement. The difference is how carefully I drill and how conservative I am about tightening hardware.
On drywall with studs
This is the easiest case. I drill pilot holes into the stud centers, set the mounting plate, and tighten the screws evenly so the flange sits flat. If the bar twists or rocks, I stop and correct the problem before finishing the job.
On tile
Tile needs patience. I use tape to keep the bit from skating, drill slowly, and avoid forcing the tool through the surface. Once I reach the substrate, I treat the rest like a normal structural fastening job. I also keep the screws snug rather than brutal, because overtightening is one of the fastest ways to crack tile or distort the flange.
Read Also: DIY Table Build - Make It Stiff, Stable, & Last for Years
On fiberglass or acrylic surrounds
I only trust this setup when I can confirm real backing behind the wall or a manufacturer-approved reinforcement system. Flexible panels are the problem, not the bar. If the surface moves when pressure is applied, the user will feel that movement every time they grab the rail, and that defeats the point of installing it.
After the hardware is in, I press and pull on the bar from several angles. I am not trying to rip it out; I am checking for twist, flex, or flange movement. Any motion means the backing or fasteners need another look.
The mistakes I watch for on every job
Most failures are not mysterious. They come from rushing the layout, trusting the wrong surface, or assuming that a bar is only as important as its finish. In reality, a support bar is a structural detail with a decorative skin.
- Relying on drywall alone. A hollow wall is not a support system.
- Choosing the easiest tile line instead of the right framing. Pretty placement is useless if the fasteners miss solid structure.
- Using towel bars, shower doors, or shelving as substitutes. Those parts were not built for body weight.
- Overtightening the screws. That can crack tile, crush the finish surface, or strip the anchor.
- Ignoring clearance. If the hand cannot wrap naturally around the bar, the setup is already compromised.
- Assuming suction accessories count as permanent support. They do not.
The easiest way to avoid trouble is to stop as soon as something feels off. A bar that shifts even slightly is telling you the backing is not right. I would rather reopen a wall than let a weak install stay hidden behind a polished finish.
The final decision is whether the project still looks like a simple DIY, or whether the wall has made the case for a pro.
What I spend and when I bring in a pro
Current 2026 pricing guides put a typical professional bathroom install around $200 to $350 for labor and materials, with simple replacement jobs sometimes starting near $100 and more complex work climbing to about $400. The bar itself usually costs about $20 to $100, and wall reinforcement can add roughly $200 when the framing needs help. That is still modest compared with the cost of repairing cracked tile or reopening a failed wall.
| Scenario | Typical cost | My take |
|---|---|---|
| Simple stud-mounted job | About $100 to $250 total | Good DIY candidate if the layout is straightforward |
| Standard professional install | About $200 to $350 total | Worth paying for when the wall is finished and you want clean results |
| Wall opened for blocking | Add roughly $200 or more | Best long-term fix when the framing is wrong or the wall has no real support |
| Complicated tile, fiberglass, or multiple bars | About $350 to $400 or more | Usually the point where a pro saves time and avoids surface damage |
- I hire a pro when I cannot verify the backing.
- I hire a pro when the wall is tile over a fragile or uncertain substrate.
- I hire a pro when the room needs blocking and I do not want to open and patch the wall myself.
- I hire a pro when the rail is part of a larger accessibility plan and the layout has to work for more than one user.
If the job is just one bar into clear studs, DIY makes sense for many homeowners. If the wall is old, brittle, or already finished in a way that punishes mistakes, paying for the labor is usually the cheaper decision in the end.
If you are planning the wall work now, one extra carpentry detail can save you from opening it again later.
The wall details that make future upgrades easier
If I already have the wall open, I like to leave myself options. One strip of blocking can support a future support bar, a fold-down shower seat, a towel rail, or a shelf without reopening the finish. That is the part that feels like real carpentry: build the structure once, and let the room stay adaptable.
- Photograph the blocking before the wall is closed.
- Write down stud centers and the exact fastener type you used.
- Use corrosion-resistant hardware in wet areas.
- Keep the bar model number and install height in your records.
- Think ahead to accessories that may need the same backing later, especially shelves and fold-down fixtures.
That little record pays off when the room is remodeled, a fixture moves, or someone needs a second handhold later. The strongest install is the one you never have to question again.