Small dents, nail holes, chipped corners, and shallow cracks can make cabinets and shelving look worn long before the rest of the piece fails. This article shows the practical side of fixing those flaws: choosing the right product, preparing the surface, packing it correctly, sanding it flush, and finishing it so the repair blends into trim, furniture, and storage pieces. The difference between a visible patch and a clean repair is usually technique, not luck.
The cleanest repairs start before the filler goes in
- Choose the filler by finish and function paint-grade work is more forgiving than stain-grade work.
- Clean and dry the wood first dust, loose fibers, and old finish are the usual reasons repairs fail.
- Pack the cavity firmly do not smear a thin layer across the surface and hope it fills itself.
- Build deep repairs in layers thin lifts shrink less and sand more cleanly than one thick mound.
- Sand with control use the grain on flat work and a block or profile sponge where the shape matters.
- Finish realistically stain is harder to match than paint, and clear coats show every mistake.
Pick the filler that matches the repair
I start by asking one question: does the piece need to be painted, stained, or just made presentable? That answer usually decides the product. Painted repairs are forgiving; stained repairs are not.
| Type | Best use | What it does well | Main limit |
|---|---|---|---|
| Water-based wood filler | Nail holes, tiny dents, interior trim, cabinets that will be painted | Easy cleanup, low odor, quick sanding | Can shrink in deeper gaps |
| Solvent-based wood filler | Small to medium repairs that need a harder patch | Hardens well and shapes cleanly | Strong odor and better ventilation are needed |
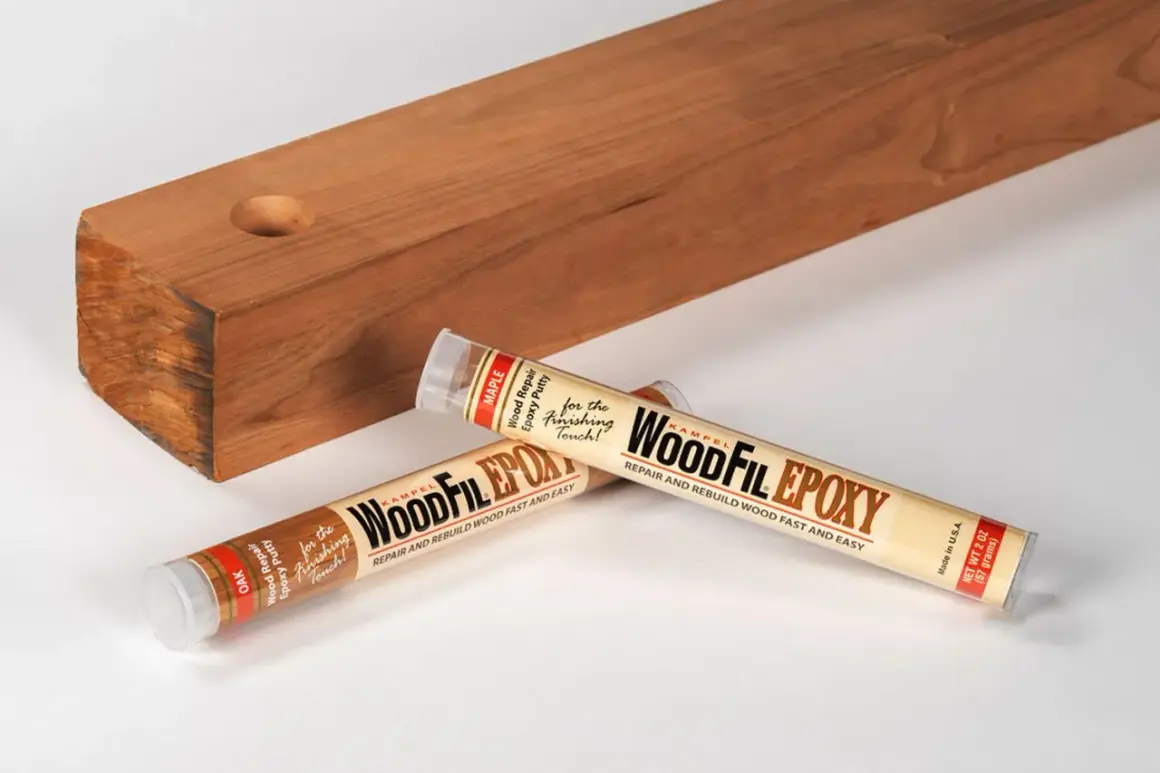
| Two-part epoxy filler | Deep voids, broken corners, some exterior pieces | Strong, stable, and less likely to shrink | More steps, more cost, more sanding effort |
| Wood putty | Finished furniture or trim after staining or painting | Good for cosmetic touchups on finished surfaces | Usually not sandable or stainable like true filler |
For unfinished wood that will be painted, I usually want a filler that sands fast and does not crumble. For stain-grade work, I prefer a product made for staining, but I still expect a close match rather than a perfect one. If the repair needs to hold a screw, support weight, or rebuild a broken edge, filler alone is the wrong tool and the fix needs to be structural instead. Once the material is chosen, the surface prep decides how well it bonds.
Prepare the wood so the filler can bond
Most bad repairs start with a rushed prep step. If the hole still has dust, loose fibers, wax, or glossy finish on the walls, the filler is trying to stick to debris instead of wood. I want the repair area clean, dry, and slightly open so the product can grab.
- Scrape away loose fibers, crumbling finish, and weak edges with a knife or scraper.
- Vacuum the cavity, then wipe the area with a tack cloth or a dry rag.
- Mask the clean finish around the repair if you want less sanding later.
- Make sure the wood is dry before you fill it; trapped moisture can slow curing and weaken the bond.
- Wear ventilation and dust protection, especially with solvent-based products or when sanding old finishes.
On cabinets and storage furniture, I also pay attention to the surrounding hardware. Hinges, shelf pins, and drawer slides can collect dust and interfere with the repair if I ignore them. With the surface ready, the actual application becomes much easier.
Press the filler in, do not just smear it across the surface
This is the step that separates a solid patch from a mess that needs extra sanding. I use a putty knife for wider flaws and the edge of the blade for small nail holes. The goal is to force the filler into the damage, not lay it on top like frosting.
- Load a small amount of filler on the knife rather than overloading the blade.
- Press it into the void from more than one angle so the cavity fills completely.
- For shallow repairs, leave the patch slightly proud of the surface so you can sand it flush later.
- For deep holes, build in thin layers instead of one thick mass. As a practical rule, keep each lift to about 1/4 inch or less.
- Scrape off the excess around the edges before it starts to set.
I am careful not to spread filler far beyond the damaged area. The more product I leave on the surrounding wood, the more sanding I create for myself. For cabinet faces, drawer fronts, and trim, that extra sanding can be the difference between a quick cleanup and a damaged finish line. After the patch is packed, the next job is to level it without flattening the surrounding profile.
Sand it flush without flattening the surrounding profile
Dry time depends on the product and depth of the repair, so I do not sand by the clock alone. Some shallow repairs are ready in under an hour, many are ready in a few hours, and deeper layers can take overnight. When in doubt, I wait until the patch feels hard all the way through rather than firm only on the surface.
For the sanding itself, I keep the process controlled. Flat surfaces want a sanding block; rounded trim wants a wrapped sponge or a profile tool. That small choice keeps me from carving a dip into the surrounding wood.
- Start with 120 to 150 grit to level the patch.
- Finish with 180 to 220 grit on paint-grade work.
- Sand with the grain on visible surfaces whenever possible.
- Use a block on cabinet doors, shelves, and flat trim so the repair stays level.
- Check the area under raking light, which means a lamp held low so shadows reveal ridges and pinholes.
- If the filler shrinks or leaves pores, add a thin second pass and sand again.
I also stop as soon as the patch feels even. Over-sanding is how a repair turns into a shallow depression that catches finish later. Once the surface is smooth, I move to the finish step with realistic expectations.
Stain, paint, or topcoat with realistic expectations
Paint is the easiest route because it hides variation well. Stain is more demanding because filler and surrounding wood absorb color differently, even when the label says stainable. Clear finishes are the toughest of all because they leave almost nothing to hide the patch.
| Finish situation | What I do | What to expect |
|---|---|---|
| Painted trim or cabinets | Sand smooth, prime the repair, then paint | Best chance of a clean, nearly invisible repair |
| Stained bare wood | Use a stainable filler, test on scrap, then stain after the patch is fully dry and sanded | Close match, but rarely perfect grain-for-grain blending |
| Already-finished furniture | Use color-matched putty or a finish touchup method after the main finish is on | Works well for small cosmetic flaws, not for deep structural damage |
I always test on scrap from the same wood species if stain matters. Pine, oak, maple, and poplar all behave differently, and a patch that looks fine in the can or under store lights can look wrong on the real piece. If the color match is critical, I would rather slow down and test than try to bury a bad match with extra stain. That is also where the limits of filler become obvious.
Know the limits before you trust the patch
Wood filler is a cosmetic and light-repair material. It can hide flaws, rebuild small missing sections, and make a cabinet or shelf look clean again, but it cannot restore strength to rotten or loose wood. I treat that line seriously because it saves time and prevents bad repairs from coming back later.
| Problem | Better fix | Why filler is not enough |
|---|---|---|
| Loose joint | Glue, clamp, and rebuild the joint | Filler does not restore structural strength |
| Soft rot | Remove damaged wood and replace or rebuild with epoxy | Rotten fibers will not hold a reliable patch |
| Large missing corner | Epoxy or a patch block | Too much material in one spot tends to shrink or crack |
| Exterior piece with movement | Exterior-rated epoxy repair system | Seasonal movement and moisture can break a standard filler |
| Cosmetic nail hole or chip | Standard wood filler | This is the kind of flaw filler handles well |
The biggest mistake I see is using filler as if it were glue or a structural patch. If a shelf support is stripped, a hinge screw no longer bites, or a corner is soft to the touch, the real fix comes before the cosmetic repair. Once that difference is clear, it is easy to use the same method across cabinets, shelves, and storage furniture.
Use the same approach on cabinets, shelves, and storage pieces
The core sequence does not change much from one project to another, but the priority does. On a cabinet door, I care most about a clean appearance. On a shelf, I care about whether the repair is near a support or a screw. On a storage chest or bench, I also think about humidity and a little seasonal movement.
- Cabinet doors and drawer fronts use a paintable or stainable filler for chips, dents, and old hardware holes.
- Shelves and closet units use filler only on cosmetic flaws, not on holes that carry brackets or fasteners.
- Trim around storage areas is usually a straightforward paint-grade repair if the wood is sound.
- Blanket chests and storage benches benefit from tougher filler choices when the repair sits near an edge that may move a little.
- Built-ins and pantry units often look best when the repair is sanded flush and primed before the finish goes on.
I think of this as a repeatable workflow: choose the right product, clean the wood, pack the defect, sand carefully, and finish with the right expectations. The project may be small, but the result is much better when each step is deliberate. If you keep a few supplies together, the next repair becomes faster than the first.
Keep a small kit ready for the next cabinet nick
I get better results when the tools are already within reach. A small, organized repair kit saves time and prevents me from improvising with the wrong blade, the wrong grit, or a filler that has gone stale in the garage.
- One paintable filler and, if you do a lot of stain work, one stainable filler
- Two putty knives, one narrow and one wider
- Sanding block plus 120, 180, and 220 grit paper
- Tack cloth or a vacuum attachment for dust control
- Painter's tape, gloves, and a dust mask
- Scrap wood for stain tests and color checks
- A sealed plastic bin or zip bag so the filler stays usable longer
I keep the container sealed, flat, and away from heat because dried-out filler is one of the easiest ways to waste time on a small repair. If I had to leave you with one rule, it would be this: match the filler to the job, prep the wood properly, and do not finish until the patch is fully dry and checked under good light.