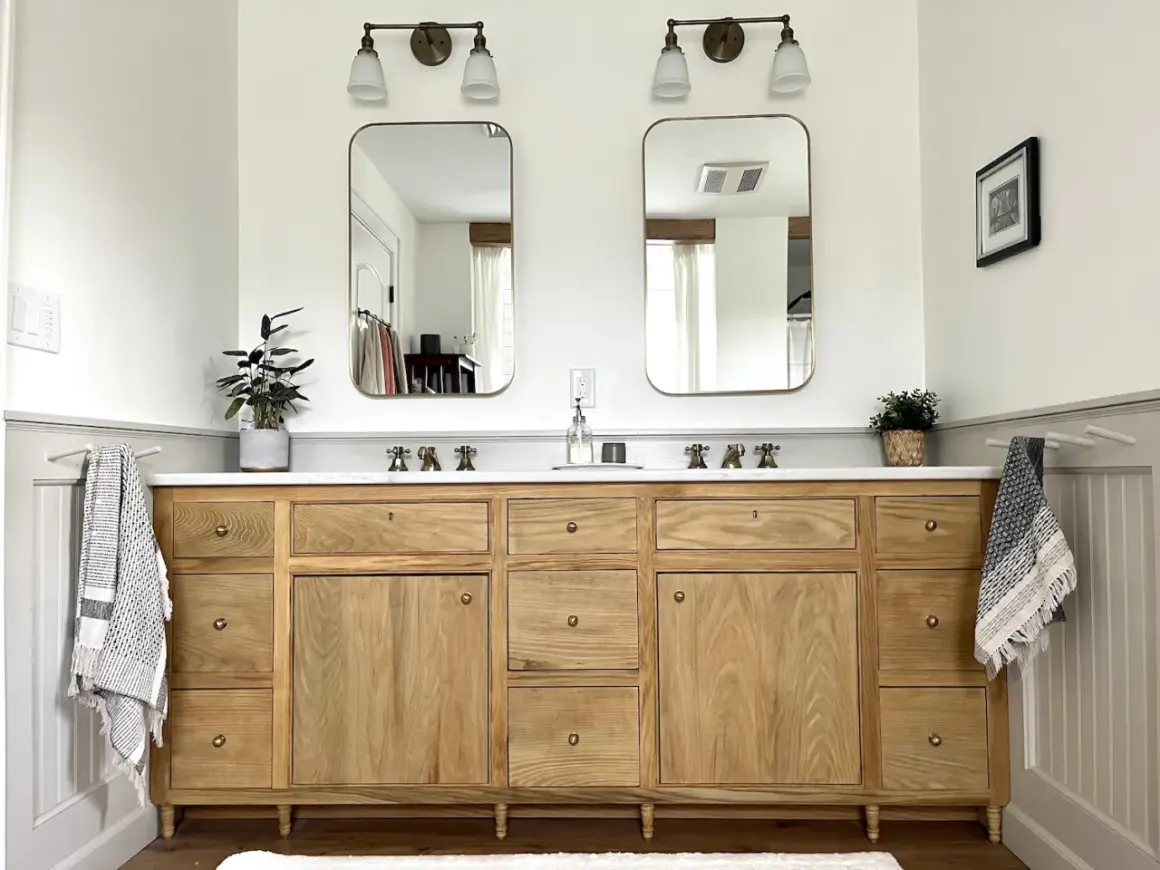
The smartest vanity builds solve storage, plumbing, and moisture at the same time
- Measure the room first. Width, depth, door swing, and front clearance decide what will actually fit.
- Pick the storage layout before you cut lumber. Drawers, doors, and open shelves behave very differently around plumbing.
- Use moisture-tolerant materials and seal every exposed edge. Bathrooms punish weak finishes fast.
- Leave room for shutoffs, the trap, and future service. A pretty cabinet that blocks plumbing is a bad trade.
- Budget for hardware, finish, and the top, not just the carcass. Those parts change the total cost more than most people expect.
Measure the room before you measure the lumber
I start here because every other choice depends on fit. In most U.S. bathrooms, a single vanity usually lands between 24 and 48 inches wide, a double vanity often starts around 60 inches, and depth commonly sits near 21 to 22 inches. Height is usually 30 to 36 inches, with comfort-height builds near 36 inches, but a vessel sink can push the finished surface higher than you expect.| Width | Best use | What it means in practice |
|---|---|---|
| 24 to 30 inches | Powder rooms and very tight baths | Single sink, minimal drawer space, but easier to keep the room open |
| 36 inches | Standard single-sink bathroom | A balanced size that gives you usable storage without crowding the room |
| 48 inches | Medium bathrooms | More counter space and a better shot at real drawers instead of just a door |
| 60 inches | Primary bathrooms with two users | Common starting point for a double sink, but only if the room can support it |
| 72 inches | Large primary baths | Generous storage and better personal space, but it can overwhelm a narrow room |
I also leave at least about 30 inches of clear standing space in front when possible, because a cabinet that fits on paper can still feel cramped in use. If the vanity has to work for seated access, I would build around open knee space rather than a closed base, with roughly 30 inches of width, 17 to 25 inches of depth, and 27 inches of clear height under the sink. Once those numbers are locked in, the next question is what the inside of the vanity should do for you.
Design the storage around what you reach for every day
Most bad vanity layouts fail because they treat storage as an afterthought. I usually think in three zones: small daily items, bulky backup items, and plumbing space. If you design those zones early, the cabinet feels organized from day one instead of becoming a catch-all box under a sink.
| Storage layout | Best for | Main tradeoff |
|---|---|---|
| Full drawers | Toothpaste, skincare, hair tools, and small containers you want to see at a glance | More hardware and more careful planning around the drain and supply lines |
| Doors with one shelf | Budget builds and awkward plumbing layouts | Cheaper to build, but the inside can turn messy fast |
| Open shelf | Towels, baskets, and a lighter visual feel | Looks airy, but clutter and dust show immediately |
| Pull-out organizer | Cleaning products and tall bottles | Excellent access, but it consumes width and takes more time to build |
| Floating vanity | Small rooms that need floor visibility or a modern look | The wall must be properly blocked, or the cabinet will not be secure enough |
My own rule is simple: drawers deserve the best real estate, and plumbing gets the least visible real estate. If I cannot avoid a center sink area, I use the side sections for drawers and keep the middle section serviceable with a false front or removable panel. After that, material choice becomes the make-or-break detail in a wet room.
Pick materials that survive bathroom humidity
Bathroom air is hard on wood. Steam, drips, floor moisture, and repeated cleaning all expose weak materials quickly. For that reason, I usually favor cabinet-grade plywood for the box, solid wood or high-quality plywood for visible fronts, and a finish system that seals every edge, not just the faces you can see.
| Material | Why I use it | Watch out for |
|---|---|---|
| Cabinet-grade plywood | Stable, strong, and a good default for the carcass, shelves, and side panels | Seal cut edges and any exposed plywood layers so moisture cannot wick in |
| Solid hardwood | Excellent for doors, drawer fronts, legs, and trim where durability matters | Moves with humidity, so it needs careful joinery and a bit more patience |
| MDF | Smooth for painted builds and easy to machine | Edge swelling is the problem; once water gets in, it can fail fast |
| Melamine or laminate panels | Easy to clean and useful for utility-focused storage | Edges and screw holding need extra care, so the build has to be precise |
If I were budgeting a new vanity from scratch in the U.S., I would expect a basic plywood-and-pine build to land around $150 to $400 in materials, a mid-range version with better fronts and hardware to land around $400 to $900, and a premium build with hardwood and a nicer top to move past $900 quickly. Tool purchases can add a few hundred dollars more if you are starting from zero. With the board selection settled, the cabinet itself can go together in a straightforward sequence.
Build the carcass and doors in the right order
For a cabinet this size, I like to build in the cleanest sequence possible: cut, dry fit, assemble, then refine. Pocket-hole joinery is popular because it is fast and plenty strong for many vanity builds, but it is not the only valid approach. Screws, glue, cleats, and dados can all work if the cabinet stays square and the load paths make sense.
- Cut every part first and label it. That prevents small mistakes from multiplying when the project is half assembled.
- Dry fit the cabinet box or frame before any glue goes on. If the diagonals do not match, square it up now, not after the finish is on.
- Keep the back open or partially open until you are sure the plumbing path works. A solid back too early can turn a simple install into a headache.
- Add the toe-kick, shelf supports, and face frame after the main structure is true. A toe-kick, the recessed base that gives your feet room, makes the vanity easier to use and visually lighter.
- Build drawers and doors off the cabinet, then test their fit before finishing. That saves you from sanding and repainting a part that later needs to be trimmed again.
- If the vanity is floating, install proper wall blocking first. Drywall anchors are not enough once the cabinet is loaded with stone, sink, and storage.
I also like to leave room for a service opening or removable back panel if the trap will be hidden behind the cabinet. A vanity that looks perfect but cannot be serviced is not finished in a practical sense. Once the box is square, installation details decide whether it feels built-in or improvised.
Install, seal, and anchor it like it has to last
The finishing stage is where a decent build becomes a durable one. I would seal every exposed surface, including underside edges and any cut plywood, before the cabinet ever sees water. If you paint, choose a durable cabinet enamel and let it cure fully. If you stain, use a moisture-resistant clear coat and do not skip the end grain.
- Prime or seal all sides, not just the visible faces.
- Level the cabinet with shims before fastening it to the wall.
- Anchor into studs wherever possible, especially for wider or heavier units.
- Dry-fit the top and sink before final adhesive or silicone goes on.
- Check that doors, drawers, and the trap all clear each other before the final caulk line.
- Test for leaks while the front is still easy to reach.
I am also cautious with countertop cutouts. The sink opening is one of the most vulnerable spots in the whole project, so I seal the raw edge well and make sure water cannot sit there unnoticed. After the cabinet is installed, a neat caulk joint at the wall and a clean leak test matter more than decorative details. Those safeguards reduce failures, but the biggest headaches still come from a few avoidable mistakes.
The mistakes I would watch for on every vanity build
Most vanity problems are boring, which is exactly why they show up so often. They are not dramatic design failures. They are measurement misses, service oversights, and moisture mistakes that only become obvious after the cabinet is already in the room.
- Measuring the cabinet without accounting for the finished top. The countertop overhang can steal the clearance you thought you had.
- Making the vanity too deep. An extra inch or two sounds harmless until the bathroom starts to feel tight.
- Using MDF where floor moisture or splash water will hit raw edges. It paints well, but it does not forgive water damage.
- Ignoring the plumbing path. Drawers and shelves are only useful if the drain and shutoffs do not block them.
- Skipping a service plan behind a solid back panel. If a leak develops, you want access without demolition.
- Underestimating the finish time. Sanding, priming, and curing take longer than most first-time builders expect.
Most of these errors are easy to prevent if you slow down before the first cut and mock up the footprint on the floor with painter's tape. That quick check tells you more than a rough sketch ever will. If you keep those traps in mind, the final walk-through becomes quick and deliberate.
The final checks that keep it useful after the novelty wears off
Before I call a vanity finished, I check the parts that daily life will punish first. Doors and drawers need to open fully without rubbing the wall, the sink must drain cleanly without stress on the trap, and the cabinet needs enough access that future plumbing work will not require a full teardown. I also keep a small labeled container with leftover finish, touch-up paint, or stain, because the first nick or water spot usually arrives sooner than you expect.
- Open every door and drawer all the way.
- Run water and watch the plumbing for a few minutes.
- Check the seam between the cabinet, wall, and top for gaps that need caulk.
- Save the sink template, hardware notes, and leftover finish in one place.
If those checks pass, the vanity is not just attractive, it is practical, serviceable, and built for real bathroom use. That is the difference between a weekend cabinet and storage that earns its place in the room.