
Learning how to cut glass is mostly about control: choosing the right sheet, scoring it once with the right cutter, snapping it cleanly, and finishing the edge so it is safe to handle. That matters in cabinet work and shop storage as much as it does in windows, because a glass shelf, display insert, or replacement pane has to fit without chips, cracks, or wasted material. I focus here on the method I trust for straight cuts, the tools that make the difference, and the points where a DIY approach stops being worth the risk.
The safest cuts start with the right glass and a clean score
- Use annealed flat glass for DIY cuts; tempered glass is not a hand-cut job.
- A basic glass cutter, straightedge, cutting oil, running pliers, and eye protection cover most small projects.
- Score once with steady pressure; do not saw back and forth over the line.
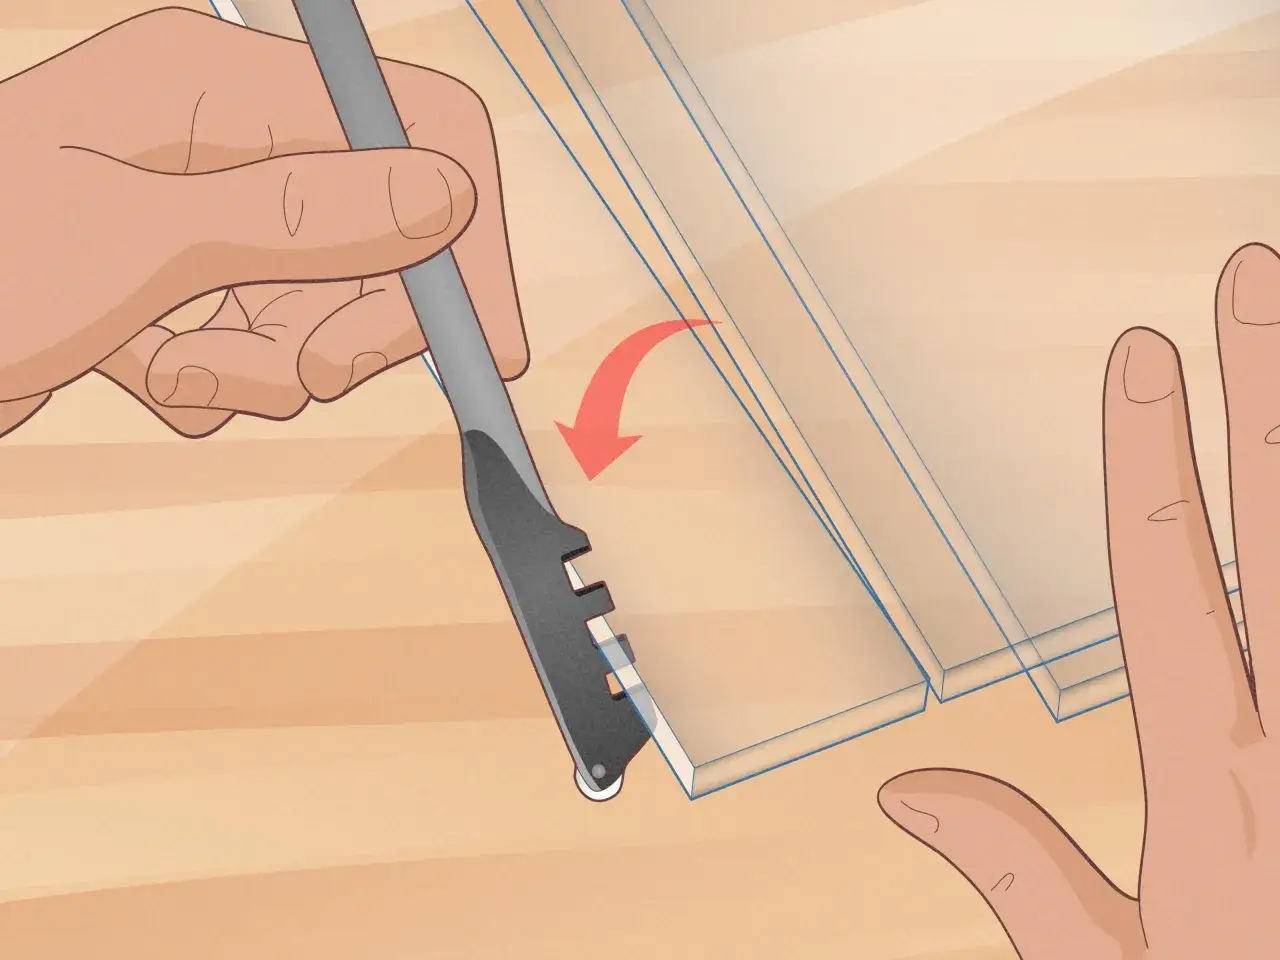
- Support the sheet flat while cutting, then snap along the score with a controlled motion.
- Finish the edge lightly and store cut pieces vertically, separated and labeled.
The tools and glass types that actually work
For most home projects, I keep the setup simple. A solid cutter, a straightedge, and a way to break the score cleanly matter far more than a drawer full of gadgets, and the glass itself matters even more than the tool in your hand.
| Tool or material | What I use it for | What to look for |
|---|---|---|
| Glass cutter | Scoring straight lines in annealed glass | An oil-fed wheel is easiest to control; many hand cutters are comfortable on 1/8 to 1/4 in. plate glass. |
| Straightedge | Keeping the score true | Something rigid, clean, and non-slip; I prefer one with a backing that will not creep. |
| Running pliers | Snapping the sheet along the score | Useful for long cuts and narrow strips where hand pressure is less predictable. |
| Cutting oil | Helping the wheel glide and score evenly | A light, even film is enough; the goal is consistency, not saturation. |
| Safety glasses, gloves, and closed-toe shoes | Protecting eyes, hands, and feet from chips | Use them even on small cuts; the dangerous part is usually the tiny shard you do not see. |
| Edge stone or diamond pad | Knocking down sharp burrs | Good for cleanup, not for reshaping a bad cut. |
On the material side, I only trust the score-and-snap method on annealed glass. Mirror can usually be cut the same way if you score the glass side, not the backing. Laminated glass, insulated units, and any piece that is already cracked are a different conversation, and tempered glass is the clear stop sign.
That distinction matters because the problem is often not the cut itself, but the way the break travels once the score starts to run. From there, the quality of your workspace decides whether the line behaves or wanders.
Set up the workspace like a cabinetmaker would
I want the sheet flat, clean, and fully supported. A plywood top, a clean bench, or a cutting table covered with cardboard or a thin pad works well; I avoid rough concrete and anything that rocks, because a tiny bump can send the break off line. I also keep eye protection, gloves, and closed-toe shoes on from the first score to the final cleanup.
- Wipe both sides of the glass so grit does not drag the cutter off course.
- Mark the cut clearly on the glass side, especially on mirrors and coated pieces.
- Keep the line away from dust, clamps, and sawdust.
- Leave enough room around the sheet so the waste side can release without hitting a wall or tool tray.
- Have a shard container nearby before you make the first score.
In shop work, I treat glass the way I treat a finish-grade board: if the surface is dirty or unsupported, I do not expect a clean result. That habit saves time later, because the cleanest score in the world still fails if the setup is sloppy.
Score the line once and break it with control
This is the part most beginners overcomplicate. The score is not a saw cut; it is a controlled weakness that tells the glass where to separate. If you press too hard, you crush the edge. If you press too lightly, the line never runs evenly.
- Measure twice and mark the cut line clearly.
- Place the straightedge exactly where the cut should go and keep it from shifting.
- Lightly oil the wheel if your cutter is designed for it.
- Hold the cutter upright and pull it in one continuous motion from one edge to the other.
- Listen for a steady, fine crackle; that is usually a better sign than a deep scratch.
- Move the score to the edge of the bench or use running pliers, then snap in one clean motion.
I do not re-score the same line. If the first pass is weak or the line drifts, I start over on a new blank. Repeated passes tend to create a jagged fracture instead of a predictable one, and that is how a two-minute job becomes a replacement order.
For straight cuts
Use the straightedge and keep your body movement smooth. The wheel should stay in contact without wobbling, and your hand should not speed up near the end of the stroke. I like a single, steady pull more than a hesitant one with extra pressure at the tail.
For narrow strips
Narrow waste strips are where glass gets stubborn. Support both sides of the score, snap with pliers if the strip is small, and expect more breakage if the remaining piece is very slim. If the cut leaves almost no margin, I stop and rethink the layout rather than forcing the strip.
Read Also: DIY Floating Shelves - Build Strong, Sag-Proof Shelves
For curves and circles
Curves are less forgiving and usually belong in a glass shop unless the piece is small and replaceable. For most DIY work, I would rather redesign the opening than chase a hand-cut curve that can split the whole sheet. If the shape must be exact, a shop cut or a different material is usually cheaper than a failed sheet.
Know when the safer answer is not to cut at all
Some glass is simple; some glass is engineered to resist exactly this kind of work. I sort those projects quickly, because the cost of guessing wrong is higher than the cost of replacement.
| Type of glass | DIY cut? | Why |
|---|---|---|
| Annealed flat glass | Usually yes | It scores and snaps predictably when the sheet is in good condition. |
| Mirror | Usually yes | The cut is the same basic method, but the backing must stay protected. |
| Laminated glass | Usually no | The interlayer makes a clean hand break difficult and messy. |
| Tempered glass | No | It must be cut before tempering or replaced as a finished piece. |
| Insulated glass units | Usually no | They are sealed assemblies, so the cut is rarely practical or economical. |
I also stop when the piece has chips, edge damage, or old cracks near the cut line. Those flaws can redirect the break in a way that no amount of careful scoring will fix. For shower doors, automotive glass, and other safety-critical panels, I treat a pro cut or a replacement part as the smart move, not the expensive one.
If the job is decorative, structural, or tied to a door, window, or cabinet that must fit perfectly, I would rather pay for precision than waste an afternoon forcing a risky cut.
The mistakes that turn one sheet into two problems
Most bad cuts come from a short list of habits, and they are all avoidable. I watch for these first because they explain most failures better than bad luck does.
- Scoring twice and weakening the line unevenly.
- Using too much pressure and crushing the wheel into the glass.
- Cutting on a dusty or uneven surface.
- Trying to snap the sheet without supporting the score line.
- Ignoring edge chips, cracks, or hidden stress in reused glass.
- Leaving sharp edges untreated and then storing the piece loosely with other material.
My practical rule is simple: practice on scrap until your score looks and sounds consistent, then cut the real piece once, clean the edge, and store it upright or in a padded rack so it does not get nicked later. If a cut matters more than the material cost, I let a glass shop handle it, because that is usually the cheapest decision by the time the project is finished.