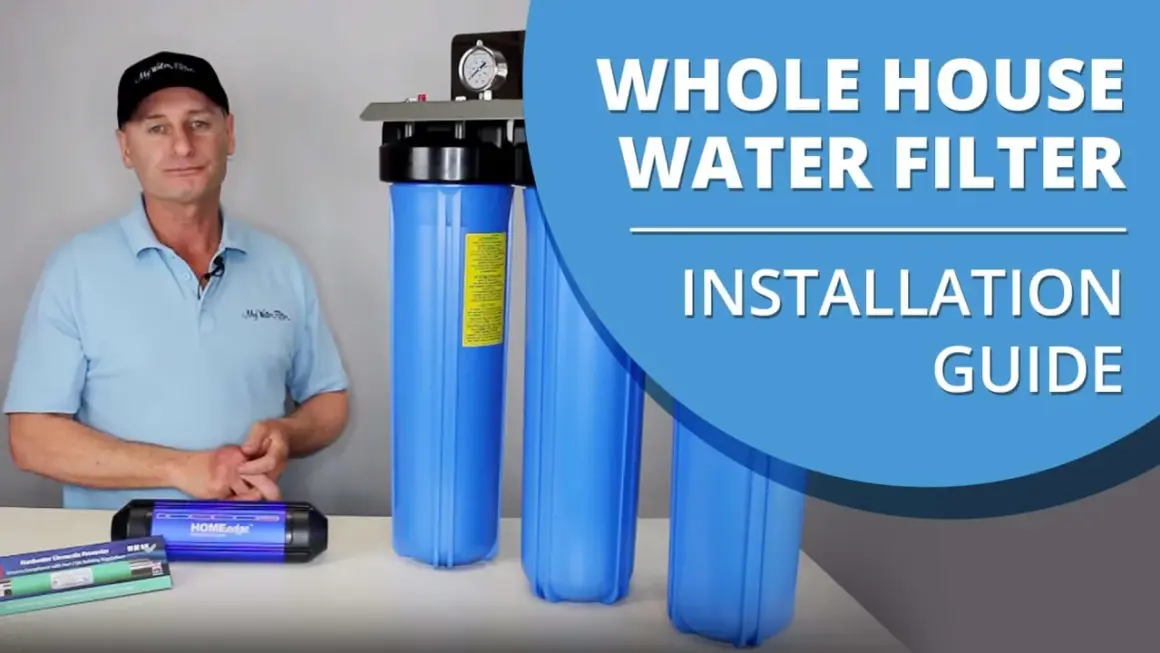
A successful whole house water filter installation starts long before anyone cuts into the main line. The real work is choosing the right treatment stages, placing them where the plumbing can still be serviced, and making sure the system matches the water problem you actually have. In this guide I break down what the system does, how to plan the layout, the install sequence, and the cost and maintenance realities that matter in a U.S. home.
The practical takeaways before you start
- A whole-home system is a point-of-entry setup, so it treats water for every tap, shower, and appliance.
- Test the water first. City water and private wells need different treatment logic.
- Leave room for a bypass valve, shutoff access, and future filter changes.
- Expect a real plumbing project, not a quick add-on, and budget for maintenance after the install.
- If the system removes chlorine or other disinfectants, you need to think about microbial control too.
What a whole-home system is really doing
A point-of-entry system treats water where it enters the building, so every fixture gets the same baseline quality. That matters when the issue is sediment, taste and odor, rust staining, or another problem you want to solve across the house instead of only at one sink. EPA’s WaterSense guide describes whole-house treatment this way, and CDC notes an important caveat: if a whole-home filter removes chlorine or other disinfectants, germs can grow more easily in plumbing.
That is why I treat this as a plumbing decision and a water-quality decision at the same time. If you only want better drinking water at one faucet, a point-of-use filter or reverse osmosis unit may be the smarter move. If you want cleaner shower water, less debris in fixtures, and a single treatment point for the entire home, a whole-home system makes more sense.
The first question I ask is simple: am I solving a house-wide water problem, or just improving one tap? Once that is clear, the rest of the project becomes much easier to design.
Choose the right treatment train before you cut the pipe
I use the phrase treatment train for the order of stages in the system. That order matters. A sediment filter protects the rest of the setup, carbon improves taste and odor, a softener handles hardness, and UV adds a disinfection layer when microbes are a concern. The wrong sequence can waste money, reduce pressure, or leave the real water issue untouched.
| Setup | Best fit | What it does well | Main trade-off |
|---|---|---|---|
| Sediment prefilter + carbon tank | City water with rust, sand, chlorine taste, or odor | Protects fixtures and improves everyday water quality | Does not disinfect water or solve every dissolved contaminant |
| Sediment + catalytic carbon + UV | Private wells with particles plus microbial concern | Handles particles and adds a disinfection layer | More upkeep, electricity, and bulb replacement |
| Filter + softener | Hard water where scale and spotting are the big complaints | Reduces scale while still addressing taste or particles | A softener is not the same thing as a filter |
| Whole-house RO | Special cases with a demanding dissolved-contaminant profile | Broad treatment capability | Expensive, space-hungry, and often more than a typical home needs |
I also care about certification claims. A product should clearly state what it reduces and under what standard or test method, because “whole-home” alone tells you almost nothing. If the system is supposed to reduce lead, VOCs, chlorine, sediment, or another specific contaminant, I want that claim to be explicit and supported.
For city water, I often put sediment after carbon if the manufacturer says that is the right sequence; for wells, I usually want sediment ahead of the rest of the train. The diagram in the manual is not decoration. It is part of the design.
Once the treatment logic is right, the plumbing layout is much easier to plan without regret later.
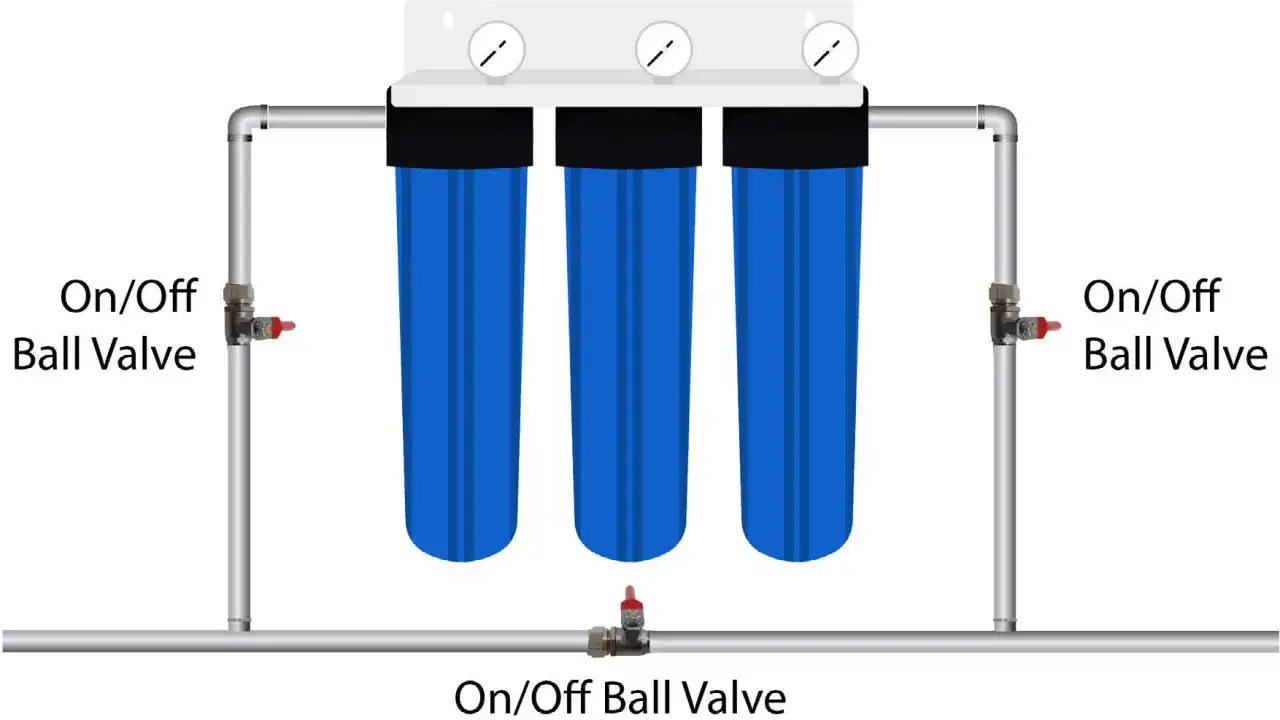
Plan the plumbing layout so servicing stays easy
The best place for the unit is near the main shutoff, on an accessible section of pipe, before the plumbing branches off to the rest of the house. I want enough room to change cartridges or service the tank without contorting around joists, drywall, or another piece of equipment. If the filter is mounted in a cramped corner, every maintenance visit becomes a nuisance, and neglected maintenance is where systems start to fail.
For city water, the filter usually belongs after the meter and any pressure regulator, but before the supply splits to fixtures. For a private well, the exact order depends on the pressure tank and the rest of the treatment train. I do not guess here. I look at the actual plumbing, the equipment manual, and the water report before deciding where the system sits.
These are the details I would not skip:
- Flow direction has to match the IN and OUT ports on the housing.
- A bypass valve should be installed so the house can keep running during filter changes or service.
- Clearance beneath or around the housing has to be enough for a wrench and a full cartridge swap.
- Pipe material matters, because PEX, copper, CPVC, and galvanized pipe each need the right fitting strategy.
- Weight support matters for tank-style systems, especially when the media is full of water.
- Orientation matters too; some housings need to stay vertical with the lid on top.
If I am working with copper, I prefer to build the run cleanly, let soldered joints cool, and then connect the filter rather than cooking the unit with a torch. If the system uses threaded fittings, I use thread sealant or tape where the manufacturer allows it and avoid over-tightening. Good layout work is what keeps the filter from becoming the weakest part of the plumbing.
With the location and parts sorted, the actual install is straightforward if you respect the sequence.
The installation sequence I would follow
The job is easier when I treat it as a controlled plumbing change instead of a race. I start by shutting off the main water supply and opening a downstream faucet to relieve pressure. Then I dry-fit every part before I make the first permanent connection, because once the pipe is cut, the margin for sloppy measuring disappears fast.
- Shut off the water and open a faucet downstream of the planned filter location to release pressure.
- Mark the cut section carefully and confirm the unit will fit with room for the housing, bypass, and future service.
- Cut the pipe, clean the ends, and deburr copper or prepare the line for the correct adapter.
- Mount the bracket or set the tank level, then align the inlet and outlet exactly as the unit requires.
- Install the bypass and any shutoff valves, keeping the assembly accessible.
- Connect the line, tighten fittings to spec, and make sure the system is not under stress from misaligned pipe.
- Restore water slowly, then inspect every joint for leaks.
- Flush or soak the system exactly as the manual says before putting it into full service.
That last step is not optional. Some carbon systems release black carbon fines at first, and the first water through the tank may look cloudy or discolored until it clears. I also like to keep the system under observation for the first day after install, because a joint that looks fine at startup can show a slow leak once pressure settles.
On some systems, the first few days also call for lighter water use while the media settles. That is a small inconvenience compared with flushing a tank that was not given time to stabilize. Once the unit is running cleanly, the next decision is whether you should have done this yourself in the first place.
When DIY makes sense and when I would call a plumber
A straightforward installation can take about 4 to 8 hours when the plumbing is easy to reach and the system is simple. Add old pipe, tight access, a bypass loop, a softener, UV, or a permit issue, and the job can turn into a full-day project. That is the line where I stop treating it like a weekend DIY and start treating it like real plumbing work.
| Situation | DIY is reasonable | Call a plumber |
|---|---|---|
| Access | Open basement or utility room with a straight run | Crawl space, masonry wall, or cramped mechanical area |
| Pipe material | PEX or accessible copper with the right fittings | Galvanized, brittle old pipe, or mixed materials that need adaptation |
| System complexity | Single-stage or basic multi-stage filtration | UV, softener integration, whole-home RO, or multiple bypasses |
| Code and permits | No permit or a like-for-like replacement | Local permit questions, backflow concerns, or utility-specific rules |
| Confidence | You already know how to cut, fit, and pressure-test plumbing | This is your first serious water-line project |
I would also bring in a pro if the home has lead concerns, a private well with multiple treatment stages, or any part of the layout that could turn a leak into damage fast. A filter is only as good as the plumbing around it. If the plumbing is improvised, the system will eventually punish that shortcut.
Cost is the other reason people get surprised, so I like to face it head-on before the job starts.
Cost, maintenance, and the trade-offs people miss
For U.S. homes, I would think of a whole-home system as a several-thousand-dollar project once parts and labor are both included. Basic units may be relatively affordable on their own, but a full setup with proper valves, fittings, and labor can land in the low thousands very quickly. Complex layouts, multi-stage treatment, and specialty equipment push that higher.
Maintenance is not a footnote. Sediment cartridges often need attention every 3 to 6 months depending on water quality and usage, while larger carbon tanks and other media systems may run much longer between service intervals. I also budget for replacement seals, housings, bulbs if UV is part of the setup, and the occasional service visit if the system is in a tight or awkward location.The hidden trade-offs are usually these:
- Pressure loss if the system is undersized for the home’s peak demand.
- Microbial risk if chlorine is removed but the plumbing is not maintained well.
- More service points if the system includes several stages instead of one simple housing.
- Waste and space if the setup includes reverse osmosis or another high-demand technology.
I size for peak use, not average use. A filter that feels fine at midnight can feel undersized when two showers, a dishwasher, and laundry run at the same time. The money you save on a smaller unit can disappear in low pressure and annoyance.
Once the install is paid for and running, the real value comes from the habits you build around it.
The small details that make the system worth the effort
After installation, I want a simple routine: label the filter date, keep the bypass accessible, save the model numbers, and note the replacement interval in a calendar where I will actually see it. I also like to test the water again after the system is online, especially if the original problem was sediment, odor, or a contamination concern that needed confirmation.If the home uses a private well, I would test at least annually for the basics and sooner if the water changes in taste, smell, color, or pressure. If the house is on city water, I would still read the annual water quality report and check whether the filter is solving the problem it was bought to solve. A system that looks impressive but does not change the water is just expensive plumbing.
My own rule is simple: buy for the water you actually have, install it where maintenance is easy, and keep the treatment train honest about what it can and cannot do. That approach produces a cleaner house-wide result than chasing the biggest system on the shelf, and it usually costs less over time because the maintenance plan is built in from day one.