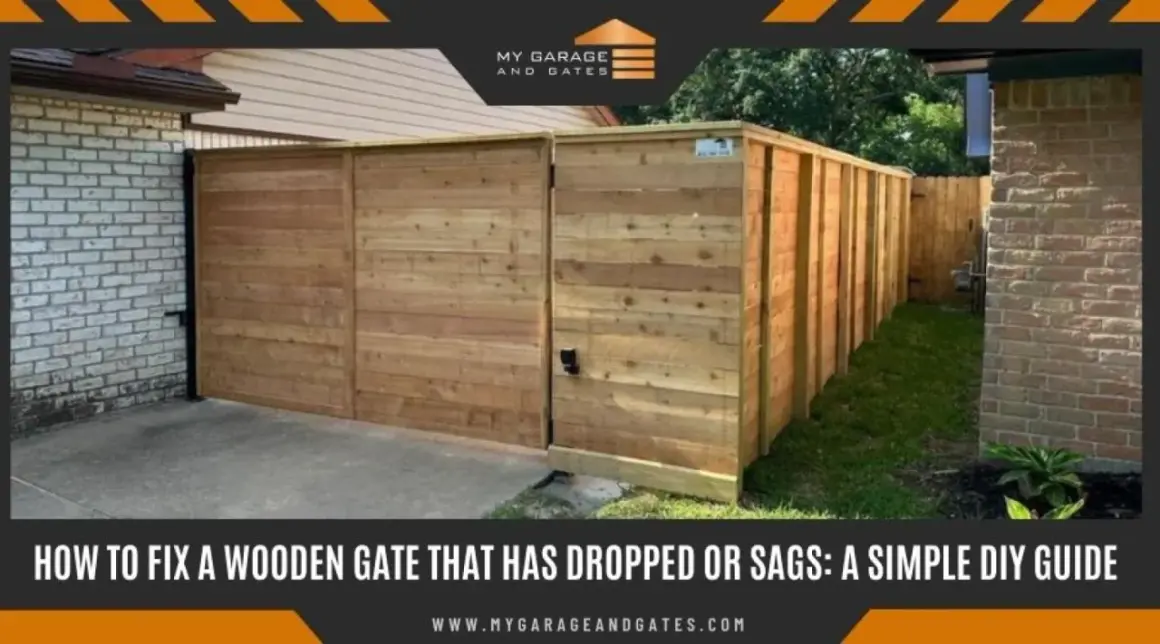
A well-built entry gate does three jobs at once: it closes the opening, fits the landscape, and stays square when wind, rain, and daily use start working on it. The practical question behind how to build a gate is less about fancy carpentry and more about getting the opening, frame, and hardware to work together. That is where most DIY projects succeed or fail.
The gate only works if the opening, frame, and hardware all agree
- Measure the finished opening in three places and plan around the smallest number.
- A 36-inch walk gate is a comfortable baseline; 42 inches feels better for carts, pots, or mulch bags.
- Build the frame on a flat surface and brace it diagonally so it does not rack or sag.
- Set the hinge post in concrete and let it cure before you hang the gate.
- Leave about 2 to 4 inches of bottom clearance on level ground, and a little more if the yard slopes or stays wet.
- For a basic DIY wood gate, I usually budget roughly $125 to $400 in materials, depending on size and hardware quality.
Choose the gate style that fits the opening
I start with use, not appearance. A front walk gate, a side-yard access gate, and a wider landscape entry each ask for a different build, even if they all look like “just a gate” from the sidewalk. For a narrow pedestrian opening, a single swing gate is usually the simplest choice. For a wider span, I often split the opening into two leaves instead of forcing one heavy panel to do too much.
| Gate style | Best for | Why I choose it | Main tradeoff |
|---|---|---|---|
| Single swing gate | Walkways and side entrances up to about 4 feet wide | Simple, affordable, and easy to keep aligned | Needs enough swing room on one side |
| Double gate | Openings wider than about 6 feet | Each leaf is lighter, so sag is easier to control | Needs a center stop, latch, or drop bolt |
| Picket or open-frame gate | Front-yard curb appeal and lighter visual lines | Blends well with landscaping and decorative fencing | Offers less privacy and less wind resistance |
| Privacy-panel gate | Side yards, pet areas, and backyard screening | Matches privacy fencing and blocks sightlines | Catches more wind and needs stronger bracing |
For a typical entry path, I like a 36-inch clear opening because it feels natural to walk through. If the gate needs to handle a mower, trash bins, or yard carts, 42 inches is a more forgiving target. Once I know the style and width, I can measure for the real opening instead of guessing at lumber lengths.
Measure the opening before you buy lumber
This is the part most people want to rush, and it is the part that saves the most frustration later. Measure the opening at the top, middle, and bottom, then build to the smallest usable number so the gate does not bind when the posts settle. I also check the slope of the ground under the swing path, because a gate that clears the opening on day one can drag after the first rain or the first season of frost movement. Lowe's also reminds DIYers to check property lines, HOA rules, and permit needs before setting posts, and that is worth doing before any hole gets dug.
- Measure the clear width between finished posts, not just the rough opening.
- Record the height at both sides if the ground is uneven.
- Decide which way the gate should swing before you mark hinge placement.
- Leave space for hinge barrels, latch hardware, and any stop block.
- Plan for 2 to 4 inches of bottom clearance on level ground, more if snow, mulch, or slope is part of the site.
As a rule of thumb, I plan the gate panel slightly narrower than the opening so the hardware has room to work. A half-inch of side clearance on each side is a common starting point, but I still adjust based on the hinge set and latch I am actually using. That measured opening tells me how much structure the frame needs, and that is where sagging is either prevented or built in from the start.
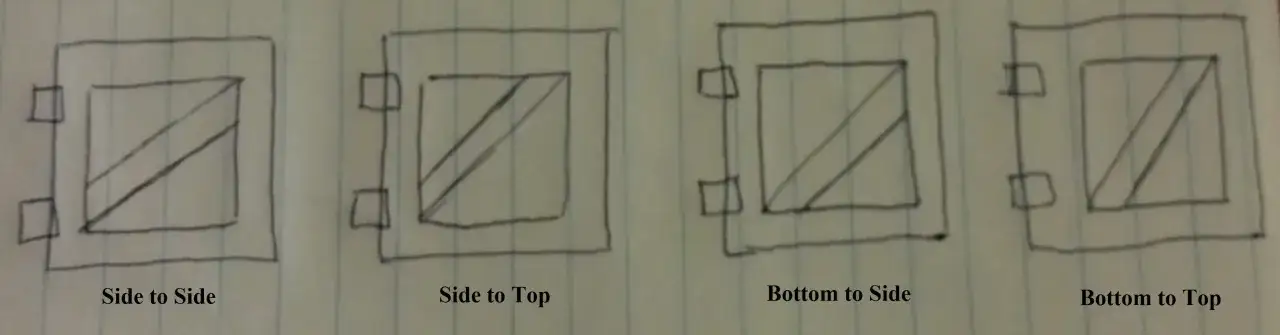
Build a rigid frame that will not sag
I start every wood gate on a flat surface. If the frame is even a little out of square on the floor, it will be noticeably worse when it hangs from the posts. A gate racking into a parallelogram is usually just a frame that was never square enough in the first place.
- Cut the frame members from straight, dry lumber and reject pieces with obvious twist.
- Lay the frame out flat and assemble the rectangle before adding pickets or panels.
- Measure corner to corner until both diagonals match, which confirms the frame is square.
- Add the diagonal brace from the bottom hinge-side corner to the top latch-side corner so the load stays in compression.
- Use exterior-rated screws and pre-drill near the ends so the wood does not split.
If I am building a heavier gate, I prefer a proper diagonal brace plus an anti-sag kit instead of hoping the fasteners will hold the shape by themselves. A turnbuckle or cable system is useful when the gate is already a little out of alignment, but the frame still has to be square before it can be tuned. A solid frame is the cheap part of the job; fixing sag after the fact is where the time and money start to disappear.
Set the posts like they will carry real weight
The hinge post carries the weight of the gate, the pull of the swing, and the stress of every open-close cycle, so I treat it like a structural element, not just a place to screw hardware. For a light pedestrian gate, a pressure-treated 4x4 can work if the soil is stable. For a heavier privacy gate, a 6x6 is usually the better call, especially in windy yards or anywhere the gate spans more than a few feet. A common rule of thumb is to bury roughly one-third of the post length, but in the U.S. I care more about frost line and soil conditions than a neat ratio.
| Gate size or situation | Hinge post recommendation | What I look for |
|---|---|---|
| Light walk gate, about 36 to 48 inches wide | 4x4 pressure-treated post | Stable soil, quality hinges, and modest panel weight |
| Heavier wood gate, about 4 to 6 feet wide | 6x6 post | Better resistance to wind and seasonal movement |
| Wide, tall, or highly exposed opening | 6x6 or steel post | Extra stiffness and better long-term alignment |
I usually dig below local frost depth when I can, add a few inches of gravel at the bottom for drainage, and keep the concrete slightly below grade so water does not sit against the post. Then I brace the post, check it for plumb, and let it cure before hanging anything on it. For a typical gate, that often means waiting at least 24 hours, and 48 hours is safer when the post is carrying serious weight. Once the posts are solid, hanging the gate becomes alignment work instead of guesswork.
Hang the gate and tune the hardware
This is where a lot of otherwise good gates go wrong, because the hardware gets treated like an afterthought. I do the opposite: I choose the hinges and latch first, then I hang the gate around those parts. Home Depot's gate hardware spans roughly $10 to $700, and that spread is a good reminder that hinge quality and latch design can make the difference between a gate that stays smooth and one that drifts out of alignment every season.
- Set the gate on blocks first so the bottom clearance is already correct.
- Mount the top hinge, then the lower hinge, and add a third hinge if the gate is tall or heavy.
- Use shims to keep the side gaps even while you fasten the hardware.
- Choose the latch for the job: a basic gravity latch for casual access, a lockable latch for security, or self-closing hardware if kids or pets are part of the picture.
- On double gates, add a cane bolt or drop rod to hold the inactive leaf.
I also pre-drill every screw hole, because gate hardware sees vibration and shear that ordinary trim work never does. If the gate rubs after the first test swing, I check the post, the hinge spacing, and the square of the frame before I trim wood off the bottom. In my experience, that order prevents more mistakes than any single “quick fix” ever does.
Finish it for weather, not just looks
Wood moves, and outdoor hardware does not care how nice the stain looked on day one. That is why I finish a gate with weather in mind, not just curb appeal. I seal cut ends, coat both faces, and make sure every fastener is exterior-rated so the first wet season does not undo the build. If the gate sits near sprinklers, mulch, or a planting bed, I pay extra attention to the bottom edge because constant moisture is what shortens the life of a good gate.
- Seal or paint all exposed cut ends before hanging the gate.
- Use galvanized, stainless, or coated hardware for outdoor durability.
- Lubricate hinges twice a year, especially before wet or freezing weather.
- Tighten fasteners after the first few weeks, then again after the first full season.
- Keep latch areas clear of mulch, gravel, and soil buildup.
If I want the gate to age well, I think in seasons, not weekends. Sun, rain, freeze-thaw cycles, and soil movement will all test the build, so the best finish is the one that makes maintenance easy instead of dramatic. That leads straight to the last thing I check before I call the project done.
What I check before I call the gate done
Before I move on, I open and close the gate several times and watch for three things: consistent clearance, smooth latch engagement, and a frame that still looks square from a few steps back. I also make sure the gate does not hit edging, irrigation heads, or uneven mulch when it swings. If the site is sloped, I would rather adjust the post and hinge setup than force the bottom rail to follow the grade in a way that looks crooked.
- The latch catches without lifting the gate leaf.
- The bottom clearance stays consistent through the full swing.
- The hinges do not creak, bind, or shift under load.
- The gate looks balanced from the street, not just from the work side.
- The first rain or heavy dew does not create rubbing at the latch or ground line.
If the gate is unusually wide or heavy, I sometimes add a support wheel, but only after the post, frame, and brace are already right. That is the real test of a good entry gate: it feels simple every time you use it, because the structure underneath has already done the hard work.