The main things to get right before the first plank
- The floor below the vinyl matters more than the flooring itself; flat, clean, and dry wins every time.
- Click-lock, glue-down, peel-and-stick, and sheet vinyl all install differently, so the method has to match the product.
- I leave a perimeter expansion gap unless the manufacturer says otherwise, because vinyl needs room to move.
- Many products want the subfloor flat within roughly 3/16 inch over 10 feet, but the exact tolerance depends on the brand.
- Buying about 10% extra material is a smart baseline, and more is wise when the room has lots of cuts or angles.
- Most problems show up at the edges, doorways, or seams, not in the middle of the room.
Choose the right vinyl type before you cut
The first decision I make is not color or pattern. It is the installation method. Vinyl flooring is a broad category, and the process changes a lot depending on whether you are working with click-lock planks, glue-down tile, peel-and-stick squares, or sheet vinyl.
| Type | Best for | Strength | Main limitation |
|---|---|---|---|
| Floating click-lock planks or tiles | Most DIY rooms, especially living rooms, bedrooms, and hallways | Fast installation, no adhesive, easy to replace a damaged piece | Needs a very flat subfloor and proper expansion space |
| Glue-down LVT or LVP | Busy rooms, commercial spaces, and areas with complex layouts | Low profile, stable feel, strong bond when installed correctly | Adhesive timing and trowel work matter a lot |
| Peel-and-stick tile | Small, smooth, dry rooms with limited traffic | Simple tools and quick placement | Very sensitive to dust, texture, and moisture |
| Sheet vinyl | Kitchens, baths, and larger spaces where fewer seams are better | Good water resistance and a clean, continuous look | Templating and cutting need patience and accuracy |
I also pay attention to what the manufacturer says about underlayment, radiant heat, and moisture limits. Some products come with attached padding, some need a separate underlayment, and some are designed to go straight over the subfloor with no extra layer at all. If you choose the wrong method for the product, the rest of the job becomes harder than it needs to be. That is why I decide the system first, then build the prep around it.
Prepare the room and subfloor like the floor depends on it
This is the part most people rush, and it is the part I refuse to rush. A vinyl floor can only look as good as the surface below it. If the subfloor moves, dips, or holds moisture, the finished floor will show it. If there is one rule I trust, it is that prep pays off twice: once during installation and again every day after.
My prep sequence is simple:
- Clear the room and remove anything that blocks the floor surface, including baseboards if I plan to reuse them.
- Take out nails, screws, staples, debris, old adhesive ridges, and loose paint.
- Sweep and vacuum carefully, especially along walls and doorways where grit hides.
- Check flatness with a long straightedge or level and mark high and low spots.
- Patch low areas and grind or scrape high spots until the floor is within the product’s tolerance.
- Confirm that the surface is dry and suitable for the specific vinyl product and adhesive, if any.
On concrete, moisture is not optional to check. On wood, I look for loose boards, bounce, rot, and fasteners that need resetting. If a subfloor flexes, the finished floor can click, gap, or wear out at the seams. I also think about temperature: many vinyl products want the room held around typical indoor comfort ranges, often about 65 to 85°F, before and during installation. When a product calls for acclimation, I usually leave the cartons in the room for about 48 hours so the material can settle into the space. Next comes layout, and that is where the whole room starts to make visual sense.
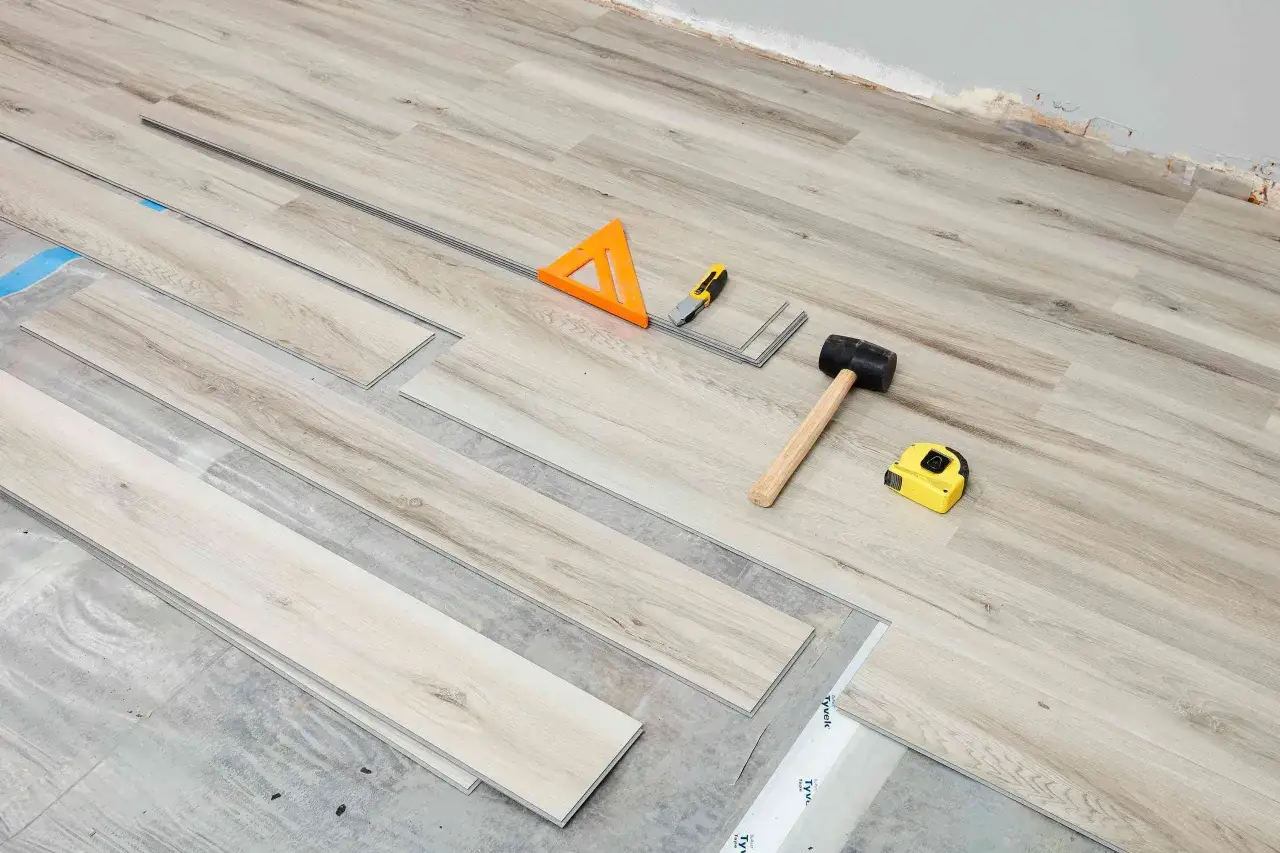
Lay out the room before you lock anything in
A straight layout is the difference between a floor that looks deliberate and one that feels slightly off from the first step. I always measure the room, check for square, and plan where the last row will land before I cut anything. The goal is simple: avoid tiny slivers at the wall and avoid a starter row that drifts out of alignment.
Here is the layout approach I use most often:
- Find the longest, straightest wall and use it as a reference, not as a guarantee that it is actually square.
- Measure the room width so I know whether I need to trim the first row to balance the last row.
- Dry-fit a few pieces to see how the seams fall and whether the pattern looks natural.
- Check doorways, hallways, and transitions early, because those spots control the visual line of the whole room.
- Plan the stagger so end joints do not line up from row to row.
I am always trying to avoid a last row that is too narrow to be stable or attractive. If the cut at the wall would become a thin strip, I adjust the starting row instead. That one choice prevents a lot of frustration later. Once the layout is right, the actual installation becomes much less stressful.
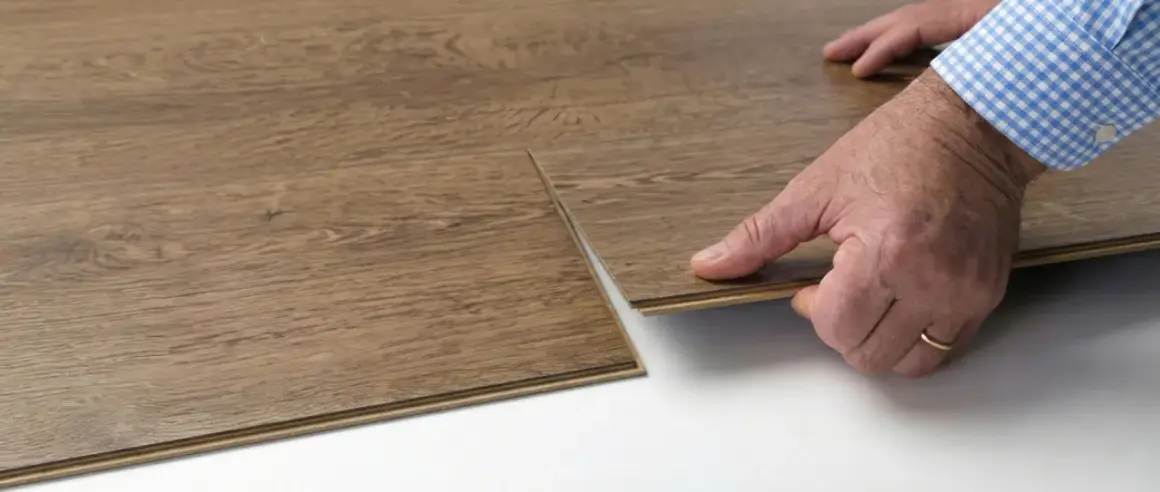
Install floating planks without forcing the joints
Floating click-lock floors are popular for a reason: when the subfloor is ready, the process is clean and efficient. But the system only works if the joints are fully seated and the floor can move as a unit. I do not force pieces together. I guide them together, check each connection, and stop if something feels wrong.
Start with the first row
I start in a left-hand corner or along my reference wall, with the trimmed side facing the wall if the product calls for it. Spacers hold the perimeter gap open while I work. That gap is not a mistake. It gives the floor room to expand and contract with the house.
Stagger the joints as you go
End joints should be offset from row to row so the floor does not look like a ladder. I usually keep a healthy random stagger and avoid tiny end pieces that are hard to lock and easier to break. If a joint resists, I check the angle, the edge, and the debris before I tap anything. A tapping block and pull bar are useful here; a hammer alone usually causes more damage than progress.
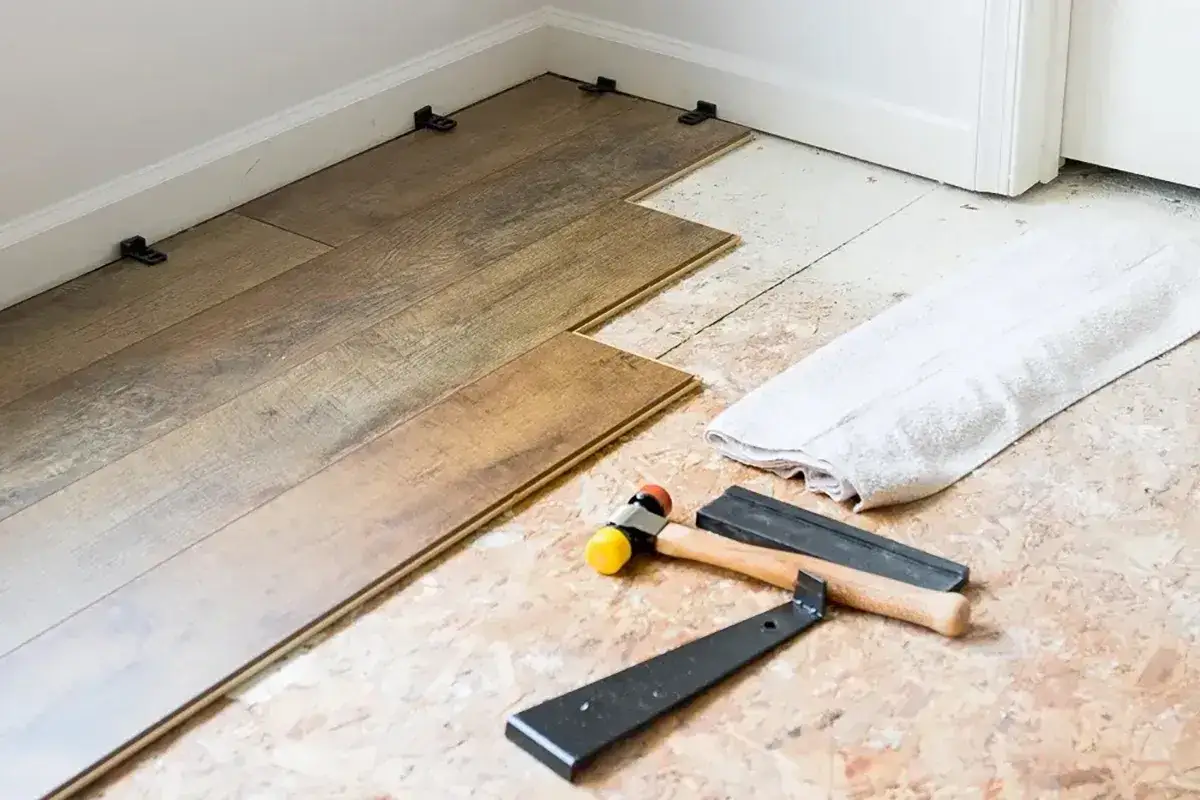
Cut around doorways and obstacles cleanly
Door casings, vents, and pipes are where a careful install starts to separate itself from a rushed one. I undercut door trim when needed so the flooring can slide underneath, and I mark each cut before I make it. A clean notch around an obstacle is better than a broad sloppy cut hidden by caulk. If the product calls for a specific expansion gap, I honor that measurement around every fixed object, not just along the walls.
Once the floating field is in place, I move straight to the finishing details, because that is where the room gets its final shape.
Handle glue-down, peel-and-stick, and sheet vinyl differently
Not every vinyl floor uses the same method, and I do not treat them as if they do. A glue-down floor depends on adhesive coverage, a peel-and-stick floor depends on clean contact, and sheet vinyl depends on accurate templating. The material may be similar, but the mechanics are not.
Glue-down floors need controlled adhesive work
For glue-down LVT or LVP, I spread the adhesive with the correct trowel notch, stay within the adhesive’s open time, and roll the floor as required. Full-spread adhesive means the glue covers the entire substrate, not just the perimeter. That matters because gaps in coverage can create hollow spots, edge lift, or movement under traffic. I also avoid heavy use until the adhesive has cured enough to handle it.
Peel-and-stick tiles demand a clean surface
Peel-and-stick sounds simple, and it is simple only if the floor is very smooth and very clean. Dust, texture, and moisture can all weaken the bond. I press each piece firmly, keep the layout tight, and work methodically so I do not trap dirt under a tile. This is the method I am most cautious with in busy or damp spaces, because small prep mistakes show up fast.
Read Also: Drop and Lock Flooring - Avoid Gaps & Squeaks!
Sheet vinyl rewards patience more than speed
Sheet vinyl is less forgiving than many people expect. I template carefully, dry-fit when needed, and make sure the sheet lies flat before I commit to adhesive or tape. Seams have to be cut accurately, and edges must land where they can be secured properly. When sheet vinyl is done well, the room looks seamless. When it is rushed, every cut shows.
From there, the final stage is less about flooring science and more about restraint. I want the trim and transitions to finish the room without pinning the floor in place.
Finish the edges so the room looks built in, not dropped in
Baseboards, shoe molding, thresholds, and transitions do more than hide a cut edge. They make the floor feel finished. I reattach trim to the wall, not to the floor, so the vinyl can move under it when the season changes. If I need to reuse baseboards, I check that they do not clamp the floor too tightly.
My finishing checklist is short but important:
- Replace or rehang baseboards after the floor is complete, leaving the proper movement space underneath.
- Install transition strips where the vinyl meets another flooring material or a change in height.
- Trim door casings and jambs where necessary so the flooring slides under the trim instead of butting awkwardly against it.
- Use caulk only where the product and setting allow it, not as a substitute for proper cutting.
- Make sure doors still swing freely after the new floor and trim are in place.
I like this stage because a room can go from “installed” to “finished” very quickly once the edges are right. The final difference often comes down to a few careful cuts and one last pass of the eye.
The mistakes that cause squeaks, gaps, and edge lift
Most bad vinyl floors do not fail because the product was terrible. They fail because one or two small decisions were wrong at the beginning. I see the same mistakes again and again, and they are all preventable if you slow down long enough to catch them.
| Mistake | What it causes | What I do instead |
|---|---|---|
| Skipping moisture checks on a concrete slab | Adhesive failure, bubbling, or edge lift | Test the slab and follow the flooring maker’s moisture limits |
| Installing over a floor that is not flat enough | Clicking joints, hollow spots, visible telegraphing, and premature wear | Patch low areas, remove high ridges, and verify flatness before starting |
| Forgetting the expansion gap | Buckling or tight edges that stop the floor from moving naturally | Use spacers and keep the perimeter gap open until trim is installed |
| Starting with a crooked first row | Every row drifts out of line as the room progresses | Snap a straight reference line and check the first few rows twice |
| Using the wrong method for the product | Bad bond, loose seams, or warranty trouble | Match the installation method to the exact product instructions |
| Ignoring suspected old flooring materials | Unnecessary health risk during removal or sanding | Stop and verify before disturbing any old floor that might contain asbestos |
The last mistake matters for safety as much as for quality. If an older floor may contain asbestos, I do not sand it, level it, or rip into it casually. I confirm what I am dealing with first. That one decision keeps a renovation from becoming a hazard.
The last checks that keep the floor quiet
Before I call the job finished, I walk the room slowly and look for anything that feels slightly off. I run a hand along the seams, check the trim for tight spots, and open and close the doors. I also listen. A good floor is usually quiet underfoot. If a plank clicks or a seam lifts, I want to catch it before furniture goes back in.
I save a few leftover planks or tiles from the same batch, because repairs are easier when I have matching material on hand. I also keep the install environment stable for a bit after completion if the product calls for it, especially in rooms that see temperature swings. The biggest lesson I trust is simple: the visible finish matters, but the invisible prep is what decides how long the floor stays looking that way.