Vinyl plank flooring looks straightforward until the first board has to fit a wall, a doorway, or a pipe. Knowing how to cut vinyl plank flooring matters because the cut edges are what separate a quick install from a floor that looks professionally finished. In this guide, I cover the cleanest cutting methods, when to use a knife versus a saw, and the small layout choices that keep the room tight, tidy, and durable.
The cleanest vinyl cuts come from matching the tool to the cut
- Short straight cuts are usually easiest with a sharp utility knife and a straightedge.
- Long rip cuts, notches, and curves are better handled with a jigsaw, miter saw, or flooring cutter.
- Leave the product’s required expansion gap at the perimeter, then hide the cut edge under trim whenever possible.
- Measure carefully, mark the waste side clearly, and test on a scrap plank if the material feels unusually rigid.
- Wear eye protection, and use a dust mask or respirator when power cutting.
Choose the right method for the cut in front of you
I treat vinyl plank cuts in two buckets: straight cuts that should look crisp and irregular cuts that should be accurate first and pretty second. That distinction matters, because the best tool changes with the shape of the opening and the thickness of the plank. A flexible plank can often be scored and snapped cleanly, while a rigid-core board usually behaves better with a saw or flooring cutter.
| Cut type | Best tool | Why it works | What to watch |
|---|---|---|---|
| Straight end cut | Utility knife and straightedge | Fast, quiet, and clean on most planks | May need a second pass on thicker rigid-core material |
| Long rip cut | Table saw, miter saw, or flooring cutter | Keeps the cut straight along the plank length | Creates dust and needs solid support |
| Inside corner or notch | Jigsaw plus starter cut | Follows the shape instead of fighting it | Edge quality depends on blade choice and speed |
| Pipe or curved opening | Jigsaw, hole saw, or template | Handles round and irregular shapes accurately | Leave room for movement around the obstacle |
Once I decide which bucket the cut belongs in, everything else becomes more predictable. The next step is making sure the plank is measured and marked in a way that leaves no room for guesswork.
Set up the plank before you make a single cut
Good cutting starts before the blade touches the board. I always dry-fit the row first, because room dimensions are rarely as square as they look. If the wall bows, the doorway flares, or the last row would end up too narrow, it is better to know that before I commit to a cut.
- Measure the space at more than one point, especially on older walls that may not be straight.
- Mark the plank clearly on the waste side so there is no confusion once you start cutting.
- Leave the manufacturer-recommended expansion gap at the perimeter; for many floating vinyl floors, that is often around 1/4 inch, but the product instructions still win.
- Plan for the cut edge to face the wall or sit under trim, where it will be hidden.
- Support the plank on a flat surface so it does not flex while you mark or cut it.
If I am working on a whole room, I also think ahead about the final row before I begin the first one. That keeps me from creating a narrow sliver at the far wall, and it makes the next step, the actual cut, much easier to control.

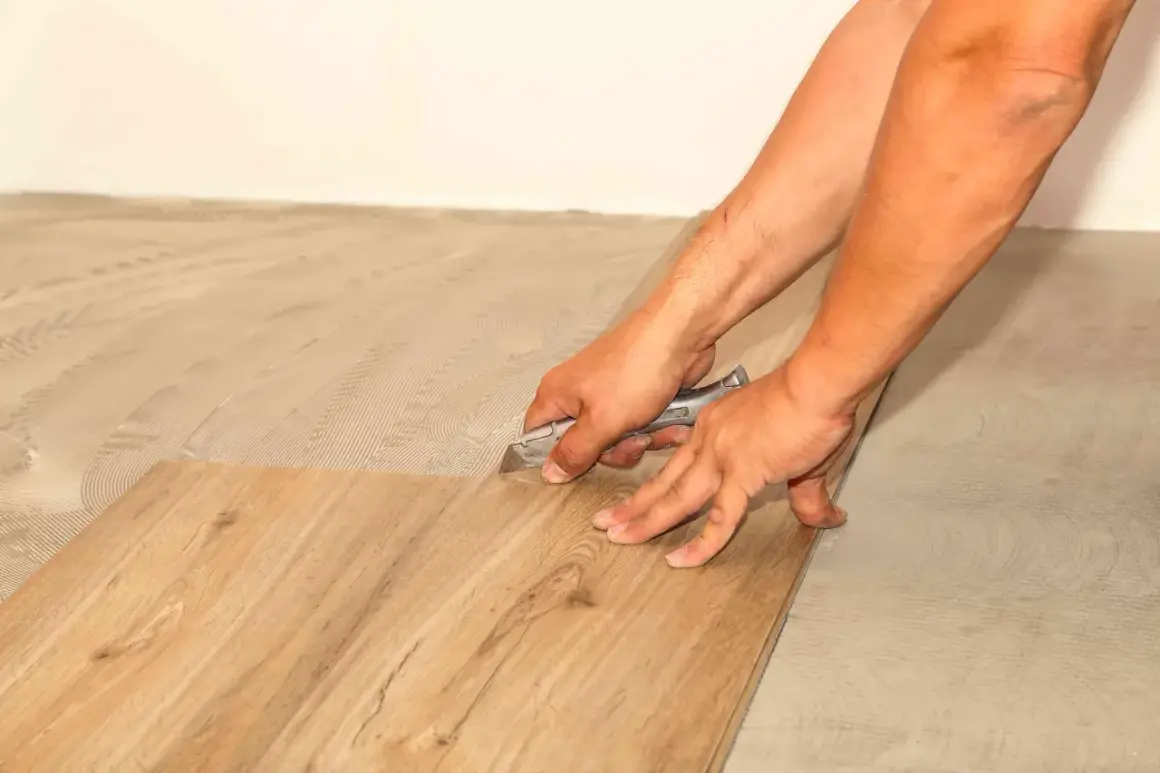
Score and snap the straight cuts cleanly
For most straight cuts, a sharp utility knife is still the simplest solution. The trick is not brute force. I score the plank firmly along a straightedge, then let the board break along that line instead of trying to slice through the whole thickness in one pass. That approach usually gives the cleanest edge with the least mess.
- Use a fresh blade. Vinyl dulls knives faster than many people expect.
- Keep the straightedge steady on the waste side of the line so the visible portion stays untouched.
- Make one strong scoring pass, then a second pass if the cut has not opened enough to snap cleanly.
- Bend the plank away from the score line until it separates, then trim any stubborn fibers or rough spots with the knife.
- For thicker rigid-core boards, work slower and expect the snap to take a little more pressure.
This method is ideal for clean end cuts, but I would not force it into every situation. The moment the shape turns into a rip cut, a notch, or a curve, I switch tools rather than risk a ragged edge.
Use saws where the knife stops being enough
Power tools are not a sign that the job is complicated; they are often the more efficient choice. When I need to cut along the length of a plank, shape a corner, or follow an irregular outline, I reach for a saw because precision matters more than speed. A good blade and a controlled feed make a bigger difference than raw power.
- Jigsaw for notches, vents, and curved cuts. It is the most flexible option, but it produces more dust and usually needs a little edge cleanup.
- Miter saw for repeatable crosscuts. It is useful when several planks need the same length, especially in a room with many identical border pieces.
- Table saw for long rip cuts. It keeps the cut straight along the length of the board and is often the cleanest choice for wide trimming.
- Flooring cutter for fast, quiet straight cuts. It is useful on larger installations, but it cannot replace a saw for awkward shapes.
I keep the workpiece clamped or fully supported, and I cut slowly enough that the blade does the work. If the edge starts melting, chattering, or chipping, the feed rate is usually the problem, not the plank. That becomes especially obvious around doorways and other tight spots, where the next section starts to matter even more.
Handle door jambs, vents, toilets, and other awkward shapes
Most of the visible quality in a vinyl floor comes from the awkward cuts, not the easy ones. Door jambs, floor registers, and plumbing penetrations are where rushed work gets exposed. When possible, I prefer to hide the cut by undercutting trim instead of tracing around it. That usually looks cleaner and gives the plank a more natural finished edge.
- Door jambs: Use a scrap plank as a height guide, undercut the casing, and slide the vinyl under the trim rather than cutting a notch around it.
- Vents and registers: Make a paper or cardboard template first, then transfer the shape to the board before cutting.
- Pipes: Mark the center point carefully, cut a slightly oversized opening, and leave movement space so the plank does not bind.
- Inside corners: Drill a starter hole at the corner radius if needed, then finish the shape with a jigsaw or knife.
Templates save time more often than people think. I use them whenever the shape is irregular enough that a one-shot measurement feels risky, because a ten-minute template is cheaper than replacing a bad plank. Once those tricky areas are handled, the remaining work is mostly about avoiding the mistakes that damage the finish.
Avoid the mistakes that leave rough edges or wasted boards
Most bad cuts come from a handful of predictable errors, and I see the same ones on almost every DIY floor. The good news is that each one has a simple fix once you know what to look for.
- Using a dull blade chips the wear layer and makes the cut look fuzzy. Replace blades early instead of waiting until they fail.
- Cutting too fast can smear the edge or throw the line off. Slow the feed and let the tool work at its own pace.
- Skipping a dry fit leads to boards that are too short or oddly narrow at the wall. Check the fit before cutting the final piece.
- Forgetting the expansion gap can cause the floor to bind later. Follow the flooring manufacturer’s spacing requirements, not just the wall line.
- Letting the plank flex during the cut creates chatter and uneven edges. Support the board fully on both sides of the blade.
- Cutting on the wrong face can damage the visible finish. Mark the waste side clearly before the blade comes out.
I also keep the cleanest offcuts instead of tossing them immediately. They are useful for checking blade settings, testing odd shapes, or replacing a damaged plank later. That small habit makes the last phase of the project feel much more controlled, which is exactly what the floor needs.
The details that make the floor look factory-finished
When I want a vinyl floor to look intentional, I focus on the perimeter: hidden cut edges, consistent spacing, and trim that covers the transition cleanly. Vacuum the dust before locking the rows together, keep one spare plank from the same batch for repairs, and save your straightest offcuts for closets or starter pieces. Those are small details, but they are the ones that keep the floor from looking improvised.
If you remember only one thing, make it this: the best result comes from choosing the right cutting method for each shape instead of forcing every plank through the same process. Sharp tools, careful marking, and a little patience will do more for the final look than any expensive specialty gadget ever will.