Cutting cement board cleanly matters because the wrong method creates dust, ragged edges, and wasted sheets. In tile work, I treat the cut itself as part of the layout: straight runs, narrow rips, plumbing holes, and awkward notches all ask for different tools. Knowing how to cut cement board well saves time on a floor or shower job and keeps the board ready for tile instead of turning the cut line into a repair.
The right method depends on the cut, the board, and the dust you can tolerate
- Straight cuts are usually fastest and cleanest with score-and-snap.
- Power saws make sense when the cut is too narrow, too short, or too irregular for a clean break.
- Hole saws and punch-outs are the better choice for pipes, valves, and other penetrations.
- Dust control matters because silica, not just mess, is the real hazard.
- Floor installs usually need 1/8-inch gaps and a layout plan before the first cut.
Choose the cut before you choose the tool
My first question is never, “What blade do I own?” It is, “What shape am I cutting?” A long straight rip, a small corner notch, and a pipe opening all behave differently, and cement board punishes the wrong approach by chipping, crumbling, or making more dust than necessary.
For tile and flooring work, I sort cuts into five groups: straight cuts, narrow rips, cutouts for fixtures, curves, and holes for pipes or fasteners. That simple separation saves me from overusing a saw when a knife would do, or trying to force a break where a saw is plainly smarter.
| Method | Best for | Dust | Finish | My take |
|---|---|---|---|---|
| Score and snap | Long straight cuts and full sheets | Very low | Clean on supported lines | My default choice for floors and walls |
| Carbide saw with dust collection | Narrow rips and repetitive cuts | Moderate if controlled | Clean when the blade is right | Use it when the board fights back or the cut is too narrow |
| Hole saw or drill-and-punch | Round plumbing and valve openings | Low to moderate | Good with a light rasp | Best for clean penetrations |
| Jigsaw or oscillating tool | Curves and awkward notches | Moderate | Useful, not perfect | Good for detail work, not for long runs |
| Electric shears | Dust-sensitive work and specialty cuts | Very low | Good on many boards | Worth it if you do this often |
That decision tree keeps me from turning a simple tile layout into a dust event. Once the shape is clear, the cutting method becomes much easier to narrow down.
Score and snap is still the best default for straight lines
For most straight cuts, I start with a carbide scoring knife, a straightedge, and a flat place to work. The goal is not to grind through the board; it is to make a deep, continuous score that guides a clean break.
- Measure the cut and mark it clearly on the board.
- Lay a straightedge on the line and score the face firmly.
- Keep the score continuous rather than hopping in short scratches.
- Break the board along the line with even pressure.
- Trim any remaining mesh or fibers from the back side if needed.
- Finish the edge with a wood rasp or sanding block just enough to remove fuzz.
This method is quiet, cheap, and fast, which is why I prefer it on floor sheets and wall panels whenever the line is straight. It also keeps dust almost nonexistent compared with saw work. If the strip gets very narrow, though, I stop trusting the snap and switch tactics instead of forcing a bad break.
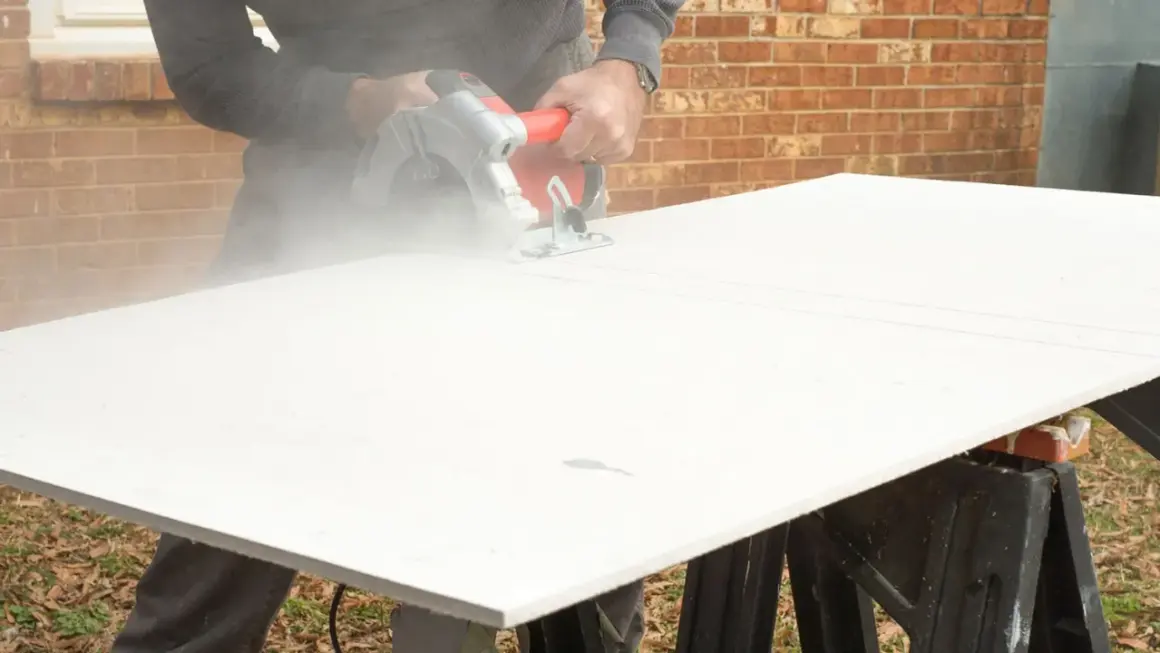
Use a saw only when the job really calls for it
When I do reach for a saw, I want the right saw setup, not just any blade that happens to fit. A low-RPM portable saw with a carbide-tipped fiber-cement blade is the practical option for rips, tight corner work, and repeated cuts that would be annoying to score by hand.
Specialty blades with about 4 to 8 teeth generally cut cleaner than a standard masonry blade, and polycrystalline diamond tips last longer when you have a lot of board to get through. If the saw uses dust collection, I want it connected to a vacuum that actually captures dust at the cut line instead of just moving it around. On a jobsite, that usually means cutting outdoors when possible and keeping the board supported so vibration does not chip the edge.
- Use a saw for narrow strips, production cuts, and boards that resist a clean snap.
- Avoid using a saw indoors unless you have strong dust collection and a setup that keeps the area controlled.
- Choose a blade made for fiber-cement instead of treating a masonry blade as a universal answer.
- Keep the sheet fully supported so the cut does not break out at the last second.
- Reserve shears for situations where low dust matters more than absolute speed.
That is the part many DIYers miss: the saw is not the default solution, it is the backup plan when the geometry of the cut makes hand scoring less reliable. Once the straight-line cuts are sorted, the awkward shapes are the next thing to handle.
Handle pipe holes, notches, and curves separately
Plumbing holes and trim cutouts are where cement board usually stops behaving like drywall. I do not try to force those with one blunt tool. A round hole, a valve opening, and a curved notch each need a slightly different approach.
- For round holes, drill with the correct hole saw size and test-fit before fastening the board.
- For fixture cutouts, score the outline, cut through the mesh on both faces, and punch the waste out from the back side if the board allows it.
- For curves, drill a starter hole and use a jigsaw or oscillating tool to creep toward the line.
- For tight pipe work, leave a little clearance and let the trim or escutcheon cover the edge.
- For rough edges, touch up the opening with a rasp instead of trying to make the power tool perfect.
I prefer a slightly generous hole over one that chips while I am trying to slide the board into place. Around showers, sinks, and toilet flanges, that small bit of clearance makes the install calmer and usually looks better once the tile is in.
Keep dust under control from the first cut
OSHA treats silica dust from fiber-cement cutting as a serious exposure issue, and the current respirable crystalline silica limit is 50 micrograms per cubic meter as an 8-hour average. That is enough reason for me to treat dust control as part of the cutting method, not as an accessory.
- Wear eye protection every time you cut board.
- Use an N95 respirator at minimum when dust is involved.
- Add hearing protection if you use a power saw.
- Cut outdoors whenever you can, especially with a saw or hole saw.
- Use vacuum collection or wet cleanup instead of dry sweeping the dust around.
- Keep the work area clear so the board does not slide while you are cutting.
If I have a choice between a cleaner method and a faster one, I usually take the cleaner method unless the layout forces my hand. That tradeoff is small on paper and very obvious once you are standing in a room covered with cement dust.
Avoid the mistakes that chip edges and waste sheets
Most bad cuts come from a few predictable mistakes, and I see the same ones over and over on tile jobs.
- Measuring only one face and assuming the sheet stayed square the whole way across.
- Scoring too lightly, then forcing a break that shatters the edge.
- Trying to snap very narrow strips instead of cutting them with a saw.
- Using the wrong blade and expecting a clean edge anyway.
- Skipping the rasp and leaving fuzz that keeps the board from sitting flat.
- Cutting before the layout is dry-fit, which usually creates avoidable waste.
- Ignoring floor gaps, especially the 1/8-inch space needed at walls and between panels on many installs.
The one mistake that costs me the most time is rushing the layout. If I cut before I know where the seams, corners, and penetrations belong, I end up trimming the same board twice. That is why I like to finish the plan before I touch the knife or saw.
The cutting sequence I use on bathroom floors and shower walls
On a real flooring or shower project, I work in a fixed order. It keeps the board manageable and prevents me from making the easy cuts after the hard ones have already stressed the sheet.
- Dry-lay the panels and mark seams, walls, cabinets, and fixtures before fastening anything.
- Cut all easy straight pieces first with score-and-snap.
- Save saw work for narrow rips, awkward L-cuts, and the boards that refuse to break cleanly.
- Make pipe holes, valve openings, and other cutouts before the sheet goes on the floor or wall.
- Rasp the edges lightly, vacuum the dust, and check every fit against the layout.
- On floors, keep the seams staggered, avoid letting all four corners meet, and leave the required perimeter gap.
That sequence is not glamorous, but it is reliable. If a board still feels awkward after I have planned it that way, I usually pause and rethink the layout instead of forcing a cut that will only make the tile work harder later. In this kind of job, the cleanest cut is often the one that takes the least convincing.