The wall succeeds or fails on drainage, base prep, and load
- Water is the main enemy because pressure builds fast behind a wall that cannot drain.
- In many U.S. jurisdictions, permits often kick in around 3 to 4 feet of wall height measured from the footing, especially with steep backfill or extra loads.
- For segmental block walls, a 6-inch leveling pad and clean drainage stone are standard starting points.
- Segmental block is usually the most forgiving option for a residential landscape wall, but tall or loaded walls need engineering.
- Build for drainage first, then for appearance. The face is the visible part, not the part that keeps the slope in place.
What the wall has to handle before you pick materials
Before I ever think about block color or stone shape, I look at three forces: soil pressure, water pressure, and anything added on top of the retained soil. A wall that holds a backyard terrace is one thing; a wall that supports a driveway, fence, or steep slope is a different project entirely. The difference matters because the loads change the footing, reinforcement, and permit requirements.
Water deserves the most respect. Colorado State University Extension notes that most retaining wall failures start with water or moisture buildup behind the wall, which is why I treat drainage as part of the structure, not a finishing detail. If the site stays wet, freezes hard, or receives runoff from uphill, the wall needs a more serious drainage plan from day one.
I also check local rules early. In many U.S. cities, walls around 3 to 4 feet high, measured from the footing, can trigger a permit, and steep backfill, driveway loads, or tiered walls can do the same. That is the point where a simple landscape project starts behaving like a small civil structure. Once those loads are clear, the next decision is whether the wall system itself matches the site.
Choose the right wall system for the slope
There is no single best wall material. I choose based on height, soil conditions, drainage needs, and how much maintenance the owner is willing to accept later. The table below is the fastest way to compare the common options I see on residential sites.
| Wall system | Best use | Strengths | Watch out for |
|---|---|---|---|
| Segmental concrete block | Low to mid-height landscape walls, terraces, planters | Modular, clean-looking, easy to level, drainage-friendly | Taller walls often need geogrid or engineering |
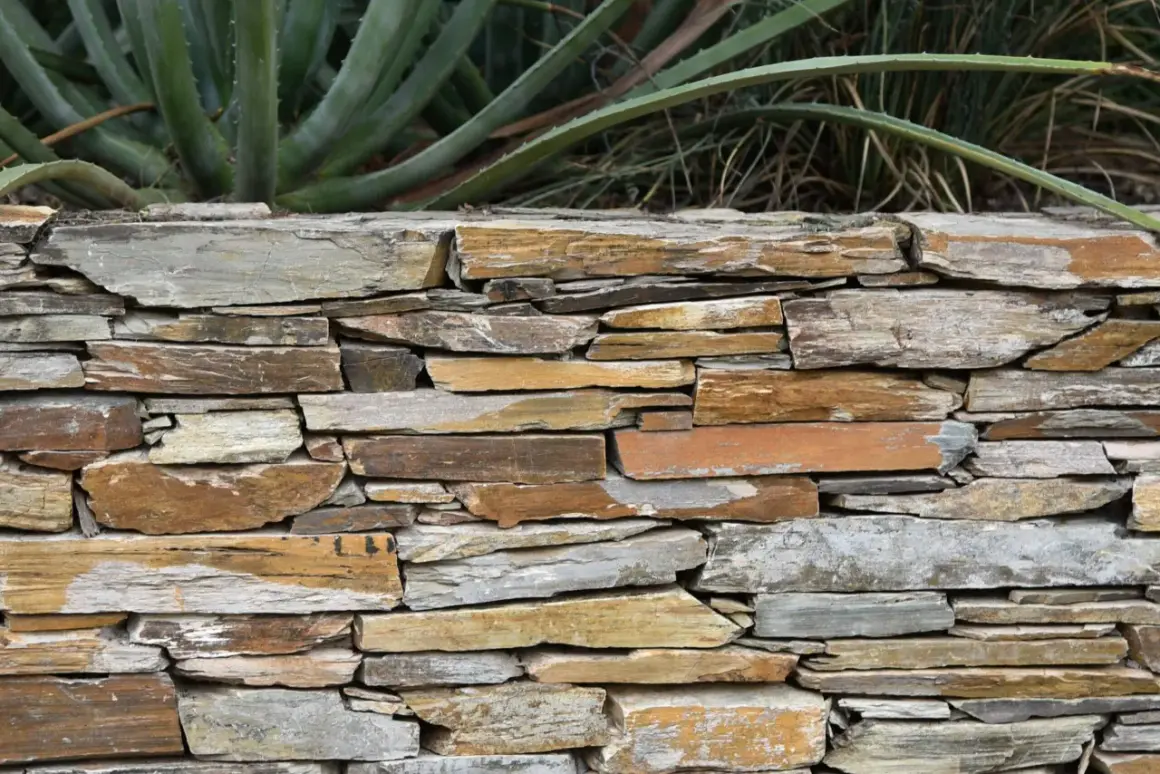
| Natural stone | Garden walls, historic homes, custom landscape features | Durable, attractive, blends well with planting beds | More labor-intensive; base accuracy matters a lot |
| Treated timber | Short walls on dry, simple sites | Lower upfront cost, quick to install | Rot, insect damage, and shorter service life |
| Poured concrete | Engineered walls, tighter spaces, heavier loads | Very strong, slim profile, long service life when built well | Formwork, steel, and inspection details matter more |
For many residential projects, segmental block is the most practical DIY-friendly choice because the system is designed to stack, drain, and tolerate small corrections. Natural stone can be beautiful, but it is less forgiving if the base is off. Timber can work for short runs, yet I treat it as the least durable option unless the site is dry and the wall is modest. Once the material is chosen, the trench and sub-base become the real foundation of the job.
Lay out the wall and excavate a stable trench
I start with stakes, string, and a clear elevation plan. Then I call 811 before I dig, because nothing ruins a wall faster than striking a utility line or discovering one after the trench is already open. The wall line should follow the intended finished grade, and I keep an eye on where runoff comes from so I do not trap water behind the structure.
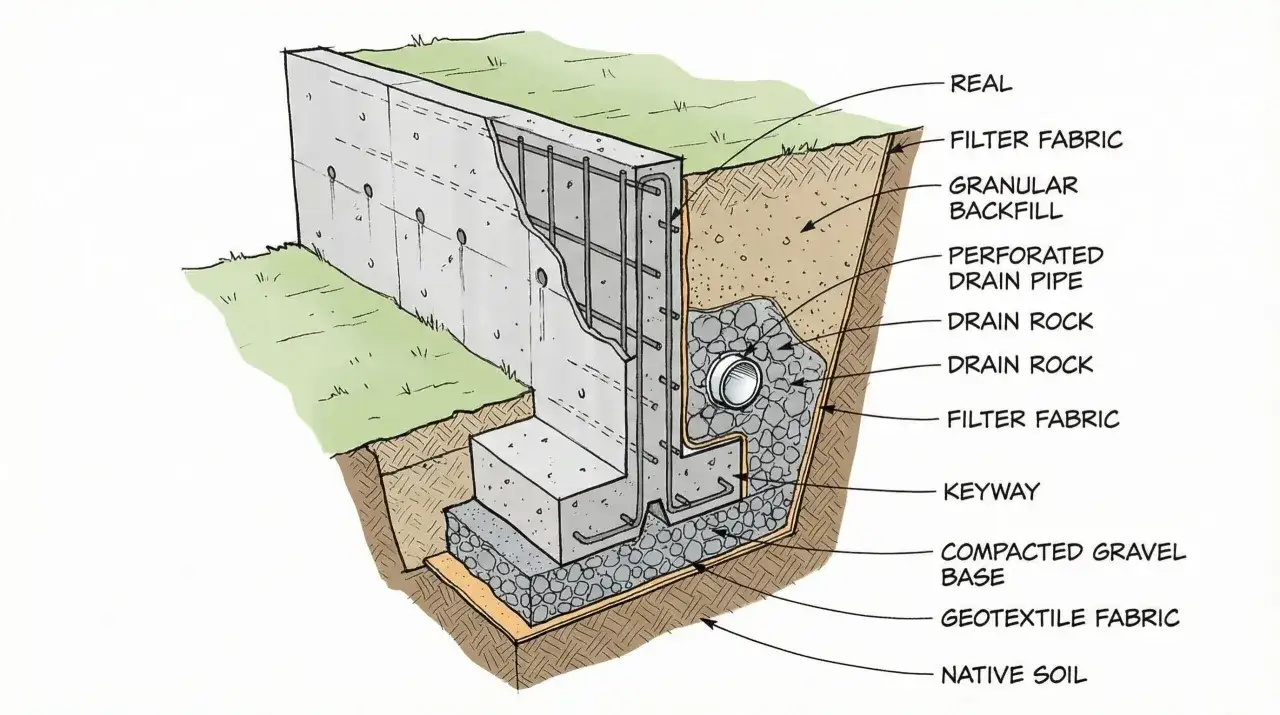
Excavation is not about digging a random trench. I want firm subgrade, not topsoil, roots, or loose fill. Soft material settles later, and settlement turns into a visible bulge or a backward lean. For segmental block walls, a typical construction spec from Texas State calls for a 6-inch leveling pad, compacted sand or gravel, and a perforated or slotted PVC or corrugated HDPE drain pipe wrapped in geotextile. That is a good reminder that the hidden layers matter more than the visible face.
I also keep the prepared base wider than the wall itself. Colorado State University Extension recommends foundation material that extends at least one foot beyond the front and back of the wall base width. That extra bearing area helps spread the load and gives the base a better chance of staying level when the soil gets wet or the ground freezes. With the trench right, the first course can be set with confidence.
Set the first course like it will carry the whole wall
The first course decides everything above it. If I rush this part, every course after that has to compensate, and walls are terrible at forgiving that kind of shortcut. I check each unit front to back and side to side, and I do not move on until the entire first course sits flat, tight, and consistent.
Most segmental systems want a slight backward lean, often called batter or cant. That tiny setback helps the wall resist soil pressure instead of fighting it head-on. With dry-stacked stone, I put the largest and most stable stones at the bottom. In timber walls, the lowest members need to be square, anchored, and fully supported, because any tilt at the base multiplies as the wall climbs.
I also avoid the temptation to “fix” a bad first course with extra adhesive or random shims. The correction belongs in the base, not in the face of the wall. Once the base course is right, the next question is how to keep water from building pressure behind it.
Drain the wall before you add more soil
Drainage is the part most homeowners underestimate. A wall may look solid on a dry day and still fail after one wet season if water cannot escape. I want free-draining material directly behind the wall face, and I want that water to have a clear path out, not a place to collect and push.
The basic recipe is simple: clean angular stone behind the wall, a drain pipe at the base, and geotextile where the soil is fine enough to clog the system. A perforated or slotted drain pipe works because it gathers water before the pressure builds. If the wall system calls for weep holes, I make sure they stay open and unobstructed. If the wall drains to daylight or to a legal collection system, I confirm that route before backfilling.
I do not like muddy backfill against the wall face. Fine soil migrates into the drainage zone and slowly turns the wall into a sponge. That is why I keep the drainage aggregate clean and angular, then transition to suitable native backfill farther back if the design allows. Water management is the difference between a wall that quietly works and one that slowly bows outward. On taller or more demanding sites, reinforcement and engineering become part of the wall, not an optional extra.
Reinforce taller walls and know when to stop DIY
Once the wall gets taller, the question is no longer just “Can I stack this?” It becomes “Can I resist the soil mass behind it for years?” That is where geogrid, deadmen, tie-backs, and engineered layouts come in. Geogrid is a synthetic reinforcement grid that extends back into the retained soil and helps the soil mass act more like one stable unit instead of sliding independently.
For timber or solid horizontal-material walls, Colorado State University Extension gives a practical rule of thumb of at least one deadman per 16 square feet of exposed face. Deadmen are anchor members that extend back into undisturbed soil and help resist forward movement. I use that as a reminder that taller or heavier walls need more than gravity and good intentions.
Here is where I stop treating the wall as a DIY project and start treating it as an engineered structure:
- The wall is above about 4 feet measured from the footing.
- The wall supports a driveway, walkway, fence, or structure.
- The backfill is steep, wet, or made of weak soil.
- The design uses tiers, corners, curves, or tight property-line constraints.
- The site has freeze-thaw exposure, seepage, or drainage that is hard to control.
At that point, I want the wall designed, not guessed at. Even a well-built wall can drift if small mistakes slip through, and that is where the first storm exposes everything.
The mistakes that usually show up after the first storm
Most bad walls do not fail in a dramatic instant. They lean, settle, crack, or seep first. Those early signs usually point to one of a few simple mistakes that were baked into the build.
- Skipping compaction leaves soft spots that settle later and open gaps.
- Using clay or organic soil right behind the wall traps water and raises pressure.
- Building on unprepared topsoil lets the base move after the first heavy rain.
- Ignoring drainage outlets turns the wall into a water trap instead of a support structure.
- Setting the first course out of level forces the upper courses to fight the mistake.
- Overloading the top edge with planters, stored soil, or hardscape pushes too much weight onto the wall.
When a wall starts leaning, I look first at water and base settlement, not at the visible face. The symptom is usually a clue to a buried problem. Once those mistakes are avoided, the wall still needs basic care to keep performing after the first season.
What keeps the wall working after the first heavy rain
The best retaining walls are quiet. They do their job without announcing themselves through cracks or bulges, and they stay that way because someone checks them after the weather changes. I inspect new walls after the first major rain, again after winter, and once more at the start of the next dry season.
The first thing I check is water movement. Are the outlets clear? Is runoff coming off the grade instead of pouring behind the wall? Are gutters, downspouts, and irrigation lines feeding the problem? If the answer is yes to any of those, I fix the water before I touch the wall face. I also keep heavy planters, stockpiled soil, and hardscape loads away from the top edge unless the wall was designed for them.
Freeze-thaw climates deserve extra attention. Water that gets trapped in the wrong place expands when it freezes, so I want drainage paths open before cold weather settles in. If I had to reduce the whole job to one rule, it would be this: spend more time on drainage and base prep than on the visible face, because that is where the wall is really built.