DIY planter boxes are one of the cleanest ways to improve a backyard, patio, or side yard without rebuilding the whole landscape. They give you control over soil quality, drainage, and layout, which is exactly why they work so well for vegetables, herbs, and seasonal flowers. In this guide, I focus on the parts that actually matter in the real world: how to size the box, choose materials, build it so it stays square, and keep roots healthy after the first rain.
What matters before you start building
- Width matters more than length in most home builds; 3 to 4 feet lets you reach the center without stepping inside the bed.
- Most vegetables are happy in 6 to 12 inches of depth, while taller beds are easier on your back and better for accessibility.
- Cedar, redwood, black locust, and other rot-resistant materials last longer outdoors than soft pine or fir.
- If the box sits on soil, keep the bottom open; if it sits on a deck or patio, drainage holes are non-negotiable.
- A good fill is usually about half to two-thirds topsoil and one-third to one-half compost.
- Raised beds dry out faster than in-ground planting, so irrigation planning is part of the build, not an afterthought.
The next decision is not the saw cut, but the role the box needs to play in your yard: solving drainage problems, fitting a tight patio, or creating a more productive planting zone.
Why a planter box changes the way your garden performs
I like planter boxes because they solve a few problems at once. In a yard with compacted soil, heavy clay, or poor drainage, a raised structure gives roots a friendlier environment and warms up earlier in spring. That earlier warm-up is useful in much of the United States, especially if you want tomatoes, peppers, or herbs going before the in-ground soil fully catches up.
There is a tradeoff, and it is easy to miss if you focus only on the nice clean edges. Raised beds and container-style boxes dry out faster than native soil, which means they need more frequent watering in hot weather. They also cost more to build up front because you are not just moving dirt; you are creating a structure that has to hold soil, moisture, and seasonal expansion for years.
That is why I think of planter boxes as small landscape structures, not just garden containers. If you build them with the same care you would give a deck step or a retaining edge, they pay you back in usability and appearance. Once that is clear, the next question is how to size the box so it works with your yard instead of fighting it.
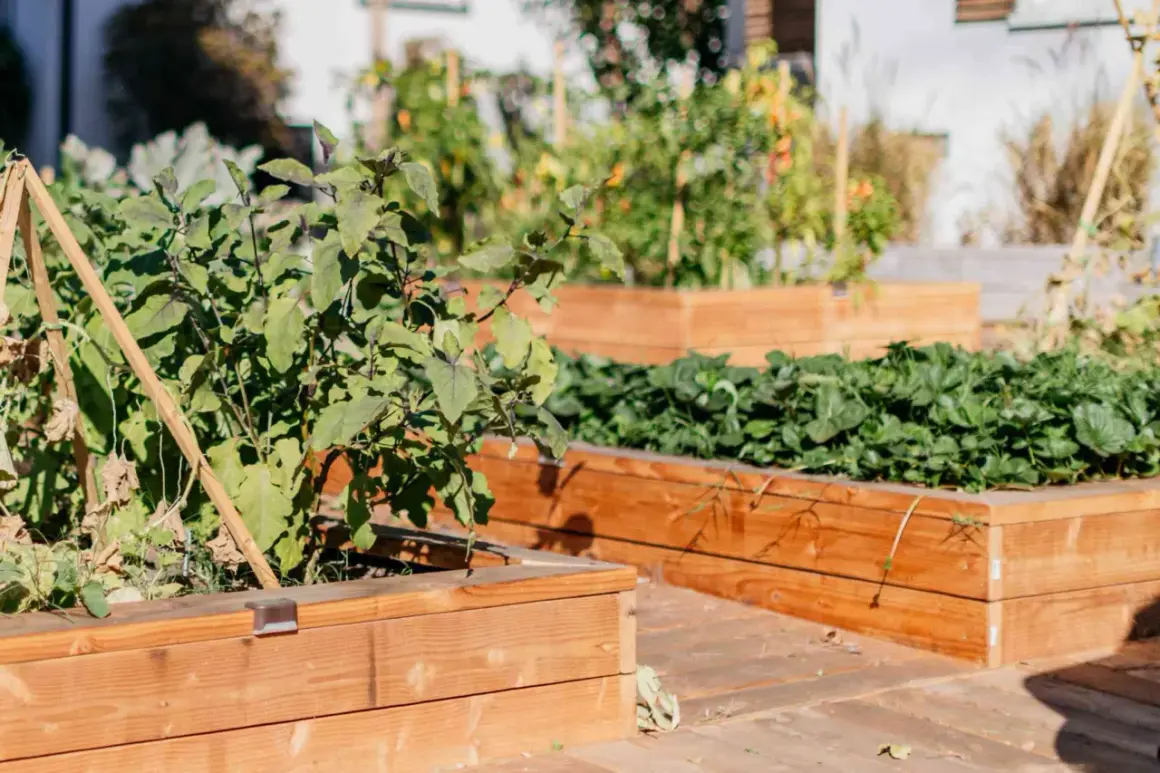
Pick the right size, site, and shape before you buy lumber
The easiest mistake is making a box that looks good on paper but is awkward to use. I keep the width narrow enough that I can reach the center from either side, because stepping into the bed compacts the soil and damages roots. For most people, that means 3 to 4 feet wide. If you only have access from one side, go narrower.
| Design choice | Practical range | Why it matters |
|---|---|---|
| Width | 3 to 4 feet | Lets you reach the middle without climbing into the bed. |
| Height | 6 to 12 inches for many vegetables | Enough depth for roots while keeping the build manageable. |
| Accessible height | About 27 inches | More comfortable for wheelchair access and less bending. |
| Length | 4 to 6 feet per section | Longer runs can warp and often need reinforcement. |
| Sun exposure | 6 to 8 hours for fruiting crops | Tomatoes, peppers, and eggplant need real sun, not bright shade. |
I also plan around service access. If a wheelbarrow needs to pass, or if I want to get a hose and spade between boxes, I leave room for a real walkway instead of squeezing everything too tightly. On patios and driveways, I pay extra attention to heat and runoff because hard surfaces change how fast the box dries out and where the water ends up. Once the footprint is right, material choice becomes the real long-term decision.
Choose a material that matches your climate and your tolerance for maintenance
For outdoor boxes, the material is not just about appearance. It determines how long the structure survives, how much upkeep it needs, and whether it suits edible planting. If I want the simplest long-life solution for a vegetable bed, I usually start with rot-resistant wood. If I want a more architectural look, metal or masonry can make sense, but they cost more and behave differently in heat.
| Material | What I like about it | Tradeoffs | Best use |
|---|---|---|---|
| Cedar or redwood | Natural rot resistance, easy to cut, good balance of price and lifespan | Costs more than basic pine | Most home garden boxes, especially edible beds |
| Black locust or other durable hardwoods | Very long-lasting outdoors | Harder to source and often pricier | Long-term permanent beds |
| Ground-contact pressure-treated lumber | Affordable and durable if labeled for ground contact | Needs more caution in edible beds; many gardeners add a liner | Budget builds where longevity matters |
| Galvanized steel or metal troughs | Long service life, clean look, low rot risk | More expensive and can heat up in full sun | Modern landscapes and compact spaces |
| Brick, block, or stone | Very durable and visually solid | Heavy, permanent, and usually the costliest to install | Landscape beds meant to stay in place for years |
I avoid old railroad ties, creosote-treated lumber, and unknown reclaimed boards for food-growing beds. If I do use pressure-treated wood, I make sure it is modern ground-contact material and separate the soil from the wood with a barrier when that extra caution makes sense. That is not about fear; it is about making an informed choice that fits the project. With the material settled, the actual build becomes straightforward.
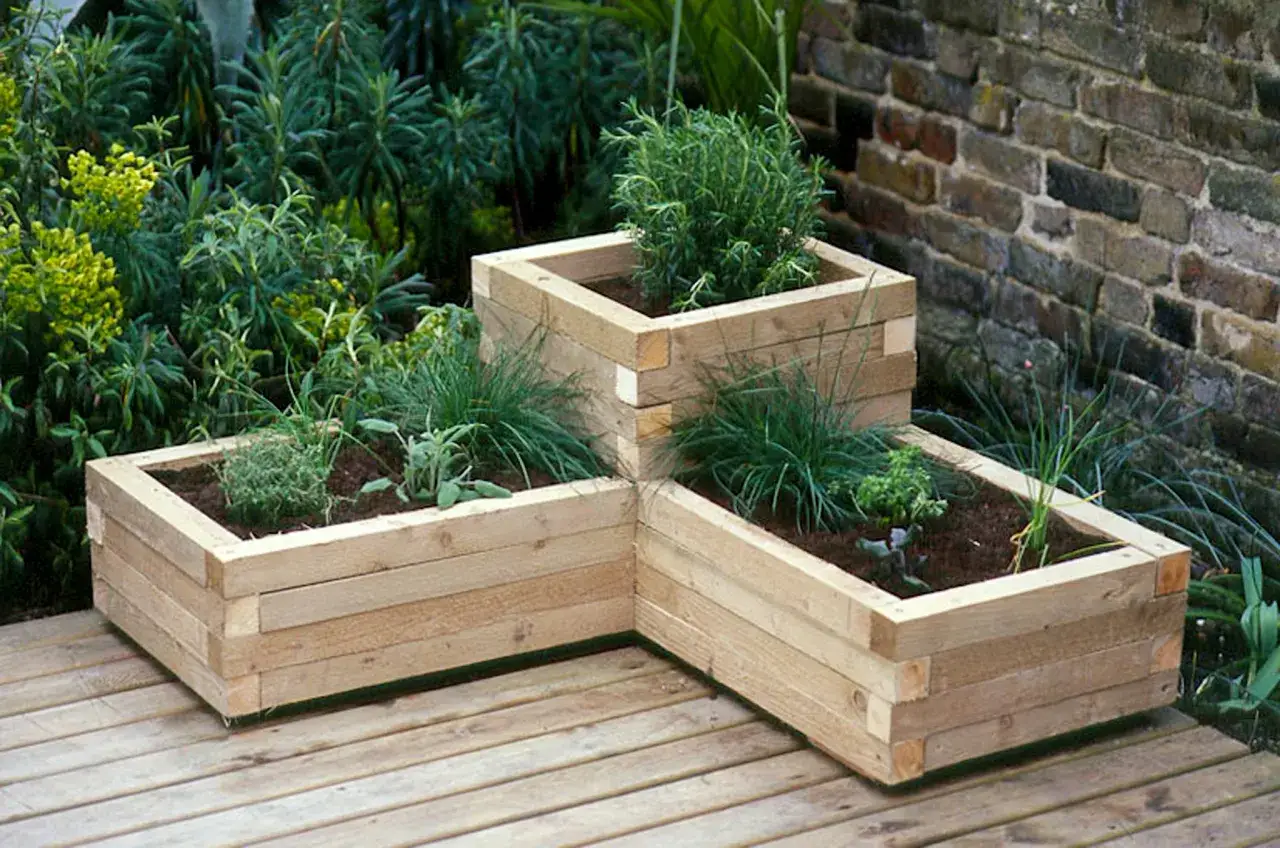
Build the box step by step without overcomplicating it
I keep the build simple enough that one person can finish it in an afternoon, but not so simple that the box falls apart by midsummer. A rectangle, square corners, exterior-rated fasteners, and a level base do most of the work. The goal is a frame that holds soil without bowing outward or twisting after the first wet spell.
- Cut the boards to size. I usually start with two boards for the long sides and two for the short sides. If I want a deeper box, I stack courses rather than trying to make one oversized board do all the work.
- Pre-drill and assemble the rectangle. Pre-drilling reduces splitting, especially near board ends. I use exterior decking screws because they hold better than nails over time.
- Check for square before tightening fully. A box that is slightly out of square is harder to fit level, harder to line up, and more likely to rack under soil pressure.
- Reinforce the corners if the box is long or tall. Internal corner blocks or metal plates help, and longer beds should get extra support so the side walls do not bow.
- Prepare the base. On soil, I remove sod and loosen the ground beneath. On a patio or deck, I drill drainage holes and raise the box slightly so water can escape.
- Add rodent protection or a liner if needed. Hardware cloth at the bottom can keep mice and chipmunks from tunneling up. If I am using treated wood, I add a barrier where the soil touches the frame.
- Set the box level and fill it. A tilted box sends water to one side and makes planting harder. Once it is level, I fill it and water it before planting so the soil settles naturally.
Get drainage and soil mix right the first time
If a planter box fails, it usually fails from water management. Roots need moisture, but they also need air, and soggy soil suffocates them fast. That is why I never treat the box like a sealed tub. If it sits on the ground, I keep the bottom open so roots can reach native soil and excess water can move down. If it sits on a hard surface, I make drainage holes and make sure water has somewhere to go.
For fill, I aim for a blend that holds nutrients without turning dense. A practical mix is about 1/2 to 2/3 topsoil and 1/3 to 1/2 plant-based compost. If the native soil underneath is workable, I often loosen it first and let the new mix tie into it rather than building a completely isolated pocket. In heavy clay sites, that extra connection makes a real difference.
I also think about water retention before planting. In hot climates or on paved surfaces, the box will dry faster than the same bed placed in open ground, so a soaker hose or drip line is worth the small extra effort. If the soil test comes back weak, I fix fertility before planting, not after the leaves tell me something is wrong. Once the roots have a good home, the box can start doing what you built it for.
Plant it for the light you actually have, then water like a gardener who expects heat
Plant choice should match the box, not the other way around. In full sun, I lean toward tomatoes, peppers, eggplant, bush cucumbers, and herbs that want a lot of light. In part sun, leafy crops such as lettuce, kale, scallions, and radishes are more forgiving. If the box is shallow, compact or patio varieties save a lot of frustration because they are bred to stay manageable in confined root space.
Watering is where most box gardens get underbuilt. Raised beds dry faster, and the difference becomes obvious in July. I prefer slow, even watering over short daily splashes because it encourages deeper roots. A thin layer of mulch helps, but it does not replace irrigation. It just buys you time.
- Check moisture with your finger before watering again; the top layer can lie to you on hot days.
- Water early in the day when possible so leaves dry faster and the bed does not steam overnight.
- Feed heavy crops with compost and supplemental fertility as needed, especially in beds that produce all season.
- Keep walkways clear so you are not compacting the planting area every time you weed or harvest.
Once the box is planted, the last job is not glamorous but it is the job that decides whether the structure still looks good after the first year: maintenance.
The details that keep the box looking good after year one
The small stuff matters more than people think. I tighten fasteners at the start of the season, refresh mulch, and inspect corners where moisture and soil pressure tend to concentrate. If I added a liner, I check that it is not trapping water against the wood. If I painted or stained the outside, I make sure the finish is still protecting the frame and not peeling where water splashes hardest.
I also plan for the box to change a little over time. Wood moves, soil settles, and irrigation hardware shifts. That is normal. What is not normal is letting a box warp, bow, or dry out unevenly until the whole thing becomes hard to use. When I build carefully, most of the upkeep is light: compost, moisture checks, and the occasional hardware adjustment. That is the real payoff of well-made DIY planter boxes: they turn maintenance into a manageable routine instead of a seasonal repair project.
If I were building one for a typical U.S. backyard today, I would keep the footprint narrow, choose rot-resistant material first, and spend more time on drainage than decoration. That combination usually gives the best balance of durability, plant health, and day-to-day convenience.