Pool shock is one of the fastest ways to reset water that has gone dull, cloudy, or stubbornly smelly, but it only works well when the chemistry, timing, and safety steps are handled in the right order. I break the process down into what the treatment actually does, which product fits the pool, how much to add, and when the water is safe to use again. The point is not to dump in a big dose and hope for the best; it is to restore control without creating a new problem.
What matters before you open the bag
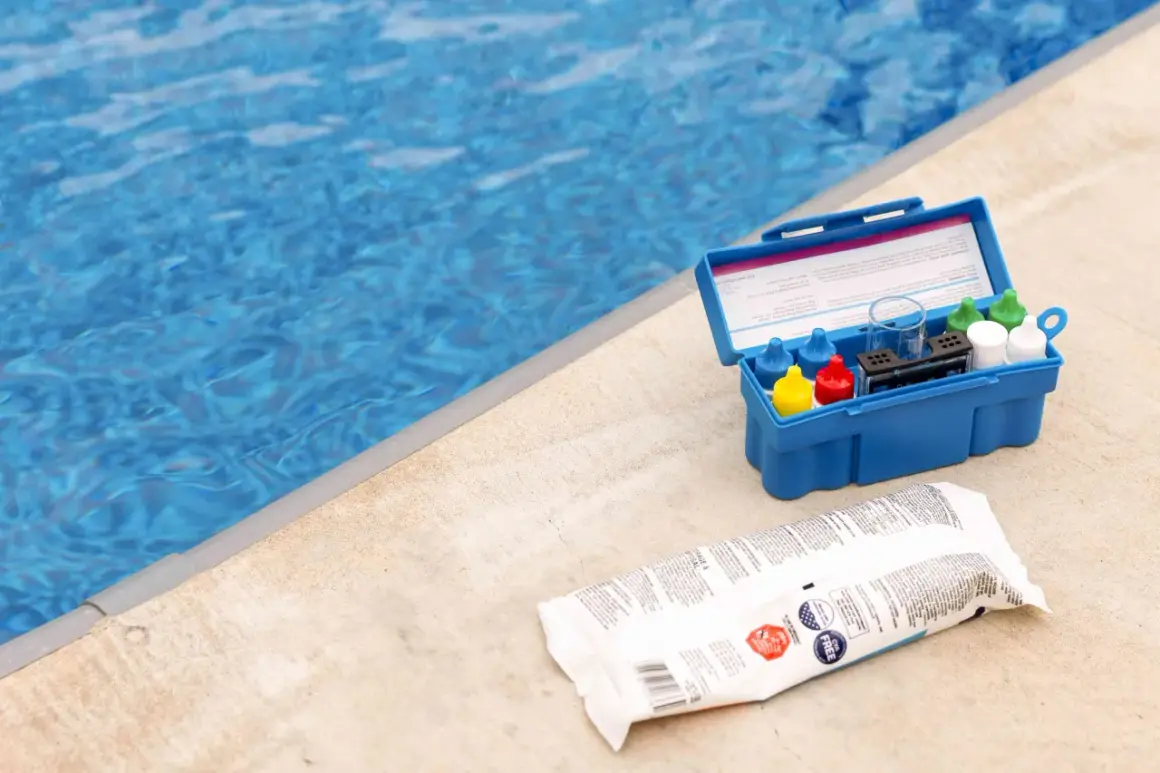
- Test pH first; shock works best when water is around 7.2 to 7.6.
- Pick the right product for your pool type and current chemistry, not just the cheapest bag on the shelf.
- Remove debris and brush surfaces so the chemical load is not wasted on leaves and dirt.
- Run the pump and filter while you add shock and keep circulation going afterward.
- Do not swim too early; use the product label and your test kit, not the smell of the water.
What pool shocking actually does
Shocking is a high-dose oxidation step. In plain terms, it gives the water enough active sanitizer or oxidizer to break down the stuff normal maintenance chlorine has been struggling with: chloramines, sunscreen residue, sweat, algae pressure, and organic debris after heavy use. It is useful when the pool looks fine on the surface but the water has lost its edge and chlorine disappears faster than it should.
I think of it as a reset, not a cure-all. If the filter is clogged, the pump is weak, or there are piles of leaves sitting on the floor, shock alone will not carry the job. Brush first, vacuum if you can, and make sure circulation is working before you reach for chemicals. Once that is clear, the next choice is which shock product makes sense for your pool.
Choose the right shock product for your pool
I separate pool shock into two broad groups: chlorine-based shock and non-chlorine oxidizer. They are not interchangeable, and the right one depends on whether you are cleaning up an everyday chlorine demand problem or dealing with a bigger sanitation issue.
| Product type | Best for | Main advantage | Watch out for |
|---|---|---|---|
| Calcium hypochlorite | Routine residential shocking and algae cleanup | Strong, common, and effective at raising free chlorine quickly | Can add calcium and leave some cloudiness if the water is already hard |
| Dichlor | Fast-dissolving shock when stabilizer is still low | Easy to handle and quick to disperse | Adds cyanuric acid, so repeated use can over-stabilize the pool |
| Liquid chlorine | Large pools, vinyl pools, or owners who want to avoid extra calcium | Fast dosing with no granular residue | Short shelf life and splash risk during handling |
| Non-chlorine oxidizer | Routine oxidation when you want a faster re-entry window | Useful for odor and bather waste without a long wait | It is not a replacement for chlorine when the pool is green or badly contaminated |
On labels and in EPA guidance, you will often see very specific handling instructions for shock products, and those instructions matter more than brand names. If the package says not to pre-dissolve, not to use the skimmer, or not to mix with other chemicals, I follow that literally. Product chemistry varies, but the label is always the final authority. That brings us to the actual application steps.
The step-by-step process I use
Test and prep the water first
I start with a proper test, not a guess. pH should usually be in the 7.2 to 7.6 range before shocking, because chlorine works more efficiently there. If the water is littered with leaves, bugs, or sediment, I skim and vacuum first. The cleaner the pool is physically, the less chemical you waste on debris.
I also check the filter and pump before I add anything. If circulation is weak, the shock treatment will be uneven and slower to clear. For a pool that is already green, brushing the walls and floor before dosing makes a noticeable difference.
Add the shock safely
I wear gloves and eye protection, open one chemical at a time, and keep the bucket dry. Never mix chlorine products with acid or with other pool chemicals; the CDC is direct about that because the reaction can create toxic gas or other dangerous conditions. I add chemical to water when the product calls for pre-dissolving, never water to chemical, and I do it in a well-ventilated area.
For granular shock, I spread it evenly across the deep end or around the perimeter with the pump running. For liquid chlorine, I pour slowly in front of a return jet so it disperses quickly. I do not use the skimmer unless the label specifically allows it, because leftover chemicals in the plumbing can react badly.
Read Also: DIY Pond Waterfall - Build a Natural & Manageable Feature
Circulate, brush, and retest
After dosing, I keep the pump and filter running for several hours, often overnight for a stubborn pool. A common window is 4 to 8 hours of circulation, but the label still wins if it gives a different direction. I brush the surfaces again the next day and retest before anyone swims.
If the pool still looks dull and the chlorine drops again too fast, that usually tells me the water is carrying a bigger load than one treatment can clear. At that point, I stop treating shock like a one-time fix and look harder at the dosage and the pool’s actual volume.
How much to add without overdoing it
Pool volume is where a lot of homeowners misjudge the job. A bag that “treats 10,000 gallons” means nothing if the pool is 16,000 or 24,000 gallons. As a simple starting point, a common granular chlorine dose is about 1 pound per 10,000 gallons, but product strength varies and the label remains the rule.
| Pool size | Common starting dose | What that means in practice |
|---|---|---|
| 10,000 gallons | 1 pound | Typical starting point for a lightly dirty pool |
| 15,000 gallons | 1.5 pounds | A good example of why measuring the pool matters |
| 20,000 gallons | 2 pounds | Common for many suburban in-ground pools |
| 30,000 gallons | 3 pounds | Often used for larger backyard pools or heavier cleanup |
If you are dealing with severe algae, heavy rain runoff, or a pool that has been neglected for a while, the dose may need to be adjusted, repeated, or changed entirely. That is one reason I like to think in terms of water condition rather than just a weekly routine. A 16,000-gallon pool, for example, lands at roughly 1.6 pounds on that common starting scale, which is close enough to show why “one bag” is not a serious measuring method.
When to swim again and what to watch for
Swimming too early is the easiest way to ruin a good treatment. With chlorine-based shock, I usually expect a wait of 8 to 24 hours, but I do not go by time alone. I wait until the free chlorine level is back in the normal operating range and the water is clear enough to trust. Non-chlorine oxidizers can be much faster, sometimes 15 to 30 minutes, but again the label and the test kit matter more than the clock.
| Product type | Typical re-entry window | What I check first |
|---|---|---|
| Chlorine-based shock | 8 to 24 hours | Free chlorine, clarity, and label directions |
| Non-chlorine oxidizer | 15 to 30 minutes | Label instructions and visible water condition |
One practical note: a strong chlorine smell does not automatically mean the pool is clean. It often points to chloramines, which is exactly the kind of buildup shocking is meant to correct. If the water still smells sharp, looks hazy, or tests high, I keep swimmers out a little longer. Re-entry should be based on chemistry, not impatience.
The mistakes that ruin a shock treatment
Most bad outcomes come from order and handling, not from the chemistry itself. I see the same mistakes again and again:
- Shocking before balancing pH.
- Guessing the dose instead of measuring pool volume.
- Adding shock in bright midday sun instead of after sunset.
- Putting product through the skimmer or feeder when the label does not allow it.
- Mixing different chemicals or storing them too close together.
- Skipping brushing, filtration, and retesting after the dose goes in.
The CDC guidance on pool chemicals is blunt for a reason: separate chemicals, ventilate the area, and never mix chlorine with acid. That sounds basic, but basic mistakes are exactly what create dangerous fumes and wasted product. Once you get the handling right, the treatment itself becomes much more predictable.
When shocking is not the right fix
Sometimes a pool does not need more shock; it needs diagnosis. If the water stays cloudy after treatment, I look at filtration, circulation, calcium balance, and stabilizer levels before adding more chemical. A dead spot behind a ladder, a clogged cartridge, or a weak pump can make a good shock look like it failed.
Metals can also confuse the picture. Iron or copper can tint the water, and shock will not solve that on its own. If the pool was hit by a contamination incident, such as a fecal event, I would follow local health guidance instead of treating it like a normal cleanup. That is one of the places where the safe answer is also the boring answer: stop, test, and follow the right protocol.
The maintenance habits that make the next shock unnecessary
I would rather keep a pool stable than rescue it every weekend. In hot, sunny weather, chlorine burns off faster, so small corrections work better than big emergency doses. A few habits keep the water calmer and cut down on how often you need a heavy treatment:
- Test free chlorine and pH two or three times a week during swim season.
- Keep pH in the 7.2 to 7.6 range so sanitizer works efficiently.
- Brush the walls, steps, and corners weekly to break up film and dead spots.
- Empty baskets and clean the filter before buildup starts to choke circulation.
- Shock after heavy rain, a crowded pool party, a heat wave, or a visible algae bloom.
- Use the right sanitizer level day to day so shock stays a correction, not a crutch.
When I keep those habits in place, shocking becomes an occasional reset instead of a recurring headache. That is the real goal for any backyard pool: clean water, safer chemistry, and a system that stays under control without constant guesswork.