Knowing how to cut down a tree safely means treating the job as planning first and cutting second. The real work is deciding whether the tree is safe to fell at all, clearing the area, choosing a fall path that protects the rest of the landscape, and making cuts that give you control instead of surprises. In practice, that is what keeps a backyard project from becoming a property-damage or injury case.
The safest tree felling job is decided before the saw starts
- Check the tree first for lean, decay, wind exposure, and anything the trunk could hit on the way down.
- Clear a retreat path at about 45 degrees away from the fall line and keep it free of brush, logs, and snow.
- Wear proper PPE and never work alone with a chainsaw.
- Use an open-faced notch and leave a clean hinge so the tree falls where you planned.
- Stop if conditions are wrong near power lines, in rotten wood, on bad footing, or when the tree’s behavior is uncertain.
Know when the tree is beyond a DIY cut
I start every job with the same question: does this tree belong on a sawyer’s to-do list, or on an arborist’s truck? A tree with a clear lean into open space, solid wood, and plenty of room to fall may be manageable for an experienced homeowner. A tree with rot, a split trunk, tight surroundings, overhead utility lines, or a target zone full of fences and hardscape is a different problem entirely.
| Situation | Why it raises risk | Better move |
|---|---|---|
| Visible rot, hollow base, or split trunk | The hinge can fail and the trunk can barber-chair, meaning it splits upward violently | Stop and bring in a certified arborist |
| Power lines or a service drop nearby | Electric shock and utility damage can happen fast | Call the utility and do not cut until the area is cleared |
| Tree leaning toward a house, deck, car, or fence | There is little room for error if the fall shifts even slightly | Use a pro with rigging or sectional removal |
| Wind, ice, wet ground, or steep slope | Footing becomes unreliable and the tree’s movement is harder to read | Wait for better conditions |
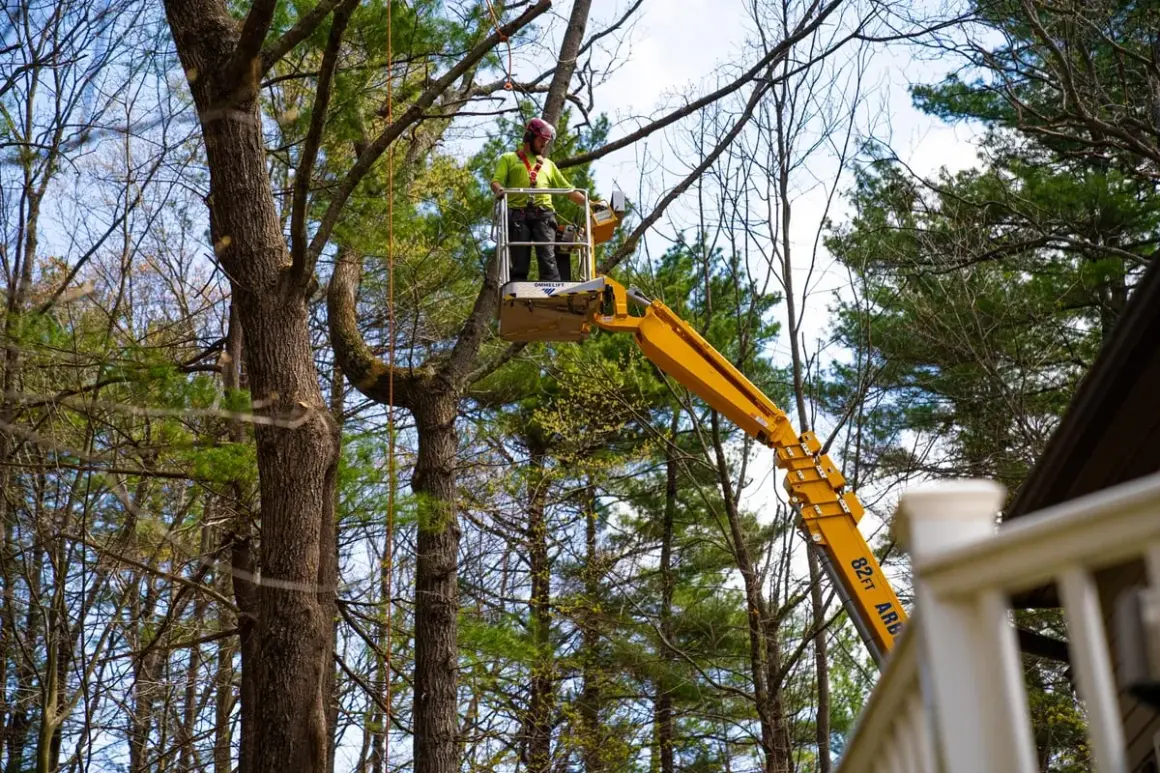
| Cutting from a ladder or inside the tree without training | Kickback and fall risk climb sharply | Use trained climbers or a bucket crew |
My rule is simple: if I cannot describe the fall path and the retreat path in one sentence, I do not start. That is especially true in landscaping jobs, where a wrong decision can damage irrigation, turf, beds, or structures that cost more to fix than the tree was worth.
Set up the site and gear before the saw starts
The job gets safer when the work area looks boring. I want the saw, fuel, wedges, first-aid kit, and phone staged before I make the first cut, because walking back and forth through the drop zone adds avoidable risk. I also want a sharp chain, proper tension, and a saw in good running condition; a dull or loose chain creates fatigue and makes control worse.
- Hard hat with face protection and hearing protection.
- Eye protection under the shield, not instead of it.
- Chainsaw chaps or cut-resistant trousers that cover the legs you are most likely to hit.
- Steel-toe boots with good tread for uneven or damp ground.
- Gloves for grip and minor abrasion protection.
- Wedges and a hammer or axe if you may need help controlling the back cut.
I also keep children, pets, and helpers out of the area and never cut alone if I can avoid it. If fuel is involved, I let the saw cool before refueling and move at least 10 feet away from the fueling point before restarting. Once the gear is in order, the real question becomes where the tree should go, not whether the equipment is ready.
Choose the fall path with the landscape in mind
Tree felling is as much about reading the site as it is about running a chainsaw. I look at the natural lean, the crown weight, the wind, the slope, and the obstacles the trunk could strike on the way down. A tree is not just a trunk; it is a top-heavy structure that can swing, twist, and roll through your yard in ways that are easy to underestimate.
For that reason, I aim for a drop zone that avoids the things homeowners usually care about most: patios, decks, sheds, fences, parked vehicles, and planted areas that took years to establish. If the tree has to fall toward another tree or into a tight gap, the job gets more technical and the margin for error shrinks fast. OSHA’s logging guidance makes the retreat path part of the felling plan, not an afterthought, and I treat that as non-negotiable.
- Stand back and study the tree twice, once from a distance and once at the trunk.
- Look for dead tops or hanging limbs that can fall as the tree starts moving.
- Clear the base area so you do not trip when you need to move.
- Mark a retreat path that angles back and away from the fall line.
- Keep other people out of the area until the tree is completely on the ground.
I keep the escape path at about a 45-degree angle away from the direction of fall. That route should be free of brush, branches, downed logs, and snow if you are working in winter. Once the fall path is set, the cuts themselves become a matter of control, not guesswork.
Cut the notch and hinge for control, not speed
The face cut is what tells the tree where you want it to go, and the hinge is what keeps you in control until it commits. I prefer an open-faced notch because it gives the tree room to fall farther before the cut closes, which helps preserve the hinge. That control matters more than shaving off a few seconds from the cut.
| Cut | What it does | Common mistake |
|---|---|---|
| Face notch | Sets the direction of fall | Cutting too shallow or too deep |
| Hinge | Steers and slows the tree as it falls | Cutting through it or leaving it uneven |
| Back cut | Releases the tree | Cutting below the notch or too far into the hinge zone |
| Wedge | Keeps the trunk from sitting back on the saw | Using it without a clear escape plan |
- Cut the face notch on the side the tree should fall toward.
- Make the first cut about 20 to 30 percent into the trunk.
- Shape the notch with a wider open face, ideally around 70 to 90 degrees, if you want more control.
- Make the back cut on the opposite side, flat and about 1 inch above the bottom of the notch.
- Leave a uniform hinge. In University of Georgia Extension training, hinge thickness is often taught at about 10 percent of the remaining material on smaller trunks and about 5 percent on larger ones.
- Use a wedge only if you are ready to retreat immediately and you know the tree is not going to bind or sit back.
If the trunk is under unusual tension, if the base is rotten, or if you are tempted to improvise a bore cut without practice, stop. That is the point where a routine felling job turns technical fast, and technique matters more than confidence. Next comes the moment that matters most: the instant the tree starts to move.
Move the instant the tree starts to commit
University of Georgia Extension’s 90-15-5 rule is a blunt reminder that most felling accidents happen within 15 seconds of the tree beginning to move and within 5 feet of the trunk. I take that seriously because the tree often gives only a small visual cue before the whole structure goes. When the back cut releases and the trunk starts to tip, I am already moving.
- Use the cleared retreat path immediately instead of trying to stand and watch the fall.
- Move at a 45-degree angle away from the direction of fall.
- Keep looking up so you can track the crown and any broken limbs.
- Do not turn your back on a moving tree.
- Stay out of the area if the tree hangs up in another tree or stops in an unstable position.
A hung-up tree is not a cleanup problem; it is a hazard problem. I do not walk back under it, push on it, or try to “nudge it loose” with the saw. If the tree does anything unexpected, I leave the area and reassess from a distance. Only when the trunk is fully down and stable do I move on to limbing and bucking.
Limb, buck, and clean up without creating a second hazard
Once the tree is on the ground, it is easy to relax too soon. That is when people get hurt by spring poles, trapped limbs, rolling logs, and sloppy footing. Limbing means removing branches; bucking means cutting the trunk into lengths, and both are safer when you stay aware that wood under tension can snap or shift the moment it is released.
- Work from a stable stance and never overreach.
- Watch for tension in branches that may spring back when cut.
- Do not cut directly overhead unless you are specifically trained for that position.
- Keep the chain sharp and the saw controlled with two hands on the handles.
- Do not refuel or service the saw carelessly; let it cool and keep fuel away from ignition sources.
- Wait for loose overhead limbs to settle before moving close to the trunk or beginning cleanup.
For landscape work, this is also the point where you decide what stays and what leaves. Good firewood can be stacked, smaller brush can be chipped, and the stump can be dealt with later if the site calls for it. What matters is that cleanup never becomes a reason to ignore the last hidden hazards in the tree.
The decisions I would never skip on a real job
If I had to reduce the whole process to a few hard rules, they would be these: check the weather, respect the lean, protect the retreat path, and stop when the site stops making sense. Wind, lightning, and poor visibility all change the risk profile, and they do it fast. So do wet grass, frozen footing, and anything that makes your balance or footing uncertain.
I also check for local rules before removing a tree near a property line, sidewalk, street, or utility corridor. In many U.S. towns, a protected tree or a utility conflict can change what is allowed, even on private property. If the tree is close to something you do not want scratched, crushed, or dragged through, it is already too close for a casual DIY cut.
What usually saves money is not forcing a risky tree to come down on your schedule. It is recognizing the point where the job belongs to someone with the right equipment, training, and insurance. A clean tree removal is mostly a sequence of good decisions, and the smartest one is often the first decision to stop when the risk gets wider than the tree.