A homemade pond waterfall works best when the design is driven by water flow, not by the prettiest rocks on the pile. In this guide, I walk through the layout decisions, materials, pump sizing, build sequence, and maintenance habits that turn a backyard pond into something that sounds natural and stays manageable. I’m keeping it practical, because the details that matter most are usually the ones people skip on the first pass.
The best builds balance flow, support, and access
- Start with the spillway width and head height. Those two choices determine the pump, tubing, and overall sound.
- A small DIY pond waterfall usually performs well with a 45-mil EPDM liner, underlayment, a submersible pump, and a mix of flat capstones plus smaller filler stone.
- For many backyard ponds, a pump in the 800 to 2,500 GPH range is realistic, but the real number depends on lift, tubing length, and the width of the fall.
- The most common failures are an unlevel first rock, a pump that is too small, and stonework that rests on unsupported liner.
- Good safety practice matters: call 811 before digging, use a GFCI-protected outdoor outlet, and leave access to the pump so service does not turn into demolition.
The build starts with the spillway, not the stones
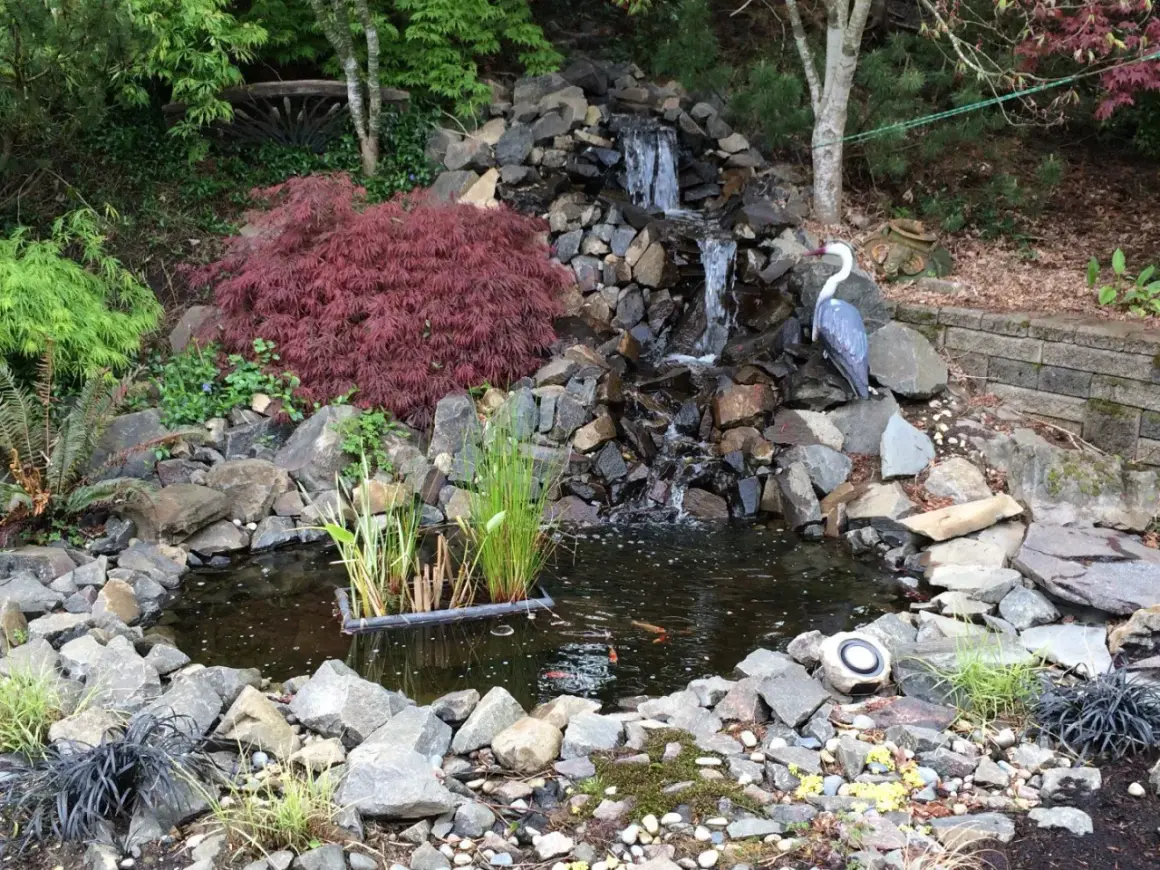
I always begin by deciding where the water will leave the waterfall and how far it will travel before it returns to the pond. That spillway controls the whole build. If it is too wide for the pump, the water will look thin and weak. If it is too narrow, the sound gets harsh and splash-out becomes a maintenance problem. For a modest garden pond, I like to keep the drop compact and the route clean so the pump does not have to fight unnecessary height or sharp turns.
Placement matters almost as much as flow. I want the waterfall where it can be seen from the patio or window, but not directly under heavy leaf drop if I can avoid it. I also want the top edge of the pond level on all sides, because a low edge on one corner can become an overflow path after a storm. Before I dig anything deep, I check for buried utilities, think about local setback or permit rules, and make sure the outlet will be safe and weatherproof. That planning step is dull, but it saves the most expensive mistakes. Once the site is chosen, the next decision is the look of the waterfall itself.
Choose the waterfall shape before you choose the stone
There are a few common ways to build a backyard pond waterfall, and each one changes the feel of the garden. I do not think one style is best for every yard. I choose based on space, maintenance tolerance, and the amount of visual structure the owner wants to see.| Style | Best for | Difficulty | What it looks like | Main drawback |
|---|---|---|---|---|
| Natural rock cascade | Woodland gardens, wildlife ponds, informal landscapes | Medium | Layered, organic, and uneven in a good way | Takes time to stabilize and dry-fit correctly |
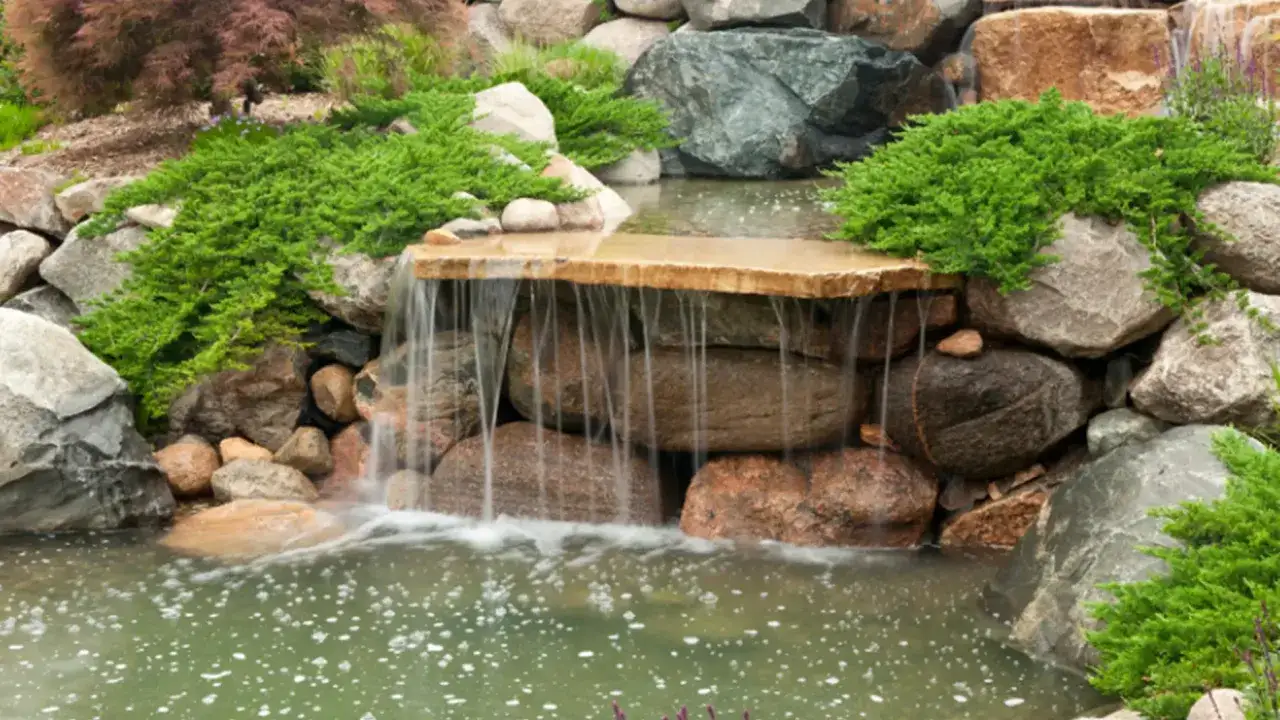
| Formal slab spillway | Patios, modern yards, narrow spaces | Low to medium | A cleaner sheet of water over a defined edge | Can look stiff if the edges are not softened |
| Multi-tier stepped fall | Smaller ponds that need more sound without a tall drop | Medium to high | Several small cascades instead of one large pour | More joints, more tweaking, more places for splash |
If I want the feature to disappear into the landscape, I lean toward natural rock and varied stone sizes. If I want a crisp, controlled look, I pick a flatter spillway with a cleaner edge. The choice is not cosmetic only. It affects how much stone you need, how hard the waterfall is to hide, and how much time you will spend adjusting the flow. With that style decided, the material list becomes much easier to shop for.
Materials that actually hold up outdoors
Good waterfall work is less about exotic products and more about using the right parts in the right places. I prefer durable basics over clever shortcuts. The liner must resist puncture. The pump must handle the real lift, not just the box rating. The stones must support themselves instead of depending on foam to do structural work.
| Component | What I recommend | Why it matters | Typical share of the budget |
|---|---|---|---|
| Liner and underlayment | 45-mil EPDM liner with geotextile underlayment | Gives the pond flexibility and protects against punctures | 20% to 35% |
| Pump and tubing | Submersible pump sized for head height, with flexible PVC or reinforced tubing | Controls the flow, sound, and real-world performance | 20% to 30% |
| Stone | One or two flat capstones, plus mixed fieldstone, river rock, and smaller filler stone | Creates the shape and hides the liner | 30% to 50% |
| Pond-safe foam | Expanding foam made for water features | Helps guide water through gaps and darkens hidden seams | Small, but useful |
| Filter or skimmer | Optional, but smart if the pond has fish or a lot of debris | Reduces clogging and maintenance | Variable |
For a modest U.S. backyard project, I usually think in ranges. A simple build with reused stone can land around $250 to $800. A cleaner custom build often runs $800 to $1,800. Larger, more natural-looking work can easily reach $1,800 to $3,500+, mostly because stone, pump capacity, and finish work get expensive fast. Head height is the vertical distance the pump has to lift the water, and every extra foot of lift reduces effective flow. That is why a pump label alone is never enough. Once the parts are selected, the actual build is straightforward if you work from the ground up.
Build it from the bottom up
I like to dry-fit as much as possible before I commit to any final placement. That means laying out the shape, testing the top fall, and checking that the rocks can sit naturally without twisting the liner. Small mistakes at the beginning tend to become big leaks later, so this is where patience pays off.
- Mark the pond and waterfall footprint. Use a hose or spray paint to outline the basin, the channel to the spillway, and the outer edge of the feature.
- Excavate the pond and the waterfall shelf. Create a stable base for the first rocks and make sure the pond edges are level.
- Install underlayment and liner. Let the liner overlap the highest water line by several inches so splash and settling do not expose the edge.
- Set the pump on a stand. Keep it off the bottom of the pond so it does not pull in sludge, and route the tubing cleanly to the top.
- Build the spillway first. Place the largest flat capstone at the outlet and make sure water has one clear path over it.
- Dry-fit the rest of the stone. I prefer to support the structure with rock contact, not with foam alone. Foam is for shaping the path, not holding up boulders.
- Test the flow before hiding anything. Run the pump and watch where the water escapes, splashes, or disappears behind the stones.
- Adjust, seal, and retest. Add pond-safe foam only where needed, then recheck the sound and the splash pattern.
- Finish with gravel and planting. Use smaller rock to hide the liner edge and soften the transition into the landscape.
If I am building a drop of more than about 12 to 18 inches, I want a small landing shelf or a controlled plunge area so the water does not strike the liner hard. I also like to hear the waterfall from the intended sitting area before I lock everything in. A feature can look right and still sound wrong if the opening is too wide or the water falls from too high. That is why testing comes before the camouflage work is finished. The next section is where most first-time builds go wrong, even when the stonework looks fine.
The mistakes that create leaks, weak flow, and endless adjustments
Most waterfall problems are not mysterious. They come from a few repeat offenders. I see the same mistakes over and over: the pump is undersized, the first stone is not level, or the builder assumes foam can replace proper support. Each one has a fix, but the fix is easier before the water is running.
- The pump is too small for the lift. The waterfall may trickle instead of flowing. I fix that by sizing up the pump or shortening the run.
- The spillway is too wide. Water thins out and loses sound. Narrowing the opening or lowering the width of the pour usually helps.
- Rocks sit on unsupported liner. That can shift when the pond settles. I always build stable contact points and use underlayment beneath the liner.
- Foam is used like mortar. Foam helps direct water, but it should not be the only thing keeping heavy stone in place.
- There is no service access. If the pump is buried under the whole feature, maintenance becomes a teardown job. I leave a hidden but reachable access point every time.
- Splash-out is ignored. Small ponds can lose water quickly in hot weather if the fall throws too much water outside the basin.
When I check a build that is not behaving, I do not start by adding more foam. I start by watching the path of the water. Once the flow is stable, the rest of the system becomes much easier to maintain. And that brings me to the part many people underestimate: the waterfall does not stop being a living part of the garden after installation.
Keep it running through summer heat and winter cold
A pond waterfall is not a one-and-done feature. It needs light but regular attention, especially in the first season when the water level, debris load, and stone placement are still settling. In summer, evaporation and splash-out can lower the pond faster than people expect. In fall, leaves clog the intake and stain the stone. In cold climates, winter strategy matters because freezing water changes the way the system should be run.
My maintenance rhythm is simple:
- In warm weather, I check the water level and clean the intake at least once a week.
- After storms, I clear leaves and twigs before they break down in the pond.
- Every few weeks, I inspect the spillway to make sure the water still tracks where I want it.
- Before freezing temperatures arrive, I decide whether the pump should keep running, be lowered to a safer setting, or be removed and stored indoors, depending on the climate and the equipment instructions.
If fish are part of the pond, I keep the water moving steadily and avoid sudden chemistry changes. A waterfall adds oxygen, but it does not cancel out poor filtration or neglect. The best long-term systems are the ones that stay easy to reach, easy to clean, and easy to visually inspect. That practical mindset is what separates a nice weekend project from a feature that still looks good after a full season outdoors.
The details that make the feature feel finished
Once the water runs correctly, the finishing work is mostly about restraint. I do not try to hide every stone edge. I hide the obvious liner lines, soften the hard transitions, and leave enough structure visible that the waterfall still reads as a deliberate design. A few larger rocks at the base can ground the composition, while smaller stones and low plants make the edge feel like part of the garden instead of a machine sitting in it.
I also pay attention to sound. A broad, thin sheet of water sounds softer and more formal. A narrower, slightly broken flow has more texture and a stronger white-noise effect. Neither is inherently better. What matters is whether the sound suits the yard and the people using it. I will often adjust the sound with nothing more than rock placement and spillway width before I touch the pump again.
If I were advising someone building one from scratch, I would keep three priorities in mind: support the structure first, size the flow realistically, and keep the pump accessible. Get those right and the rest is mostly refinement. That is the difference between a pond feature that looks temporary and one that feels like it belongs in the landscape from day one.