Building a backyard gazebo is one of those projects that changes how a yard feels the moment it is finished. This guide explains how to build a gazebo that sits level, handles weather, and fits the way you actually use outdoor space, from choosing a footprint and foundation to roofing, finishing, and the mistakes that cost the most to fix. I keep the focus on the decisions that matter in the U.S. market: permits, frost depth, materials, and the practical details that separate a solid structure from a pretty liability.
These are the decisions that matter before the first hole is dug
- Check permits, setbacks, HOA rules, and utility locations before you dig.
- Size the footprint to the use case: 10x10 feet for a small seating nook, 12x12 feet for a conversation set, and 12x14 feet or larger for dining.
- For most wood builds, 6x6 posts, galvanized connectors, and a code-appropriate concrete footing are the safer default.
- The foundation and anchoring matter more than the decorative roof trim; that is what keeps the structure square and stable.
- Rough U.S. material costs often land around $2,000-$6,000 for a modest DIY build, with screened or premium versions running higher.
- Plan on at least two people for framing and roof work; one person can measure, but two people can actually move beams safely.
Start with the site, size, and permit questions
I would start by deciding what the gazebo must actually do. A quiet two-chair reading spot, a dining space for six, and a covered hot-tub surround all want different footprints, roof heights, and access paths. A gazebo looks best when it feels intentional, not squeezed into the only empty corner of the yard.
- For a compact retreat, 10x10 feet can work if you keep furniture simple.
- For conversation seating, 12x12 feet gives more breathing room.
- For dining or a grill-adjacent setup, 12x14 or 12x16 feet is usually more comfortable.
- If the ground slopes or drains poorly, fix that first instead of trying to hide the problem with landscaping.
- Check setbacks, easements, HOA rules, and permit triggers before you mark the corners.
- Call 811 a few business days before digging any footings.
I never treat that checklist as overhead; it is the difference between a clean build and a project that has to be moved later. Once the location is settled, the next choice is the structure itself.
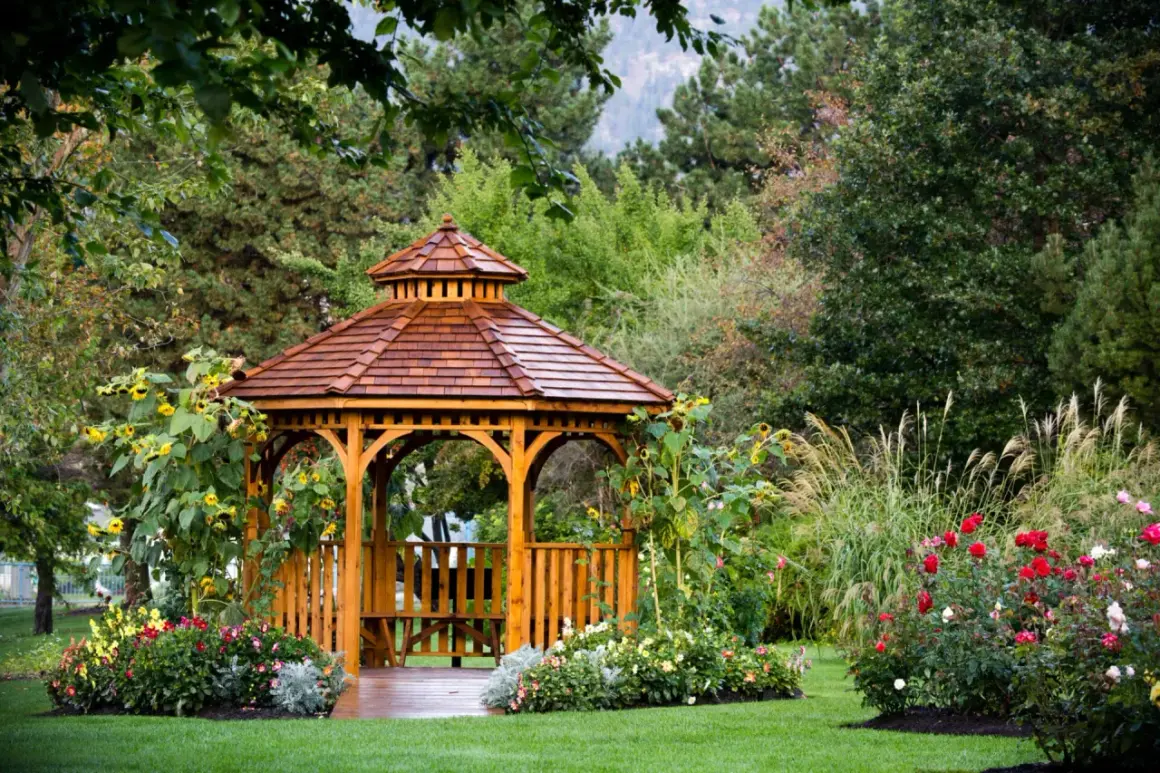
Choose the right style and materials for your climate
For most homeowners, wood is still the easiest path because it cuts cleanly, accepts stain well, and can be repaired without replacing an entire frame. Metal has a slimmer look and less maintenance, while vinyl or composite trims the upkeep but limits how custom the final shape can be. If you want true rain protection, a roofed gazebo is the right move; if you only need shade, a pergola is a different and simpler structure.
| Option | Why it works | Tradeoffs | Best for |
|---|---|---|---|
| Wood frame | Easy to cut, customize, stain, and repair | Needs sealing and periodic maintenance | Most backyard DIY builds |
| Powder-coated metal | Low maintenance, slim profile, good weather resistance | Harder to modify; connections matter | Homeowners who want a cleaner, modern look |
| Vinyl/composite | Simple cleaning and consistent color | Higher upfront cost, fewer structural options | Low-maintenance yards |
| Kit build | Clear parts list and faster assembly | Less design freedom; still needs a proper base | People who want a guided project |
If I were building a permanent gazebo for a mixed-climate backyard, I would lean toward a wood frame with galvanized hardware and a roof covering that matches the house. The roof shape matters too: a steeper hip roof sheds rain and snow better than a shallow cap, and a simple shape is usually easier to keep watertight. After that, the foundation decides whether the gazebo stays quiet and solid or starts moving.
Build a foundation that stays square and dry
For a permanent gazebo, I would never rely on bare soil alone. Even a modest roof adds enough weight and wind exposure that I want footings, piers, or a code-approved slab under it, with the posts anchored above the concrete so wood never rests in standing water. If you are building on an existing patio or deck, do not assume it can carry the load just because it is flat; the load path still needs to make sense.| Foundation option | Why it works | Tradeoffs | Best use |
|---|---|---|---|
| Concrete piers or footings | Strong, permanent, and easy to anchor correctly | More digging and layout work | Most wood gazebos and exposed sites |
| Existing slab | Fast and clean if the slab is suitable | Requires verified thickness and approved anchors | Patios with a known structural base |
| Paver pad or light base | Simple and flexible | Not ideal for heavy roofs or strong wind exposure | Temporary or lightweight builds |
When I lay one out, I use batter boards and string lines. Batter boards are temporary supports set outside the footprint so the layout can be adjusted without moving stakes every time a corner changes. After that, I check the diagonals until the footprint is square, then dig to the required depth.
- Mark the corners and establish reference strings.
- Measure both diagonals; they should match.
- Dig footings below local frost depth where required.
- Pour concrete and set post bases or anchors in the correct positions.
- Let the concrete cure before loading the frame.
If the site slopes, step the footing heights rather than forcing the whole structure to follow the grade. A finished floor is optional, but if you want one, treat it like a small deck: frame it, anchor it, and keep drainage below it. With the base locked in, the frame is where the project starts to look like a real room.
Frame the structure one stage at a time
I build the shell in this order: posts, beams, braces, then rafters. A helper is not optional once the beams come off the ground, and I would use a level on every major member instead of trusting the eye. This is the point where a gazebo stops being a set of parts and starts behaving like a structure.
- Set the posts plumb and brace them temporarily.
- Install the perimeter beams or ring beam and check level.
- Add knee braces or diagonal bracing to prevent racking, which is the side-to-side wobble that appears when a frame is stressed.
- Fit rafters with a template so each one matches.
- Use structural screws, bolts, or approved connectors at load-bearing joints, not basic interior fasteners.
- Recheck the diagonals before tightening everything permanently.
If you are working from a kit, the same rule applies: dry-fit first, tighten later. A small twist locked in at the base tends to show up most clearly at the roof, where it becomes much harder to correct. In my experience, the frame goes faster when I slow down on the first day and refuse to “fix it later” with trim.
After the shell is sound, the roof and finishes become worth the effort.
Roof, screens, and finish choices that change the experience
The roof is where a gazebo stops being a frame and starts feeling like a place people will actually use. In a windy or snowy area, I care less about decoration and more about shape, slope, and connection strength, because uplift can try to pull the roof away from the structure. A vented ridge or cap helps hot air escape and reduces trapped moisture, which matters more than most homeowners expect.
| Roof covering | Why it works | Tradeoffs |
|---|---|---|
| Asphalt shingles | Budget-friendly, easy to source, familiar to most installers | Heavier than some alternatives |
| Metal panels | Sheds rain and snow quickly, light for its strength | Can be louder in storms |
| Cedar shake or cedar shingle | Warm, natural look with strong visual character | More maintenance and a higher price tag |
Screen walls, half-rails, built-in benches, and curtains all change how the space works day to day. Screens are excellent where insects are a problem, while half-rails keep the structure open and lighter visually. If you want lighting or a ceiling fan, I would plan for that before the roof is closed and let a licensed electrician handle the wiring.
Seal cut ends, prime exposed grain, and choose finishes that can be renewed without stripping the whole structure. Once those choices are clear, the remaining question is budget and the mistakes that waste it.
Budget, timing, and the mistakes I would avoid
For a DIY wood gazebo in the U.S., a realistic materials budget often starts around $2,000-$6,000 for a modest build, climbs to $6,000-$12,000 for a screened or more elaborate version, and can go well past $12,000 for premium roofing, trim, and electrical work. A simple project may take a long weekend with help, but a custom build usually stretches across several days plus concrete curing time.
| Build type | Typical materials | Time | Notes |
|---|---|---|---|
| Basic DIY wood gazebo | $2,000-$6,000 | 3-7 working days plus curing time | Best for a simple footprint and standard roof |
| Mid-size screened build | $6,000-$12,000 | One to two weekends, often longer | Extra cost goes into screening, trim, and hardware |
| Custom or premium build | $12,000-$25,000+ | Several weekends or contractor-managed | Complex roofs, better finishes, or electrical work drive the price up |
- Skipping permit, setback, or utility checks.
- Building on a spot that holds water after rain.
- Using undersized posts or weak hardware to save money upfront.
- Setting wood directly in soil or on unanchored blocks.
- Choosing fasteners that are not compatible with outdoor, treated lumber.
- Making the footprint too tight for chairs, movement, and cleaning.
The common theme is simple: the cheapest shortcut usually shows up later as wobble, rot, leaks, or a layout that never feels comfortable. When those traps are avoided, the gazebo becomes easier to live with for years.
The maintenance details that keep a gazebo useful year after year
A gazebo lasts when maintenance stays boring. I would inspect the roof after storms, keep mulch and sprinklers away from the base, wash off leaves and pollen before they trap moisture, and refresh stain or paint on a schedule that matches the sun exposure in your yard. The goal is not perfection; it is preventing small problems from becoming structural ones.
- Check anchors, bolts, and connectors every season.
- Keep post bases visible and above grade.
- Touch up rust spots before they spread.
- Recoat wood sooner on south- and west-facing sides.
I would rather see a simpler gazebo built well than a larger one built loosely. If you keep the structure dry, square, and properly anchored, it becomes one of the most useful pieces in the yard instead of just another outdoor object to maintain.