A stubborn screw can stop a cabinet repair, delay a shelf install, or turn a small storage project into a damaged surface and a bigger mess. When people ask how to remove stuck screw, the answer depends on whether the fastener is rusted, stripped, or simply bound up in swollen wood. This guide walks through the least destructive fixes first, then the stronger methods for the cases that refuse to budge.
The safest approach is to loosen the bond first, then escalate only if the screw still will not move
- Start with the correct bit, firm downward pressure, and a clean screw head before reaching for power tools.
- If corrosion is involved, penetrating oil and a few light taps often do more than brute force.
- Manual impact drivers, left-hand drill bits, and screw extractors solve different kinds of failure, so match the tool to the damage.
- Finished cabinets and storage furniture need surface protection first, or the fix can create a bigger repair than the screw itself.
- Drill out the head only when the screw is beyond salvage and you are ready to repair the hole afterward.
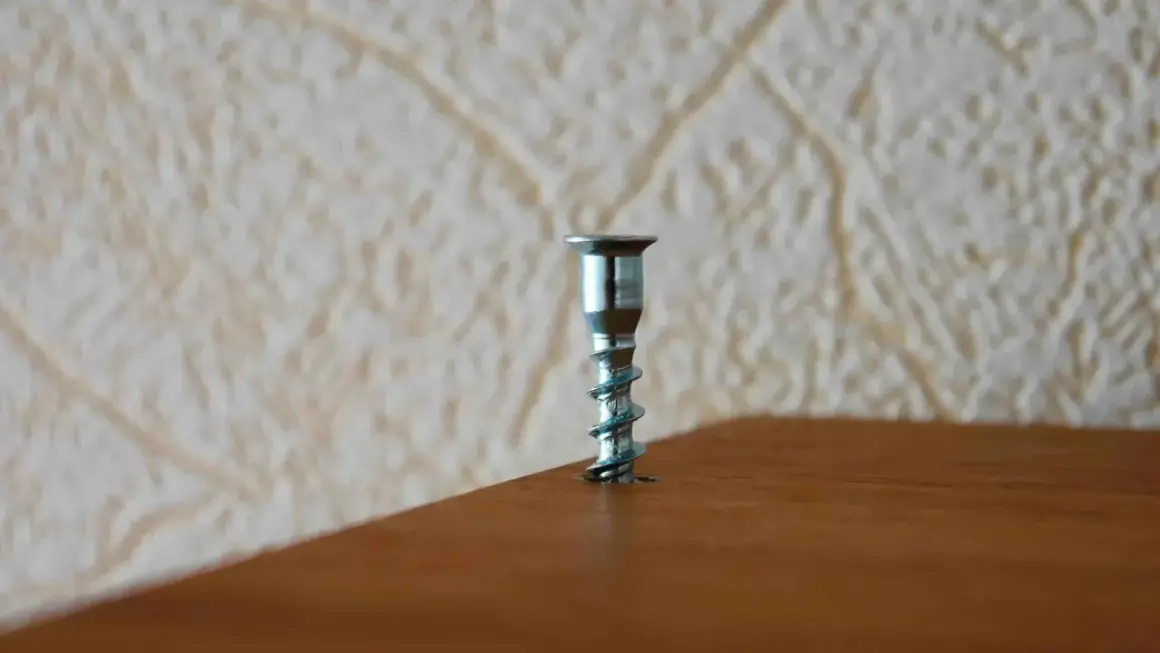
Why screws seize in wood and storage hardware
I always start by asking why the screw is stuck, because the cause tells me which technique has the best chance of working. In carpentry and storage projects, the usual culprits are rust, stripped recesses, over-tightening, swollen wood, and cheap hardware that has been driven too hard. A screw in a garage shelf bracket behaves differently from a cabinet hinge screw in painted maple, and a particleboard closet system behaves differently again.
Rust is the obvious one on metal brackets, outdoor storage units, and anything that has seen moisture. In wood, the problem is often friction rather than corrosion: the shank binds because the pilot hole was too small, the screw was over-driven, or the surrounding fibers have swollen. In MDF and particleboard, the fibers can crush and grip the threads like glue. The bit also matters more than many people admit; a slightly wrong Phillips or square-drive bit cam-outs fast, and once the recess rounds over, every later attempt becomes harder.
Once you know the cause, the first move becomes much more deliberate. That is the difference between a clean removal and a hole that needs full repair later.
The first moves that free most stubborn screws
Before I reach for extractors, I try the simplest fixes that preserve the surrounding material. In my experience, these solve a surprising share of stuck screws in cabinets, shelves, and drawer hardware.
- Match the bit exactly. Phillips, square, and Torx all look “close enough” until they are not. If the bit rocks in the recess, switch sizes before you force anything.
- Clear the head. Paint, dust, rust flakes, or compressed wood fibers keep the driver from seating fully. A pick, awl, or utility knife can clean the recess in seconds.
- Use penetrating oil when metal is involved. On rusted screws, a small amount of penetrant and a wait of 10 to 30 minutes is usually worth it. Severe corrosion may need longer, even overnight.
- Tap before turning. A few light hammer taps on the screw head can break the corrosion bond and help the penetrant work its way in.
- Turn slowly and keep pressure steady. Fast, jerky force strips heads. A slow clockwise nudge to test the bite, then a controlled counterclockwise turn, is safer than muscle.
- Use heat carefully. A soldering iron or heat gun can help on metal hardware, but I avoid open flame near finished wood, glue joints, or stored solvents.
If the screw starts to move, do not rush it. Back it out a quarter turn, drive it in slightly, then back it out again. That little oscillation helps clear rust, grit, and compressed fibers. If it still will not move after a few honest attempts, the shape of the damage determines the next tool.
Match the method to the damage you have
Not every stuck screw needs the same rescue. I use the method that matches the failure point, not the one that sounds strongest.
| What you are dealing with | Best next move | Why it works | Main caution |
|---|---|---|---|
| Head is intact but the screw will not turn | Penetrating oil, tapping, then a manual screwdriver or impact driver | Breaks the bond before adding torque | Aggressive hammering can damage finished surfaces |
| Recess is slightly rounded | Fresh bit, rubber band only as a last try, then impact driver | Adds grip where the bit has started to slip | Rubber band tricks are for light stripping, not seized hardware |
| Head is badly stripped but still accessible | Cut a new slot with a rotary tool or use locking pliers if the head is proud | Creates a fresh grip point or external bite | Easy to scar the surrounding wood or veneer |
| Screw is seized but the head is still centered | Left-hand drill bit | The reverse-cut bit can catch and back the screw out while drilling | Keep the drill square or the bit will wander |
| Head is destroyed and nothing else has worked | Screw extractor | Reverse threads bite into the drilled hole and pull the screw out | Extractors can snap if forced in hard, especially on tough fasteners |
| Fastener is beyond saving | Drill the head off and remove the remaining shank separately | Lets you free the hardware and deal with the stump afterward | Requires repair work on the hole after removal |
For cabinet and storage work, I usually prefer the least invasive option that still has a realistic chance of success. If the screw sits in a visible face frame, cutting a new slot is often less ugly than oversizing the hole with a drill. If the screw is deep in a bracket or hidden behind hardware, a left-hand bit or extractor is often cleaner. The trick is not to “win” quickly; it is to get the screw out without turning the surrounding repair into a second job.
The step-by-step sequence I trust on real jobs
When I am working through a stubborn screw in wood or storage hardware, I use the same sequence most of the time. It saves time because each step is a genuine escalation, not random guesswork.
- Protect the surface. On finished cabinets or painted shelving, I tape the area around the screw with painter’s tape before I start. That small step prevents slips from becoming visible damage.
- Clean and inspect the head. If the recess is packed with paint, dust, or corrosion, I clear it out first. I also check whether I am dealing with Phillips, square-drive, Torx, or a stripped mess that only resembles a recess.
- Seat the right bit with pressure. I use a bit that fits snugly and drive downward firmly before turning. A loose fit is usually the start of the problem, not the solution.
- Try a manual turn before power. A hand screwdriver gives better feel than a drill. If the screw moves even slightly, I work it back and forth until it comes free.
- Add shock or penetrant if needed. For metal or rusted fasteners, I use penetrating oil and a few light taps, then try again after a short wait.
- Use an impact driver when the head is still serviceable. This is one of the best tools for stubborn wood screws because the downward shock keeps the bit seated while the screw turns. It is especially useful on old cabinet hardware that has cammed out but is not yet destroyed.
- Escalate only once. If the screw is stripped, I move to a cut slot, a left-hand bit, or an extractor. I do not bounce between three methods at once; that usually enlarges the problem.
That sequence is deliberate. I want the screw out with the smallest possible hole, the least torn finish, and the fewest broken parts left behind. Once the head is gone or the extractor is biting, the repair becomes a different task, so I treat that point as a turning point, not just another try.
Cabinet and storage-specific cases that change the approach
Carpentry and storage projects bring a few special cases that are easy to miss if you are used to working on open metal fasteners. The material around the screw matters as much as the screw itself.
Finished cabinets and veneer
On cabinet doors, face frames, and veneered panels, I avoid anything that can skid across the surface. A screw extractor is useful here, but only if the bit is centered cleanly. If the screw is only lightly damaged, I would rather cut a neat slot than let a drill wander and chew through the finish.
Particleboard and MDF
Storage furniture often uses composite board, and those materials do not forgive repeated abuse. If the screw pulls out the fibers, keep going in the same hole and the hole becomes oversized very quickly. In these cases, I stop early, inspect the hole, and decide whether a dowel-and-glue repair or a relocated screw is the better fix.
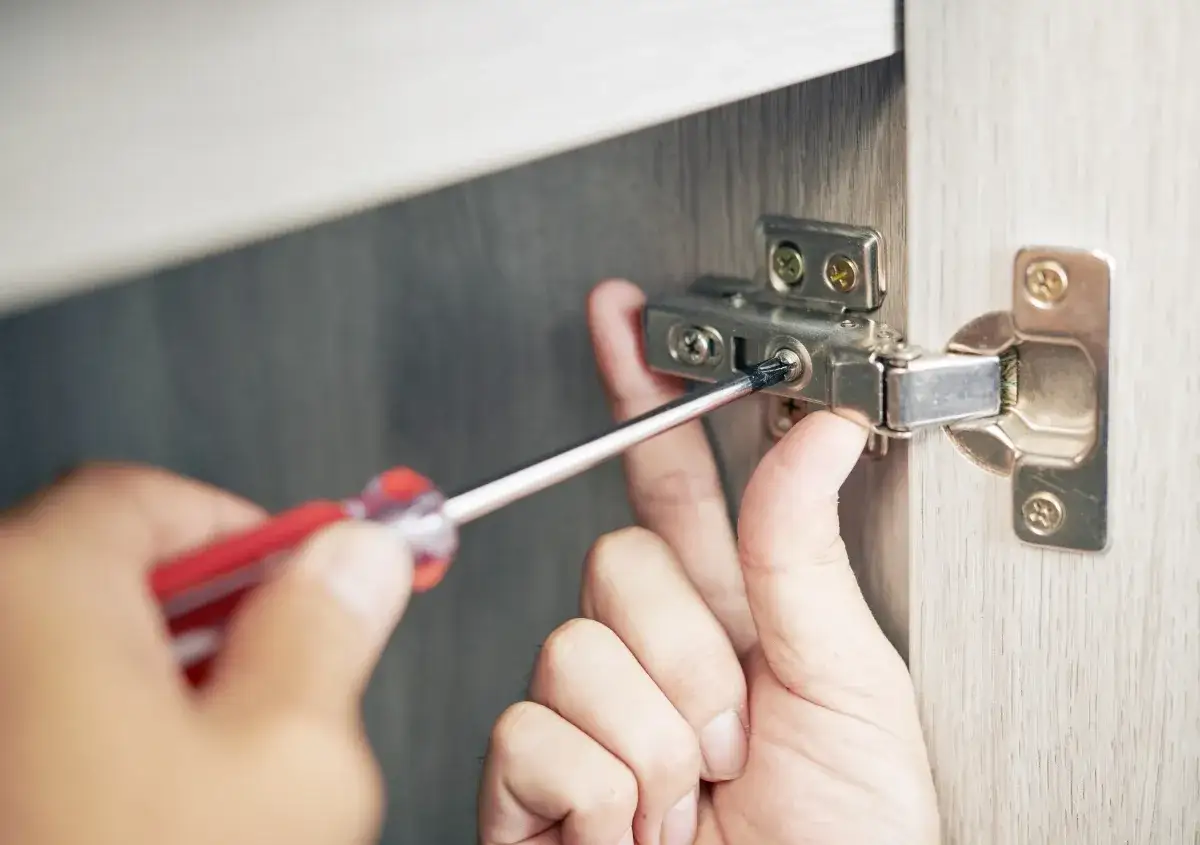
Hinges, drawer slides, and brackets
Hardware screws in hinges and drawer slides are usually small but critical. If one is stuck, I remove the load from the moving part first. A cabinet door that is hanging on a seized hinge screw puts side pressure on the fastener, which makes removal harder and increases the chance of stripping the head further.
Read Also: Batter Boards - Essential for a Perfect Layout Every Time
Outdoor and garage storage
Rust changes everything. For shelves, racks, and garage cabinets, I expect corrosion to have locked the threads into the bracket or insert. Penetrating oil and tapping become much more useful here, and heat can help if the hardware is metal and the surrounding material can tolerate it. I still avoid open flame near wood shelving or anything that has finish, adhesive, or stored chemicals nearby.
These are the situations where patience pays. A few minutes spent identifying the material and the load on the part usually saves an hour of patching later.
When drilling out the head is the right call
There is a point where a screw is no longer worth trying to “save.” If the recess is gone, the head is mushrooming, the extractor keeps slipping, or the screw has snapped flush with the surface, drilling out the head is often the cleanest path forward.
My approach is simple. I center the bit carefully, start with a size that removes the head without oversizing the surrounding hole, and stop as soon as the head separates. After that, the remaining shank is usually much easier to remove with locking pliers if any of it is exposed. If it is broken below the surface, I treat it like a repair job instead of a removal job.
That repair might mean a hardwood dowel and glue in a load-bearing cabinet part, or wood filler in a low-stress area. On drawer slides and hinges, I often prefer moving the screw location slightly rather than trusting a weak patched hole. A half-inch shift can be the difference between a lasting fix and a repeat failure.
Drilling is not the enemy. Uncontrolled drilling is. If you are already at the point where the screw is beyond rescue, a clean, intentional drill-out is better than making the surrounding wood look like it lost a fight.
How to keep the next screw moving freely
Once the screw is out, I want the next one to behave better than the last. A little prevention is easier than a future extraction.
- Drill the right pilot hole. In hardwood and dense plywood, the pilot hole should be sized for the screw and the material, not guessed.
- Use the right screw type for the job. In the U.S., Torx and square-drive often hold up better than Phillips because they resist cam-out.
- Lubricate the threads lightly when appropriate. A touch of paste wax or dry soap on wood-screw threads reduces friction. I do this sparingly and only when it suits the application.
- Stop when the head seats. Over-tightening is one of the fastest ways to bury a screw, strip the recess, or crush fibers in particleboard.
- Keep fasteners dry in storage areas. Garage and basement hardware lasts longer when the screws and brackets are not sitting in damp air.
- Use fresh driver bits. Worn bits are cheap to replace and expensive to ignore.
My practical rule is simple: if a screw is important enough to remove later, it is important enough to install correctly now. That mindset saves cabinet faces, shelf brackets, and a lot of unnecessary frustration, which is usually the real damage behind a stuck fastener.