I treat basement storage as an environment problem first and an organization problem second. The best basement storage ideas are the ones that survive moisture, keep heavy items reachable, and make it obvious what belongs where. In this article, I focus on the practical side: how to judge the room, which storage systems hold up, where carpentry adds real value, and what I would never leave in a below-grade space.
The safest basement setup is dry, visible, and easy to service
- Check humidity first; aim for 30% to 50% relative humidity and treat anything above 60% as a warning sign.
- Use steel, resin, or sealed plywood before you rely on cardboard, fabric, or finish-free wood.
- Keep stored items off the floor with shelves, pallets, or tote racks so moisture cannot migrate upward.
- Use carpentry for awkward areas like the under-stair void, not for every wall in the room.
- Label bins by category and date so the basement stays useful after the first cleanup.
Start with moisture, access, and load before you buy a single shelf
I would never start with bins. I start with the basement itself: how dry it stays after rain, how easy it is to reach the back wall, and how much weight the floor and framing can handle. The EPA recommends keeping indoor humidity between 30% and 50% when possible, and below 60% at minimum; a small hygrometer usually costs about $10 to $50, which is about the cheapest insurance you can buy for a storage room. The U.S. Department of Energy also notes that basements are especially prone to water intrusion, humidity, and mold, so if the room smells damp or shows condensation, storage is not the first fix.
When I inspect a basement, I look for efflorescence, the white powdery residue that tells me moisture is moving through concrete or block, along with rust on fasteners, swollen wood, and any floor spots that change after a storm. I also map the service areas around the furnace, water heater, electrical panel, and sump pump before I commit a wall to storage. A basement can be very useful and still need open access; if you block a shutoff valve or a filter door, the room may look organized right until the day it needs maintenance.
- Check the space after heavy rain, not only on a dry day.
- Seal obvious water entry points first, then add storage.
- Keep a clear lane to mechanical equipment and electrical access.
- Decide which items can tolerate dust and which cannot tolerate moisture at all.
Once the room is stable enough for storage, the next decision is which hardware gives you the best mix of durability, visibility, and cost.
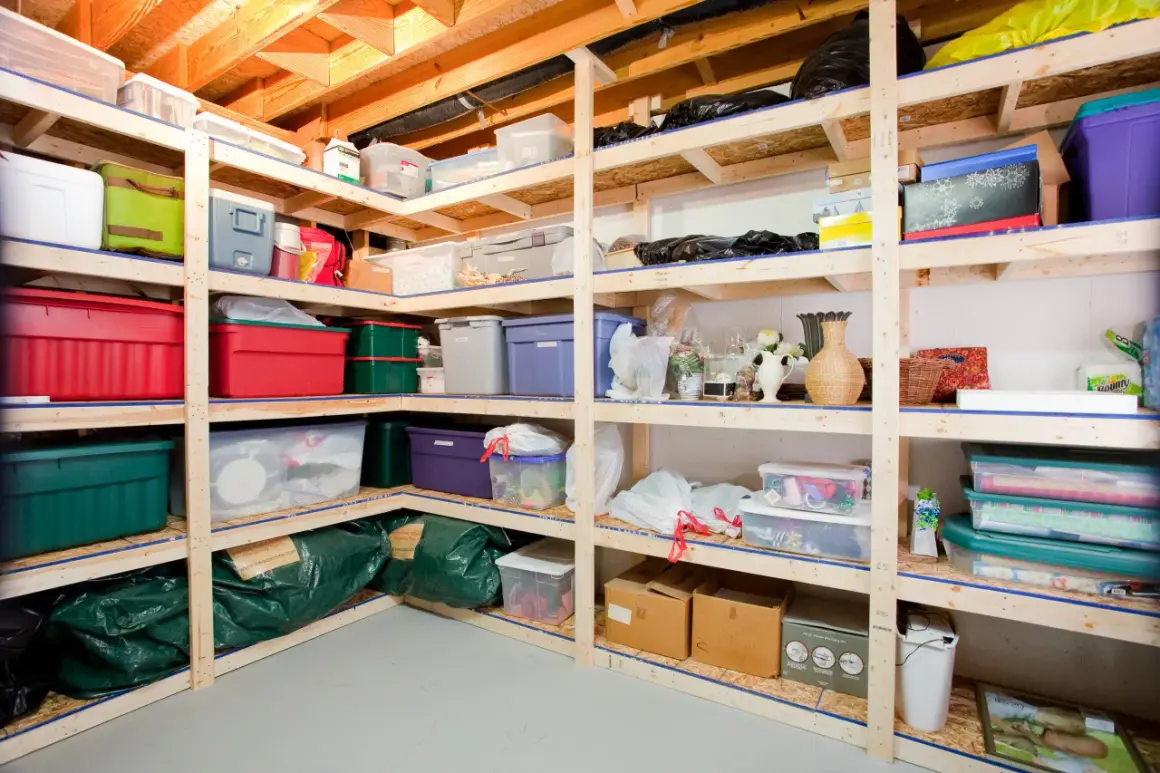
The storage systems that hold up best below grade
In a basement, I prefer storage that is open, elevated, and easy to wipe down. Cardboard is the first thing I eliminate, because it absorbs moisture, collapses under weight, and hides whatever gets pushed to the back. The table below is the way I compare the most useful options in real houses.
| Storage type | Best for | Why it works | Trade-offs | Typical U.S. cost |
|---|---|---|---|---|
| Powder-coated steel shelving | Bulk bins, tools, holiday decor | Strong, open, and easy to clean | Can rust if the basement stays damp | $60 to $250 per unit |
| Resin or plastic shelving and cabinets | Lighter household goods, detergents, paper supplies | Moisture-resistant and easy to wipe down | Lower load capacity, can flex under heavy weight | $120 to $400 |
| DIY plywood shelves | Custom widths, paint, craft supplies, shop overflow | Inexpensive and easy to size to the room | Needs a dry environment and a sealed finish | $40 to $150 in materials |
| Overhead rack | Light, bulky seasonal items | Frees up floor space immediately | Must be mounted correctly to joists and left accessible | $100 to $300 |
| Clear lidded totes on pallets | Seasonal and mixed contents | Keeps items off the floor and easy to label | Contents still need sorting and discipline | $8 to $25 per tote |
| Rolling bins or drawers | Frequently accessed items | Easy to pull out and move | Wheels need a level floor and occasional cleaning | $20 to $80 per bin |
My rule is simple: if the basement ever gets damp, the first layer of storage should not depend on cardboard, fabric, or unfinished wood. Wire shelving is fine for bulky bins, but I still prefer solid shelves for small parts because dust and debris do not fall through them. Once the basic hardware is chosen, the highest-value improvements usually come from carpentry.
That is where the room stops feeling temporary and starts feeling intentional.
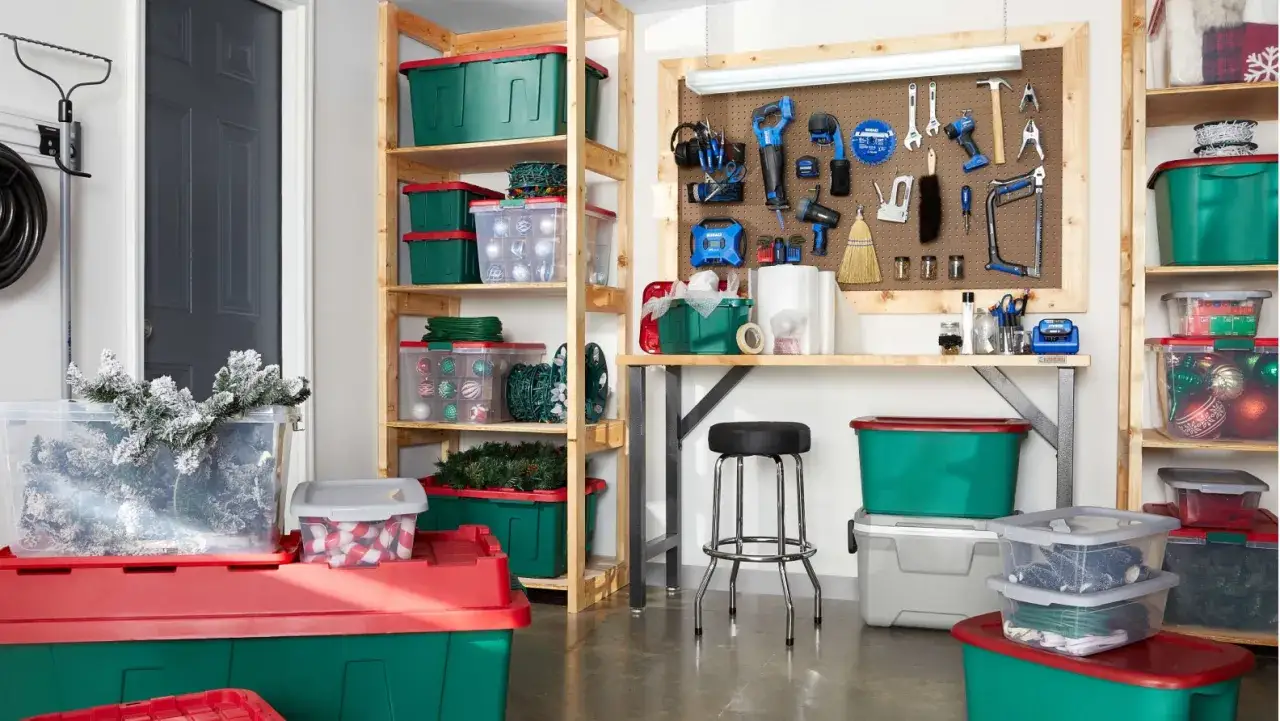
Use carpentry to claim the awkward spaces
The best built-ins in a basement are not decorative. They are the pieces that turn dead corners, stair voids, and long wall spans into storage that fits the house instead of fighting it. If I am building from scratch, I think in terms of fixed zones: an under-stair cabinet for long, awkward items, a wall system for adjustable shelves, and a shallow landing zone near the entrance for things that move in and out every week.
Under-stair cabinets make dead space useful
The underside of the stairs is usually wasted volume, but it is perfect for broom-length items, gift wrap, luggage, or seasonal overflow. I like doors or drawers there more than open cubbies, because the shape is irregular and a door hides visual clutter. If you are doing the carpentry yourself, keep the framing simple and use plywood fronts; fancy trim is optional, but square, accessible compartments matter.
French cleats give you flexibility
A French cleat is a pair of matching beveled strips that lock together so shelves, tool boards, and small cabinets can be moved later. I like them in basements because storage needs change constantly; today it is holiday bins, next year it is a small workshop. One cleated wall can carry everything from shallow bins to hanging tool storage without locking you into a permanent layout.
Read Also: Hang Shelves Right - Avoid Sagging & Falls
Use the right wood in contact with masonry
If wood touches concrete or block, I use pressure-treated lumber or a separation detail that keeps ordinary wood away from direct contact. A sill plate, the bottom board against the masonry, is the piece I care about most because it sees incidental moisture first. For the same reason, I avoid unsealed MDF below grade unless the room is very well controlled; it is too easy for moisture to swell the edges and make doors or shelves look tired long before they should be.
- Shallow pull-out drawers work well for small parts and seasonal hardware.
- A built-in bench with lift-up lids can hide light bulk items near the entrance.
- Wall cleats or slat panels are ideal for hand tools and extension cords.
- Fixed shelves sized to the actual bins you own are better than generic dimensions.
Once the room has a few smart built-ins, the remaining challenge is discipline: deciding what goes in each zone so the system does not collapse back into a pile.
Sort the basement into zones instead of piling everything together
I get the best results when I divide the basement by frequency of use, not by category alone. The items you touch every month need a very different home from the things you open once a year. If you mix them, the room may look full but function badly.
- Everyday access - vacuum bags, batteries, light bulbs, extension cords, and anything I grab without planning.
- Seasonal storage - holiday decor, patio cushions, sports gear, and luggage.
- Long-term reserve - paper towels, bottled water, spare fixtures, or building materials that stay dry.
- Workshop and repair - screws, fasteners, hand tools, caulk, and consumables that need fast access.
- Do-not-store - anything sensitive to humidity, pests, or temperature swings.
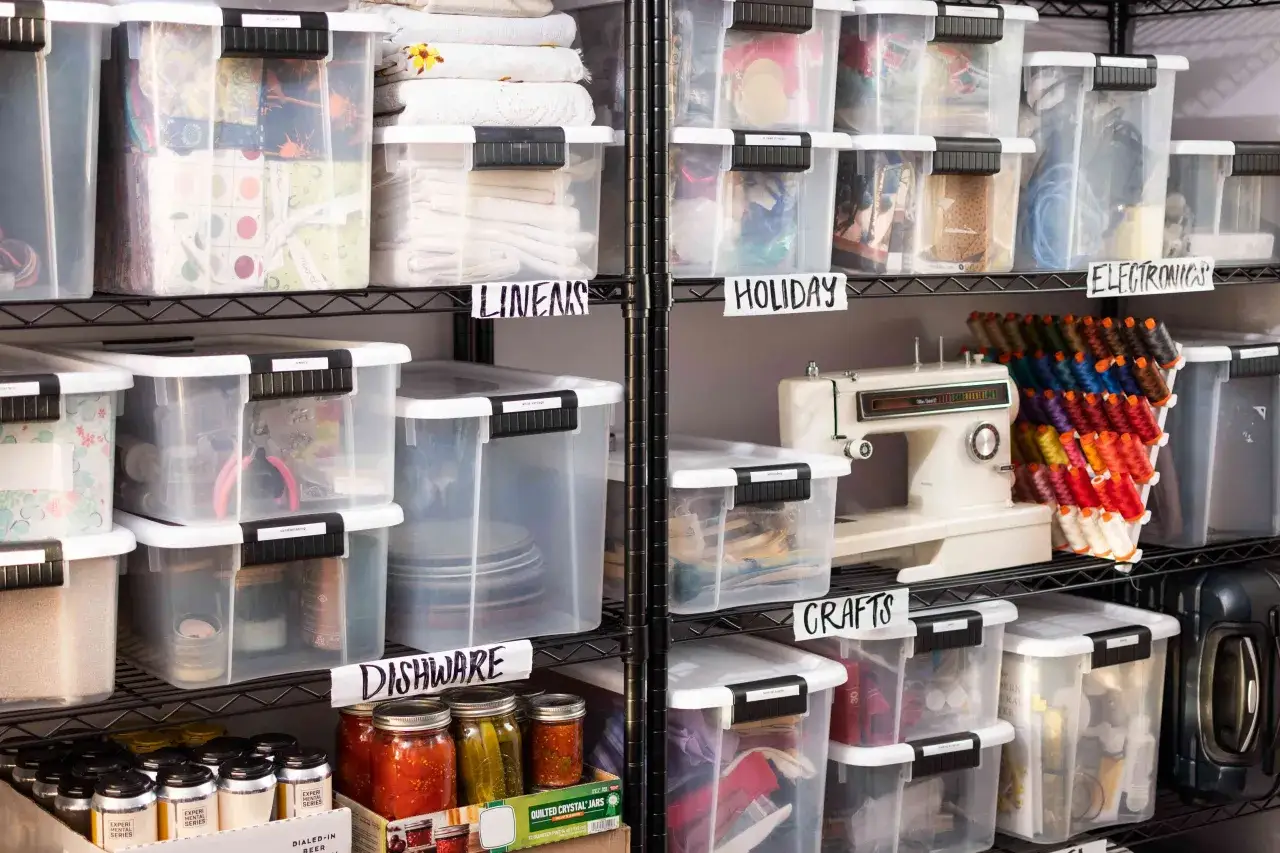
I also place the heaviest bins at knee height or lower. That is easier on the back, and it reduces the chance of stacked boxes sliding off a tall shelf. Labeling matters more than people think: I put the category on the front and top of every tote, and I date seasonal bins so I can tell at a glance what has been untouched for years. If a bin has no label, it is not storage; it is a guessing game.
That zoning only works if you are equally strict about what should never live downstairs in the first place.
Know what belongs downstairs and what should stay out
The biggest storage mistake I see is treating the basement like a universal overflow closet. It is not. A basement is a good home for durable, replaceable items; it is a poor home for anything that hates moisture, needs stable temperature, or can become dangerous if it leaks, corrodes, or attracts pests.
| Item type | Why I keep it out | Better option |
|---|---|---|
| Cardboard boxes | They absorb moisture and invite pests | Clear lidded totes or sealed plastic bins |
| Photo albums and paper archives | They curl, stain, and mold quickly in damp air | Conditioned closet storage or archival boxes in a dry room |
| Electronics and batteries | Moisture and temperature swings shorten life and can corrode contacts | Interior closet or another conditioned space |
| Unsealed fabric and soft goods | They pick up mildew, odor, and pests | Vacuum-sealed bins in a dry room |
| Paint, solvents, gasoline, and propane | They create safety and air-quality risks | Code-appropriate storage in a proper utility area |
| Food in loose packaging | It attracts pests and deteriorates faster in humid air | Sealed pantry storage or dedicated cool storage |
There are exceptions, but they should be deliberate. A sealed produce nook can make sense for potatoes, squash, or onions if the basement is cool, dark, and ventilated; that is closer to a root-cellar setup than ordinary storage. The same is true for a wine rack or workshop chemical cabinet: both can work, but only if the environment is controlled and the contents are appropriate for it. If the room cannot stay in the 30% to 50% humidity range, I would not trust it with anything irreplaceable.
That is the point where a final, practical layout matters more than theory.
The basement layout I would build first in a normal U.S. house
If I were starting from zero, I would build the room in layers instead of all at once. That keeps the budget sensible and lets the storage evolve with the house.
- Fix the moisture problem first. I would start with a hygrometer, a dehumidifier if needed, and whatever drainage, gutter, or sealing work the room actually needs.
- Install one long wall of sturdy shelving. Heavy-duty steel works well for the first pass because it is durable, easy to clean, and forgiving.
- Add one custom carpentry zone. Under-stair storage or a shallow built-in cabinet usually gives the biggest return per square foot.
- Use overhead or high shelving only for light, seasonal items. That preserves floor space without turning the basement into a climbing zone.
- Keep a clear aisle and a clear service path. No storage system is worth blocking mechanical access or creating a maze.
- Reset the system every season. I like a quick spring and fall review so old bins do not quietly become permanent clutter.
On a modest DIY budget in the U.S., I would expect a functional setup to land somewhere around $250 to $900 in materials, depending on how much carpentry you do yourself and how much of the hardware you buy new. Custom cabinet work can move that number up quickly, but it also solves the awkward corners that off-the-shelf products never quite fit. The best system is the one you can maintain after the first weekend of organizing is over.
When the basement stays dry, the shelving is sturdy, and every zone has a purpose, storage stops feeling like overflow and starts working like part of the house.