A careful dishwasher drain hose installation is less about the hose itself and more about controlling water, height, and backflow. In a typical U.S. kitchen, the drain line has to rise high under the counter, stay secured, and land at the sink drain or disposer in a way that matches both the appliance manual and local plumbing rules. Get those details right and the machine drains quietly; get them wrong and you invite standing water, odors, or leaks.
The drain connection works only when routing, height, and support are all right
- The hose should rise high under the countertop so wastewater cannot siphon back into the tub.
- Depending on the setup, I use either a high loop or an air gap, but I always defer to the manual and local code.
- A garbage disposal connection will not drain properly if the knockout plug is still in place.
- Kinks, loose clamps, and a hose that hangs too low are the most common causes of trouble.
- I always run a full drain test before I slide the dishwasher back into place.
What the drain hose has to accomplish
The hose is doing three jobs at once: moving wastewater out, blocking dirty water from coming back in, and staying secure enough that vibration does not loosen the connection over time. That is why I treat the drain line as part of the plumbing system, not just a piece of appliance tubing.
In the U.S., the dishwasher waste line usually connects to one of three places: the sink tailpiece, the dishwasher inlet on a garbage disposal, or an air break arrangement tied into the sink drain. The exact choice depends on the kitchen layout and the local rules that apply to that installation. The practical goal is the same in every case: the hose should rise first, then drain, so gravity works with you instead of against you.| Connection point | Best when | What I watch for |
|---|---|---|
| Sink tailpiece | The sink has a dishwasher branch fitting already installed | Use the proper branch, not a makeshift tee, and keep the clamp tight |
| Garbage disposal inlet | A disposer is installed under the sink | Remove the knockout plug before attaching the hose |
| Air break or air gap path | Local code or the appliance manual calls for extra backflow protection | Follow the part’s orientation and keep the outlet hose clear |
Once you know which path the water will take, the prep work becomes much easier. That is where I go next.
How I prep the cabinet before making any connections
I start with the basics: power off, water off, and enough light to see the entire route under the sink. If the dishwasher sits tight against the cabinet, I give myself enough space to reach the drain outlet and to route the hose without forcing it around sharp edges.
- I switch off the breaker or unplug the dishwasher if the outlet is accessible.
- I shut off the water supply, even though the drain hose is the part I am working on.
- I place a towel and a shallow pan under the sink area in case the old hose spills water.
- I check the manual for the allowed hose route, the maximum length, and any required loop height.
- I identify the sink connection before I disconnect anything so I am not guessing later.
This is also the moment when I measure the cabinet space and make sure the hose will not rub on the dishwasher frame, the disposal housing, or any unfinished metal edge. A hose that looks fine in open air can wear through surprisingly fast if it is pinched behind a cabinet wall. Once the space is ready, the actual connection is straightforward.
How I connect the hose step by step
When I install the drain line, I work from the dishwasher outward to the sink, because that keeps the route clear and prevents me from trapping the hose behind other plumbing.
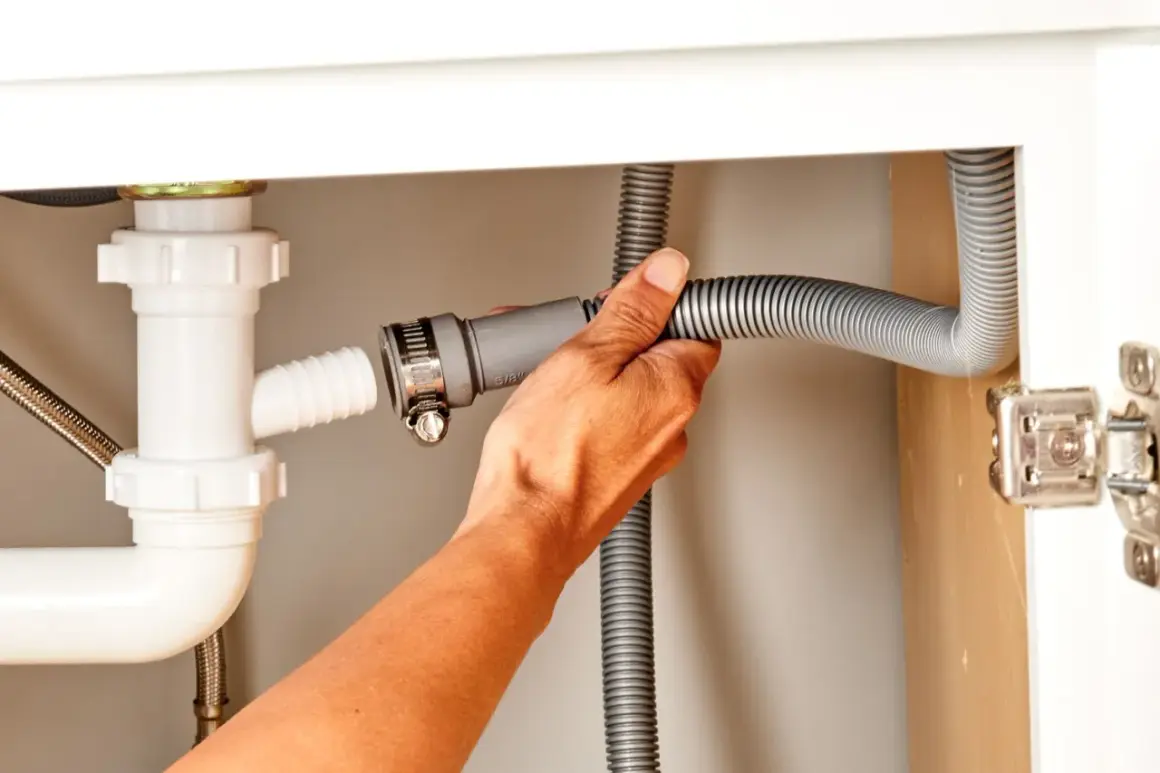
- Attach the hose to the dishwasher outlet and secure it with the clamp supplied by the manufacturer.
- Route the hose toward the sink opening without sharp bends, twists, or a low spot that can collect water.
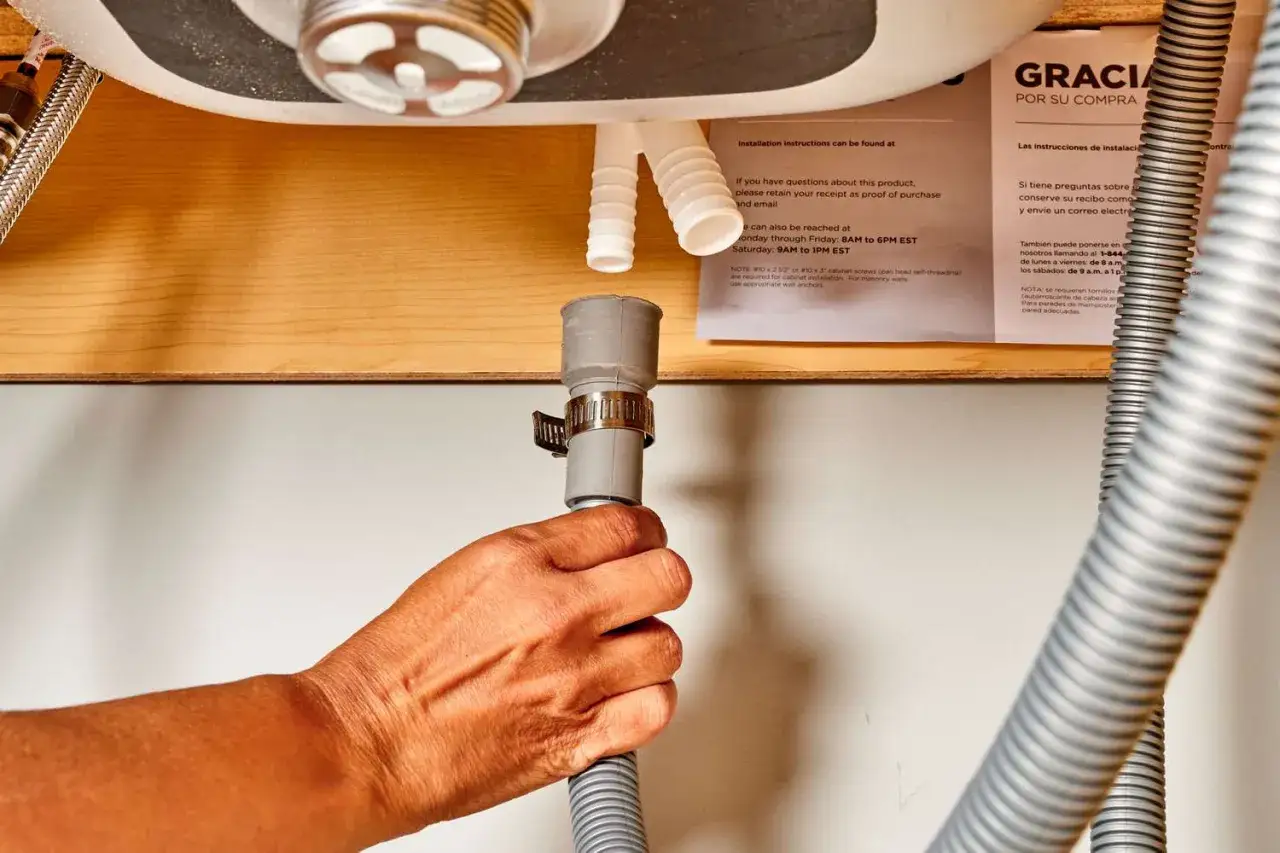
- Create a high loop by fastening the hose as high as the cabinet allows under the countertop.
- Connect the sink end to the branch fitting, disposer inlet, or air gap connection that matches the layout.
- Tighten the clamp so the hose cannot slide off the fitting, but do not crush the hose wall.
- Check that the hose has a little slack for vibration and service access, but not so much slack that it sags to the cabinet floor.
- Look for pinch points where the dishwasher will contact the hose when it is pushed back into place.
If the hose runs to a garbage disposal, I always confirm that the knockout plug has been removed before I tighten the clamp. That small plastic disc is one of the most common reasons a brand-new dishwasher will refuse to drain. If the hose goes to an air gap, I make sure the small inlet and larger outlet are connected correctly, because reversing them turns the whole setup into a problem.
The next decision is whether your setup needs only a high loop or a true air gap.
High loop or air gap and how I choose between them
For many kitchens, a high loop is enough if the manual and local rules allow it. In practical terms, I want the hose fastened high under the countertop, and I usually aim for a loop in the 20- to 33-inch range above the floor. If the cabinet space allows a taller loop, I prefer that, because more height gives wastewater less chance to creep back toward the tub.
| Option | What it does | Where it makes sense | Limitations |
|---|---|---|---|
| High loop | Raises the hose under the counter to block siphoning and backflow | Common in straightforward residential installs | May not satisfy every local code |
| Air gap | Creates a physical break that helps stop contaminated water from moving backward | Useful when code requires stronger backflow protection | Needs an extra fitting and often a countertop hole |
I choose the simplest option that still satisfies the manual and the local jurisdiction. If the code wants an air gap, I use an air gap even when a high loop would otherwise work. If the code allows a high loop and the cabinet layout is tight, I often prefer the high loop because it is simpler, cleaner, and easier to service later. Either way, the hose still has to be supported well enough that vibration cannot pull it down over time.
Even a correct layout fails if small mistakes creep in, so I check those next.
Common mistakes that create leaks or drainage problems
When a dishwasher does not drain well, I usually find one of the same few mistakes again and again. The good news is that most of them are easy to prevent if you catch them early.
- The disposal knockout plug is still installed. The hose may be clamped perfectly, but the water still has nowhere to go.
- The hose hangs too low. A low spot invites backflow, odors, and slow drainage.
- The hose is kinked behind the dishwasher. A sharp bend can choke off flow even when the outside looks fine.
- The clamp is loose or crooked. That usually shows up as a slow drip under the sink after a cycle finishes.
- The hose rubs on a sharp edge. I treat every unfinished cabinet opening as a wear point until I prove otherwise.
- The line is too long for the route. Extra length is not harmless if it creates sagging or too many bends.
The symptoms usually point back to the installation: standing water in the tub, a sour smell between wash cycles, gurgling at the sink, or water around the clamp under the cabinet. If I see any of those, I do not assume the pump has failed. I inspect the routing first, because plumbing mistakes are far more common than a broken drain pump in a new install. After that, I test the connection in a way that makes problems obvious.
How I test the connection before I call it finished
I never trust a drain connection just because it looks neat. I run a real test cycle, then I watch the hose path from the sink end and the dishwasher end while the machine drains. A flashlight helps, and so does patience.
- I run a short cycle or a drain-only step and listen for a steady pump sound.
- I inspect the clamp, the hose connection, and the underside of the sink for any moisture.
- I confirm that water exits cleanly into the disposer or sink drain without backing up.
- I check the cabinet floor and the back of the dishwasher for drips after the cycle ends.
- I open the sink cabinet again a few minutes later, because slow leaks often show up after pressure changes.
If water remains in the tub after the test, I look at the simple causes first: a kinked hose, a low loop, a blocked disposer inlet, or a clogged air gap. Only after those are ruled out do I move to the filter and pump area inside the dishwasher. That order saves time and avoids unnecessary teardown.
The last checks I make before closing the cabinet
Before I slide the dishwasher fully back under the counter, I leave enough slack for future service and make sure the hose will not get crushed when the unit moves. I also check that the loop is still high after the dishwasher is in its final position, because a hose that looked perfect on the floor can sag once the machine is pushed in.
If I want the job to stay trouble-free, I take one extra step: I snap a photo of the finished routing before closing the cabinet. That gives me a quick reference later if the hose ever needs to be replaced, and it makes it easier to spot changes if the dishwasher starts draining poorly months down the road. The difference between a clean drain connection and a recurring service call is usually a matter of routing, support, and a strict reading of the manual. That is the real work of dishwasher drain hose installation.