A successful backyard makeover is less about adding features and more about making the space usable in everyday life. I look at it in three layers: layout, durability, and atmosphere, because a yard that works in July, after dark, and five years from now is the one that keeps paying you back. In this guide, I walk through the design choices, plantings, features, budgets, and mistakes that matter most when you are turning a plain outdoor area into a real living space.
The fastest way to make the yard feel finished is to give it a clear job
- Start with how you will actually use the space: dining, lounging, play, gardening, or all four.
- Choose a design direction that matches the house and your climate, not just a trend photo.
- Spend first on structure, shade, lighting, and circulation before you buy decor.
- Use planting for backbone, privacy, and softness, then add color and seasonal detail.
- Budget in phases so drainage, hardscape, and utilities are handled before finish work.
- Watch for safety issues early: slope, slippery surfaces, fire clearances, permits, and utility locates.
Start with the way you will actually use the yard
I always begin by asking what the yard needs to do on a normal week, not on a perfect weekend. If the answer is “everything,” I break it into zones: a place to sit, a place to move through, a place for plants, and maybe a place for kids, pets, or storage. That simple filter keeps the project from turning into a random collection of features that never quite work together.
The first practical move is to map traffic. Main walkways should feel obvious and wide enough that two people can pass without turning sideways, and seating areas should not force people to squeeze past planters or grills. I also look at sun, shade, noise, and sight lines before I think about finishes, because those factors decide whether the space feels comfortable in real life.
Map the traffic first
Think about where people already walk: from the kitchen door to the grill, from the patio to the gate, from the house to the shed, or from the yard to the side gate. When those paths are awkward, the whole yard feels smaller than it is. A good layout removes friction before it tries to impress anyone.
Read Also: DIY Chicken Coop - Build a Better Home for Your Flock
Measure the non-negotiables
I also measure the things you cannot wish away. That includes slope, drainage, utility access, door swing, and the amount of open ground you are willing to give up for seating or hardscape. If the yard floods after a storm or stays muddy in one corner, that problem comes before decorative upgrades every time.
Once the use case is clear, it becomes much easier to choose a style and avoid spending money in the wrong places.
Choose a style that fits the house and the climate
In 2026, the strongest outdoor looks feel warmer and more lived-in than the hard gray patios that dominated a few years ago. I am seeing more earthy color, layered texture, and furniture that feels closer to indoor comfort, but I would still choose a style that suits the house first. A clean modern yard beside a colonial home can work, but only if the materials and lines are controlled. The same is true of rustic or coastal looks: they succeed when they feel intentional, not themed.
| Style direction | Works best when | What usually carries the look | Main trade-off |
|---|---|---|---|
| Modern and minimal | You want a crisp, low-clutter space | Concrete pavers, black metal, clean edges, simple planting | Looks sharp, but can feel cold if you skip texture |
| Natural and layered | You want the yard to blend into the landscape | Native plants, stone, wood, mulch, mixed heights | Needs more thoughtful plant selection to stay tidy |
| Resort-inspired | You want a vacation feel at home | Outdoor rugs, woven seating, soft lighting, planters, water accents | Comfort matters more than visual drama, so furniture quality counts |
| Family-first | The yard needs to handle daily use | Durable lawn, simple paths, shade, storage, resilient surfaces | Less formal, but usually easier to maintain |
| Edible landscape | You want the space to produce food as well as look good | Herbs, berries, raised beds, compact fruit trees, drip irrigation | Needs regular harvesting and seasonal care |
My rule is simple: if your climate is hot, dry, and sunny, shade and drought-tolerant planting matter more than decorative extras. If you live where freeze-thaw cycles are common, I would prioritize frost-rated materials, good drainage, and pavers or stone that can move a little without cracking. Style is important, but climate decides whether that style lasts.
Once the visual direction is settled, the next step is deciding which features actually change how the yard feels day to day.
Pick the features that make the biggest visual difference
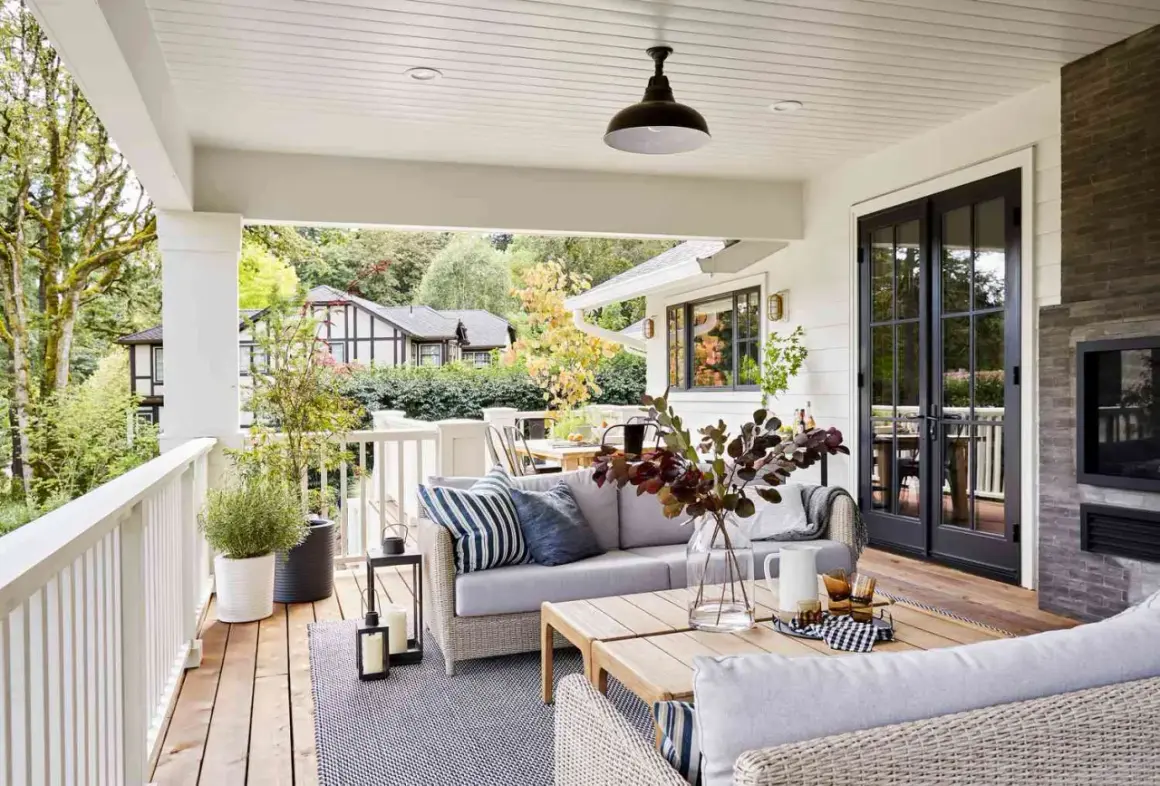
Most people want the yard to feel transformed, but not every feature pulls its weight. I usually look for the elements that anchor the space first: a patio or deck, shade, lighting, and a focal point that gives the eye somewhere to land. Those choices change the experience far more than a pile of decor ever will.
| Feature | What it changes | Why I prioritize it | Common mistake |
|---|---|---|---|
| Patio or deck | Creates a true outdoor room | It gives furniture a base and makes the yard feel intentional | Building it too small for the furniture you actually need |
| Shade structure | Makes the space usable in hot weather | A pergola, sail, or tree canopy can be the difference between usable and ignored | Adding shade after the seating area is already fixed |
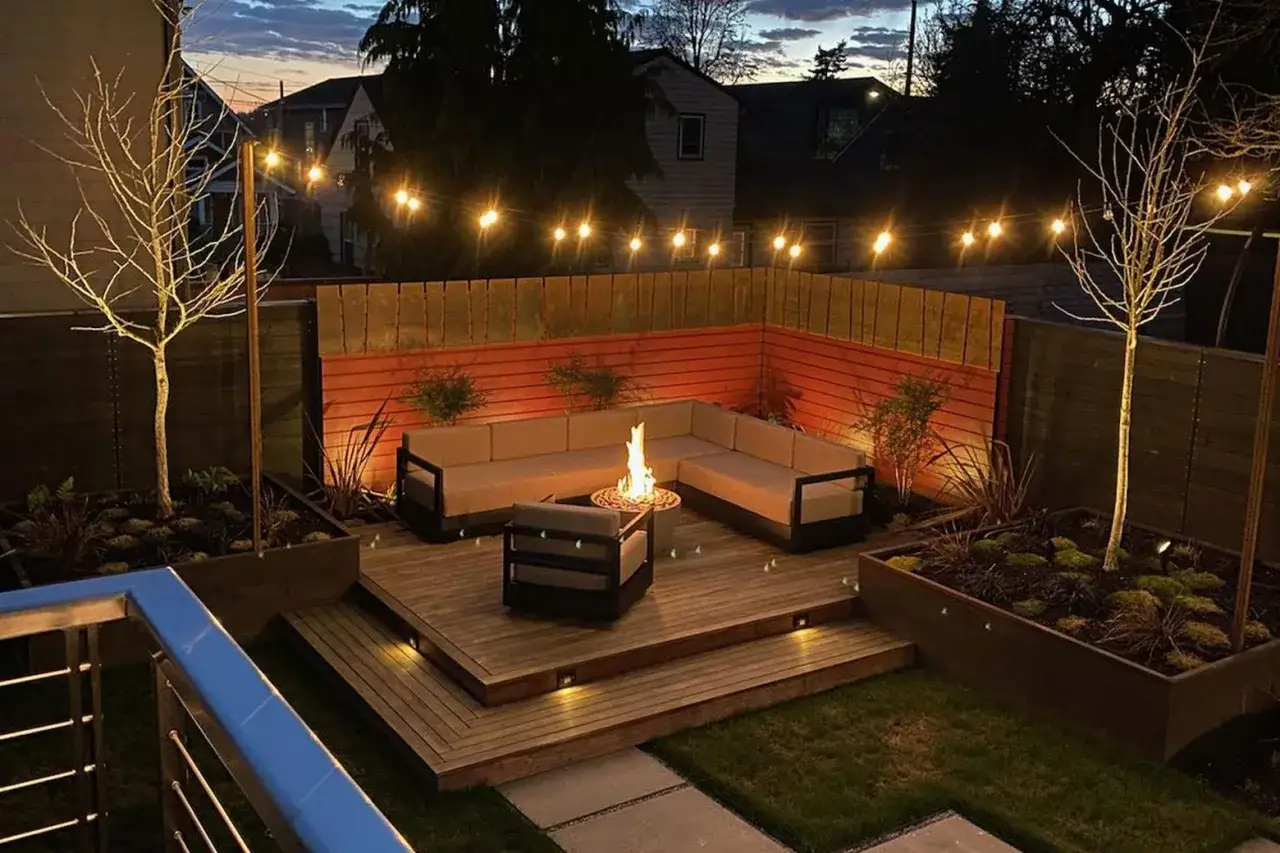
| Lighting | Extends use into the evening | Low-voltage path lights, wall lights, and uplights make a yard feel finished | Relying on one bright floodlight |
| Fire feature | Creates a gathering point | Good for cool evenings and social seating | Placing it too close to walls, branches, or traffic paths |
| Privacy screen | Makes the space feel calmer | Fencing, trellises, hedges, or panels reduce visual noise | Using tall barriers where a softer layered screen would work better |
| Outdoor kitchen | Turns the yard into an entertaining zone | Useful when cooking outside is a real habit, not a novelty | Overbuilding before you know how often you will use it |
A few numbers help keep expectations grounded. Outdoor kitchens can run from roughly $1,000 to $52,000 depending on complexity, and retaining walls often land in the $3,000 to $9,000 range. Gazebos average about $5,700, which is a useful reminder that a single feature can absorb more budget than people expect. If you want the biggest return on effort, I would usually invest in a comfortable seating zone, good lighting, and one strong focal element before chasing specialty add-ons.
After the structure is in place, the planting design starts doing a lot of the visual work.
Plant for structure first, color second
A yard feels finished when the planting has backbone. I like to start with the largest plants first, then work downward: one or two trees for scale, evergreen shrubs for year-round shape, perennials for movement and seasonal change, and groundcovers or mulch to unify the base. That order gives the yard depth without making it feel crowded.
If you want lower maintenance, choose plants that suit your soil and light instead of forcing exotic choices into a bad location. Native and climate-adapted plants usually need less water once established, and they tend to look more natural in the landscape. I also prefer repeating a small set of species in groups rather than scattering too many different plants around the yard. Repetition reads as design; random variety usually reads as clutter.
- Build with an evergreen backbone. Shrubs and small trees keep the yard from looking bare in winter and make the space feel anchored.
- Use mulch correctly. Two to three inches is usually enough to suppress weeds and hold moisture; pile it away from trunks and stems.
- Install drip irrigation where possible. Drip lines send water to the root zone and keep foliage drier than overhead spraying.
- Layer heights intentionally. Tall in back, medium in the middle, low at the edge works almost everywhere.
- Leave room for growth. The most common planting mistake is cramming mature-size plants into young-space dimensions.
| Site condition | Better planting and surface choice | Why it helps |
|---|---|---|
| Hot, dry sun | Drought-tolerant natives, shade, lighter paving, drip irrigation | Reduces heat stress and water use |
| Wet or heavy clay soil | Raised beds, grading, permeable paving, drainage-friendly plants | Prevents soggy roots and muddy traffic areas |
| Freeze-thaw climate | Flexible joints, frost-rated pavers, hardy shrubs, less brittle finishes | Helps materials survive seasonal movement |
| Small yard | Vertical layering, compact shrubs, restrained color palette, fewer materials | Makes the space feel larger and calmer |
If you want one shortcut, here it is: structure before spectacle. That principle keeps the planting from becoming decorative clutter and leads naturally into the question of budget and timing.
Budget the work in phases instead of chasing the whole yard at once
The money conversation is where a lot of outdoor projects either stay grounded or go off the rails. Recent pricing puts professional landscaping around $3,517 on average, with a broad range from about $200 to $14,854 depending on scope. A complete backyard renovation commonly lands between $15,000 and $50,000, but simple beds or mulching can be finished in a day or two while full renovations can take around six weeks. I like to use those numbers as planning anchors, not promises, because site conditions and material choices change everything.
| Project tier | Typical scope | Planning range | Best use case |
|---|---|---|---|
| Refresh | Cleanup, pruning, mulch, small plant swaps, staining, basic lighting | Low hundreds to low thousands | When the yard needs a reset, not a rebuild |
| Defined outdoor room | Patio or deck, seating, planting beds, shade, walkway improvements | Landscape design often falls around $500 to $14,000 | When the space lacks a clear center of gravity |
| Feature build | Fire feature, gazebo, retaining wall, outdoor kitchen, stronger lighting plan | Gazebos average about $5,700; kitchens can run $1,000 to $52,000; retaining walls $3,000 to $9,000 | When entertaining is the main goal |
| Full renovation | Drainage, grading, hardscape, plantings, utilities, finish work | $15,000 to $50,000 | When the yard has structural or layout problems |
Phasing the work is often smarter than forcing the whole thing into one season. I would usually start with drainage and grading, then add the hardscape, then utilities and lighting, and only after that move to planting and furniture. That sequence lowers the chance that finished work gets torn up later, which is where many budgets quietly disappear.
Even a beautiful plan can fail if the basic mistakes are ignored, so I always check for those before the first shovel goes in.
Watch the mistakes that make the project expensive later
Most yard projects do not fail because the ideas are bad. They fail because the order is wrong or the details are ignored. The biggest trouble spots are usually drainage, maintenance, and safety.
- Ignoring drainage. A pretty patio over bad grading will still collect water, and water always wins in the end.
- Using too many materials. Four paving types, three fence styles, and a mixed plant palette usually look busy instead of designed.
- Skipping utility checks. Before digging, I want to know where gas, electric, irrigation, and communication lines run.
- Forgetting clearances. Fire pits, grills, and heaters need space around them, not just a nice location on the plan.
- Building more maintenance than you want. Water features, high-edge plant beds, and specialty materials all require upkeep.
- Choosing surfaces that are slippery or unstable. This matters especially on slopes, around pools, and near shaded areas that stay damp.
There is also a safety layer that should never be treated as optional. If the work involves electricity, gas, retaining walls, or significant grade changes, I treat permits and local code checks as part of the project, not an afterthought. The same goes for slip resistance, outdoor-rated fixtures, and winter durability in colder states. A yard should be attractive, yes, but it also has to be safe enough to use without thinking twice.
Once those risks are out of the way, the project becomes much easier to finish cleanly.
The build order I trust when I want fewer mistakes
If I had to reduce the whole process to a sequence, I would keep it simple and disciplined. Build the bones first, finish with the details last, and do not let decorative choices outrun the structure underneath them.
- Fix grading and drainage so water moves away from the house and out of traffic areas.
- Mark zones and walkways so the yard has a clear flow before materials are ordered.
- Run utilities, lighting, and irrigation rough-ins before hard surfaces go down.
- Install patios, decks, walls, steps, and shade structures.
- Add planting, mulch, edging, and any low-voltage lighting.
- Bring in furniture, planters, and decor only after the space is functionally complete.
That order keeps the budget focused and saves rework, which is one of the easiest ways to protect the project from turning into a long, expensive correction cycle. The best outdoor spaces usually look effortless because the hard decisions were made in the right sequence. The best backyard makeover is the one that looks deliberate, drains properly, and feels easy to live with long after the first season is over.