Stepping-stone paths are one of the few outdoor projects that can change how a yard feels without turning into a full hardscaping budget. The best inexpensive stepping stone walkway ideas solve a real traffic pattern, use materials you can source locally, and still leave room for drainage, safety, and a clean finish. In 2026, the smart move is usually not to chase the fanciest stone; it is to build a path that matches the way people actually move through the yard.
What matters most before you start
- Keep the layout simple. Curves and short runs are usually cheaper than wide, fully paved walks.
- Spend money on the base and edging before you spend it on decorative stone.
- For most adults, 18 to 24 inches between stone centers is a practical starting point, but I always test the stride on site.
- Reclaimed brick, cast concrete, and mixed gravel-and-stone layouts usually give the lowest cost per finished path.
- If you need stroller or wheelchair access, stepping stones are usually the wrong surface.
Inexpensive stepping stone walkway ideas that feel intentional
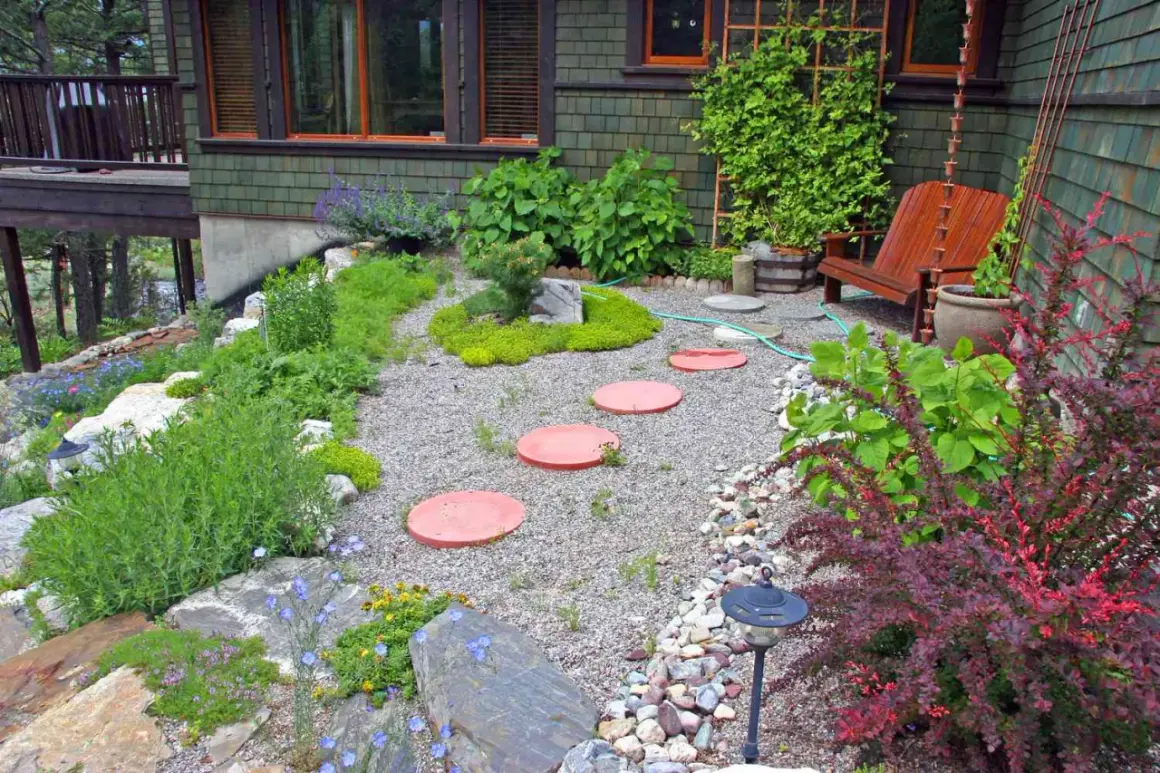
When I sketch a budget path, I look for the shortest route that still feels natural. A run of oversized concrete pads through mulch, for example, costs less than a fully paved walkway and often looks better in a planting bed. Reclaimed brick works well when the goal is to keep shoes out of damp grass, while a few large flagstone pieces can turn an awkward side yard into something that feels deliberate instead of improvised.
The cheapest-looking paths are usually the ones that ignore rhythm. The cheapest good paths repeat one idea clearly: same spacing, same edge treatment, same fill material. That does more for the final look than buying a more expensive stone and scattering it randomly.
| Layout idea | Best use | Why it stays affordable | Main tradeoff |
|---|---|---|---|
| Large concrete pads in mulch | Garden beds and light foot traffic | Uses simple forms or precast pads and minimal excavation | Mulch needs occasional topping up |
| Reclaimed brick path | Side yards and narrow connectors | Used brick is often cheaper than new stone | Uneven pieces need a solid base |
| Irregular stone islands in gravel | Informal backyard routes | Uses fewer large stones and a low-cost infill | Not ideal for carts or strollers |
| Mixed-size flagstone stepping path | More natural-looking landscapes | You can stretch the budget by using only a few larger slabs | Flagstone gets expensive if you try to cover too much area |
| Offset stepping stones with groundcover | Sunny beds and soft landscape edges | Reduced stone count keeps the material bill down | Groundcover takes time to fill in |
Once the layout is decided, the real savings come from material choice and site prep. That is where the budget either stays controlled or quietly gets out of hand.
The cheapest materials and where to spend a little more
For a pricing reality check, I usually start with two benchmarks. The Spruce places basic walkway builds around $7 to $35 per square foot, and HomeWyse estimates installed stepping stones at roughly $26 to $49 per stone in May 2026, depending on size and site conditions. In practice, a DIY path can land much lower than that if you keep the run short, use salvaged materials, and do your own digging.
If I had to prioritize the budget, I would spend on the base, not the surface. A low-cost stone on a compacted base lasts longer than a prettier stone laid in soft soil. The same goes for edging: cheap edging done well beats expensive stone that drifts out of line after the first heavy rain.| Material | Typical budget level | What it does well | What to watch for |
|---|---|---|---|
| Reclaimed brick | Low | Rustic look, easy to source locally, good for short runs | Uneven sizes can rock if the base is thin |
| Precast concrete pavers | Low to moderate | Uniform shape, easy spacing, simple DIY install | Plain shapes need better edging to look finished |
| Cast-in-place concrete | Low materials, more labor | Custom shape, good if you want a one-off design | More work up front and slower curing |
| Flagstone used selectively | Moderate | Natural look, strong visual payoff from just a few pieces | Costs rise quickly if you use it everywhere |
| Gravel or mulch fill | Low | Cheap infill, good drainage, simple installation | Needs topping up and weed control over time |
When the goal is a real budget build, I am comfortable mixing materials. A path with reclaimed stones set into a gravel bed often looks more thoughtful than a one-material layout that was stretched too thin. From here, the question becomes how to install it without wasting time or money on avoidable rework.
How I would build it on a tight budget
The process does not need to be complicated, but it does need to be deliberate. I have seen more budget projects fail because the layout was guessed at than because the materials were cheap.
- Mark the route with a hose, rope, or marking paint, then walk it several times.
- Place temporary markers where each step lands and test the spacing before you dig. For most adults, 18 to 24 inches center-to-center is a practical range.
- Remove sod only where needed. On a simple path, you usually do not need to excavate a huge trench; you need stable pockets under each stone and a consistent base.
- Add a compacted crushed-stone base, usually 2 to 4 inches deep, then a thin leveling layer of coarse sand if the site needs it.
- Set each stone so the top is level with, or slightly proud of, the surrounding grade. That helps reduce puddling and keeps the stone readable underfoot.
- Backfill the gaps with pea gravel, mulch, or low-growing groundcover.
- Tap the stones with a rubber mallet, check the alignment again, and recheck after the first rain.
If the route crosses a slope or a soggy section, I add more base depth instead of hoping the stone will “settle in” on its own. That is a small change that saves a lot of frustration later, especially in freeze-thaw climates. The next issue is avoiding the mistakes that make a cheap path end up expensive.
Where budgets quietly go off the rails
The biggest budget leaks are not usually dramatic. They are small decisions that compound. The most common one is buying stones before confirming the stride and the route. If the spacing feels awkward, no amount of edging will make the path comfortable to use.
- Skipping the base and setting stones directly on soil.
- Using too many different materials, which makes the path look accidental.
- Forgetting edging, so gravel and mulch migrate into the lawn.
- Choosing polished or slippery stone near a hose, pool, or shaded area.
- Making the path too narrow for real use, then having to rebuild it later.
- Ignoring drainage on the downhill side, where water naturally wants to sit.
On a front approach, I am especially cautious. If the path needs to handle regular visitors, deliveries, or rolling carts, a stepping-stone design can be the wrong place to save money. That leads directly to the more important comparison: when stepping stones make sense, and when a different surface is the better value.
When stepping stones are the right choice and when they are not
Stepping stones are excellent when you want a softer, lighter path through a bed or side yard. They are less convincing when the route needs to behave like a true walkway every day. I think that distinction matters more than style.
| Path type | Best for | Rough budget level | Maintenance level |
|---|---|---|---|
| Stepping stones | Informal garden routes and short connectors | Low to moderate | Low to moderate, depending on fill material |
| Gravel path | Longer side yards and utility access | Low | Moderate, because it needs occasional raking and topping up |
| Paver walkway | Main routes and frequent foot traffic | Moderate | Low once installed well |
| Poured concrete | Accessibility and very regular use | Higher up front | Low, but repairs can be more noticeable |
If I need stroller access, wheelchair access, or a path that stays friendly in wet weather, I usually step away from scattered stones and look at a continuous surface instead. Budget matters, but so does usability. A path that looks charming and gets ignored because it is awkward to walk on is not a good investment.
Small upgrades that make a low-cost path look custom
The best budget paths usually have one or two details that make them feel designed. I like to keep these upgrades modest because they add polish without changing the whole project.
- Use a narrow border of steel, brick, or bender board to hold the line.
- Repeat one stone size three or four times before changing shapes.
- Add a slightly wider landing at gates, doors, or patio transitions.
- Plant low groundcover like creeping thyme in sunny gaps where it can handle light foot traffic.
- Use solar or low-voltage lights to define the path edge at night.
- Keep the material palette tight. Two stones and one filler usually look better than five competing finishes.
Curves also help. A gentle bend can make a short path feel more intentional and can hide the fact that you used a budget-friendly stone size. That is one of those design tricks that costs almost nothing but changes the whole read of the yard.
What different budgets can actually buy
When people ask me how far their money will go, I usually answer with a range instead of a promise. Prices change by region, haul distance, and whether you can source reclaimed material locally. Still, rough planning numbers are useful.
| Budget | What it can cover | Best approach | What I would not spend on |
|---|---|---|---|
| Around $200 | A short garden path or a narrow side-yard run | Reclaimed stones, mulch or gravel fill, basic hand tools | Fancy edging and premium stone |
| Around $500 | A longer path with better spacing and a stronger base | Used pavers or precast concrete, compacted base, simple edging | Overly decorative cuts or complex patterns |
| Around $1,000 | A more finished path with lighting and cleaner transitions | Better stone selection, reliable edging, optional help for grading | Extra materials that do not improve comfort or durability |
The pattern is simple: the more precise the route, the less you waste. A short, direct path with good spacing and clean edges almost always beats a longer, more decorative one that needs constant correction. That is the kind of thinking that keeps a small outdoor project from becoming a recurring repair job.
Build the path once, then let the yard do the rest
If I had to narrow this topic to one rule, it would be this: keep the design simple and spend your budget where the path meets the ground. That means a stable base, decent edging, and a layout that fits how people actually walk.
The most reliable low-cost stepping-stone paths are usually the ones that accept a little roughness in the material and make up for it with good planning. Reclaimed brick, precast concrete, gravel, mulch, and selective flagstone can all work well when the spacing is tested, the drainage is respected, and the finish stays consistent. If you build that way, the path will look intentional instead of improvised, which is the real win for a budget landscape project.
For most yards, that is the balance I would aim for in 2026: practical, durable, and simple enough to stay inexpensive without looking temporary.