The wall, the mortar, and the layout decide most of the result
- Flatness comes first. If the wall is out of plane, tile will copy every problem.
- Coverage targets matter. I aim for at least 80% in dry areas and 95% in wet areas.
- Large-format tile needs more care. A flatter wall, the right trowel, and back-buttering make a real difference.
- Wet areas are a system. Backer, membrane, seams, and corners all have to work together.
- Layout is not cosmetic. It controls cuts, visual balance, and how obvious the joints will be.
- Most failures are preventable. Wrong mortar, poor coverage, and ignored movement joints cause a lot of callbacks.
Start with the wall itself, not the finish
Before I think about tile size or grout color, I check what the wall is actually giving me. The surface needs to be clean, sound, dry, and flat enough to carry the finish without forcing the tile to do structural work. TCNA’s guidance still treats the substrate as the foundation of the whole assembly, and I agree with that completely.
For a standard wall, I want a surface that is close to plumb and within the common 1/4 inch in 10 feet plane tolerance. If the wall is worse than that, tile will exaggerate the problem instead of hiding it. That matters even more with larger or glossier tile, where every hump, dip, and twist becomes visible as lippage.
| Wall condition | What I check | Why it matters |
|---|---|---|
| Dry interior wall | Sound surface, no movement, no loose paint or dust | Tile needs a stable bond, not a cosmetic patch |
| Damaged or bowed wall | Flatness, fastener movement, cracked board, soft spots | Tile will mirror the defect and make it more obvious |
| Shower or tub surround | Approved backer and waterproofing system | Moisture protection has to be solved before setting starts |
| Masonry | Efflorescence, dust, cracks, and overall flatness | Bond strength drops fast if the base is dirty or unstable |
| Large-format wall tile | Very tight flatness checks and a straightedge test | Big tile has less room to hide surface variation |
If I find rot, loose drywall, or a wall that is badly out of plane, I fix that first. Tile is a finish layer, not a structural repair. Once the wall is trustworthy, the next decision is how the tile, mortar, and grout should work together.
Choose the tile, mortar, and grout as one system
I do not pick mortar by habit. I pick it based on the tile body, the room, and how much support the wall needs. For example, standard ceramic wall tile is much easier to set than heavy porcelain slabs or glass mosaics, and each of those asks for a different level of control. The right product can prevent sagging, improve bond strength, and reduce the chance of hollow spots behind the tile.
| Tile type | What I usually look for | Practical note |
|---|---|---|
| Ceramic wall tile | Polymer-modified thin-set for most jobs | Reliable, versatile, and usually the simplest starting point |
| Porcelain | Mortar approved for dense, low-absorption tile | Coverage matters more because the backs do not bond as easily |
| Large-format tile | Large-and-heavy-tile or nonsag mortar | Helps prevent sliding on vertical surfaces |
| Glass | Manufacturer-approved mortar, usually white | Color and compatibility both matter because glass shows mistakes quickly |
| Natural stone | White mortar and very high coverage | Stone telegraphs voids, shadowing, and uneven support faster than ceramic |
Coverage is the number I watch most closely. Industry guidance commonly calls for 80% mortar coverage in dry areas and 95% in wet areas. Natural stone also wants 95%, and translucent or semi-translucent glass is one of the few cases where I try to get as close to 100% as possible. If the coverage is not there, I change the trowel, back-butter the tile, or both.
Grout follows a similar logic. As a general rule, sanded grout is used at joints of 1/8 inch or wider, while unsanded grout is more common in narrower joints. I still check the product label, because modern formulations vary and the tile shape can change what is practical. Once the materials are matched, layout is where the wall starts to look intentional.
Plan the layout so the room feels intentional
Good layout is not about making the wall symmetrical at all costs. It is about making the finished surface look deliberate, balanced, and easy to live with. I start by finding centerlines, checking how the tile will land at the edges, and deciding where the cut pieces should live. In most rooms, I would rather move a layout a little than end up with a tiny sliver at the most visible corner.
On backsplashes, I pay special attention to outlets, cabinet bottoms, and any feature strip or accent band. On shower walls, I add niches, valve cutouts, and corners to that list. Those details do not forgive sloppy planning. If I can align the field tile so the cut lines feel even on both sides of a focal point, the whole room looks more expensive without changing the material budget.A ledger board can be helpful when the first full course has to start above a tub, countertop, or floor that is not ready to support the tile yet. It gives the row a level starting point and keeps gravity from pulling the work out of line while the mortar cures. For long plank tile, I also check the offset pattern carefully. A 50% offset is not automatically safe for every product, because warpage can make lippage worse than expected.
Once the dry layout is locked in, the actual setting becomes much more predictable.
How I set wall tile step by step
This is the part most people think of first, but it only works well because the prep and layout are already done. I keep the process simple and consistent so I can check my work as I go.
- Mix the mortar to the manufacturer’s instructions. I use a low-speed drill, measure the water, and let the mortar slake if the product requires it. That extra pause matters more than people think.
- Spread only as much as I can cover in time. Mortar skins over quickly on a wall. If it stops feeling sticky, I scrape it off and apply fresh material.
- Comb the mortar in one direction. Straight ridges make it easier to collapse the mortar and get full support behind the tile.
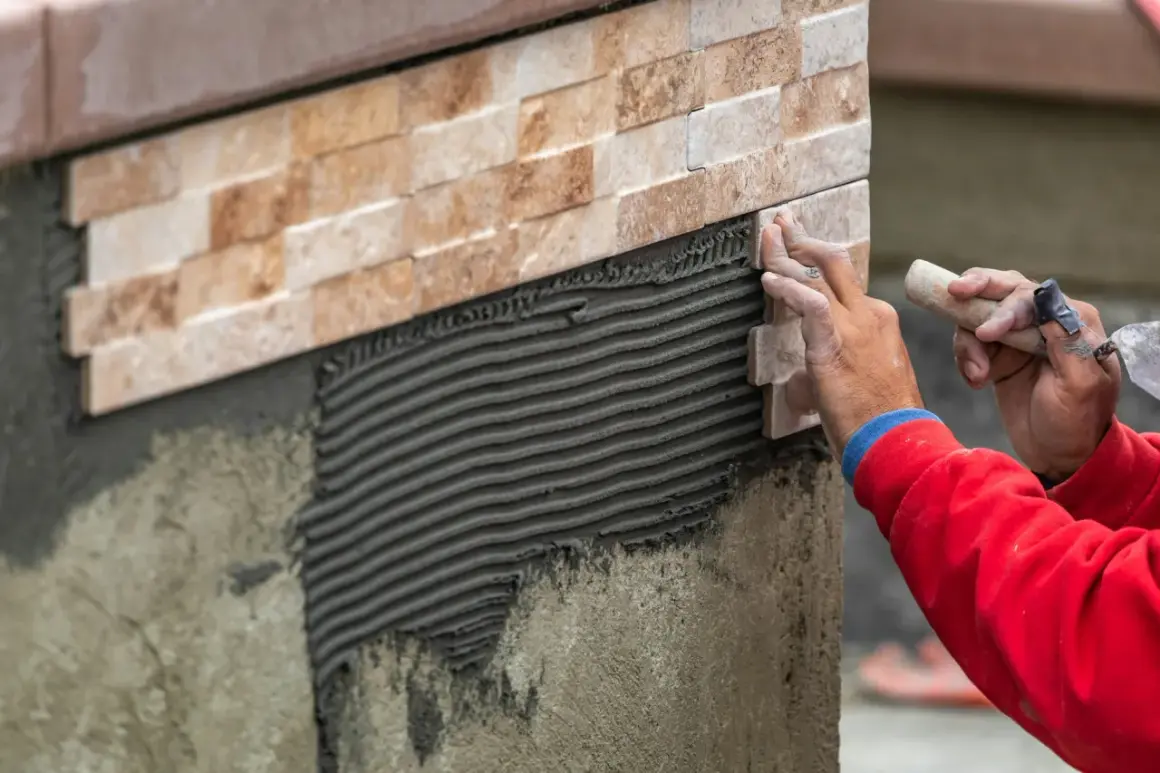
- Back-butter when the tile needs it. Back-buttering means forcing a thin coat of mortar onto the back of the tile to improve contact. I use it a lot on large-format porcelain, textured backs, and anything that sounds hollow after the first test placement.
- Set the tile with slight movement. A small slide into the ridges helps collapse them and improve coverage.
- Check level, plumb, and spacing constantly. Once a row drifts, the error multiplies upward.
- Pull a sample tile now and then. I want to see mortar transfer, not guess at it.
- Clean the joints as I go. Packed mortar in the joint makes grouting harder and can weaken the finish.
For wall work, I also pay attention to the mortar’s “nonsag” behavior. Nonsag mortar is designed to stay put on vertical surfaces instead of letting the tile slide while it cures. That feature is especially useful with larger tile, heavier porcelain, and areas where a ledger board cannot carry the whole load for long. When that part is under control, the next risk is water.
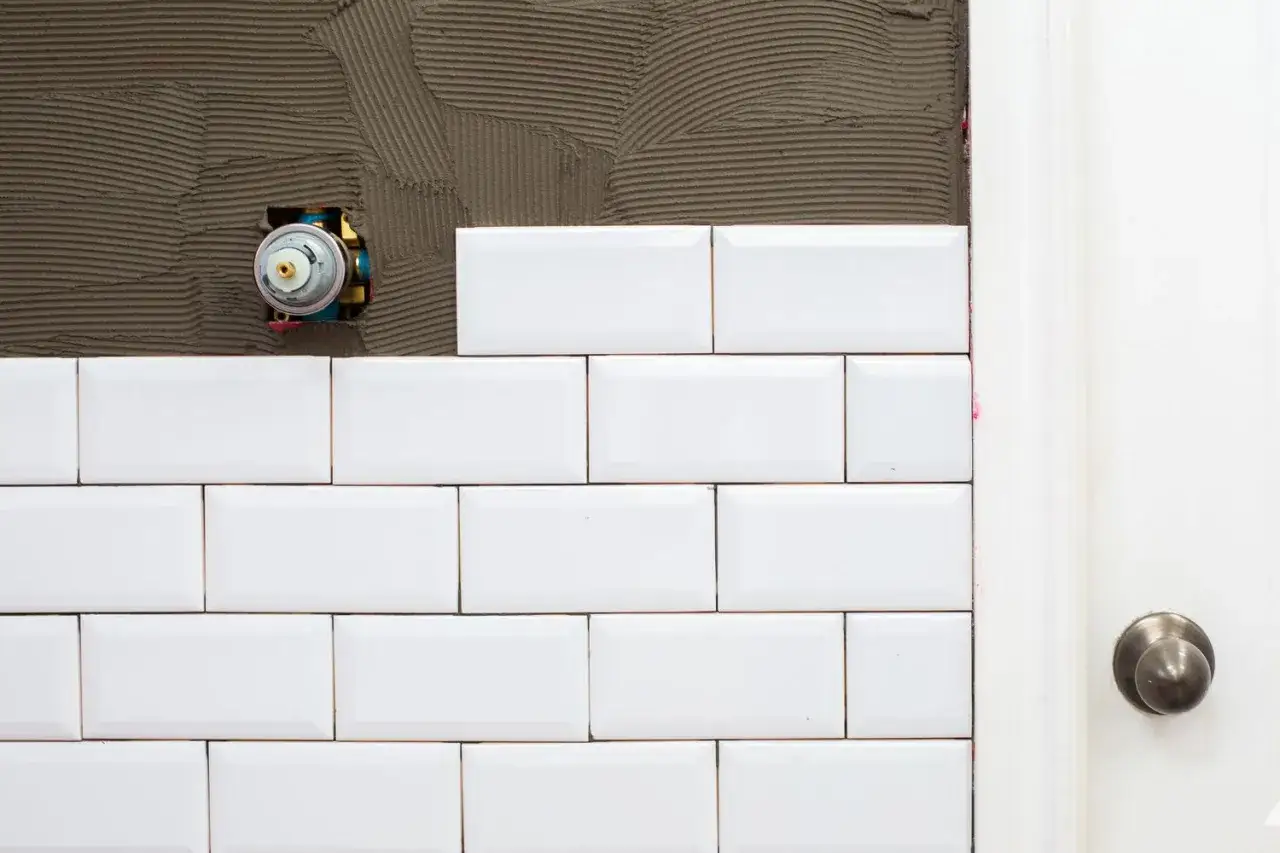
Wet areas need a waterproofing decision before the first tile
In a shower or tub surround, the tile is not the waterproofing layer. The assembly behind it is. That means the membrane, backer board, seams, corners, penetrations, and fasteners all need to be planned before the first piece is set. TCNA makes this point clearly: the waterproof membrane has to cover the solid backing under the entire tiled area, and the backer/membrane combination should be selected according to the manufacturers’ recommendations and local code.
I would not improvise a shower wall system. If the project uses cement board, foam board, or another panel system, the exact sequence matters. Joints usually need tape or banding, corners need treatment, and valve penetrations need compatible seals. If the shower is going to see daily use, I want a system that was designed to get wet, not one that just happens to accept tile.
Grout also gets misunderstood in wet areas. Grout fills joints, but it is not a substitute for waterproofing. At changes in plane, I use flexible sealant instead of grout because those areas move independently. TCNA’s grout guidance is clear on that point, and it is one of the easiest details to get wrong if someone learned tiling from a shortcut video.
Timing matters here too. Many cement-based mortars are ready for grouting after about 24 hours at 70°F, though cooler rooms and denser tile often need longer. Some rapid-setting mortars can shorten that to 2 to 3 hours, but I only trust that schedule when the product specifically says so. Once the wet-area details are in place, the job becomes much more forgiving. The remaining problems are usually self-inflicted.
The mistakes that turn a clean wall into a callback
I see the same errors over and over, and most of them are preventable. They rarely show up as dramatic failures on day one. More often they appear weeks later as hollow sounds, cracked corners, or a wall that looks fine until light hits it from the side.
- Skipping substrate correction. Tile will not flatten a bad wall. It will copy the bad wall.
- Using the wrong trowel. Too small, and coverage drops. Too large, and the tile can swim or sag.
- Ignoring coverage checks. A tile can look seated while still carrying voids behind it.
- Grouting movement joints. Corners, transitions, and perimeters need flexibility, not rigidity.
- Setting over skinned mortar. If the mortar is no longer sticky, the bond is compromised.
- Rushing wet-area sealing. Water finds seams faster than people expect.
- Dry cutting without dust control. OSHA’s silica rule applies to construction work, and I treat dust management as part of the installation, not an extra step.
That last point matters more than many homeowners realize. If you are cutting cement board, stone, or masonry on site, I would use wet methods or dust collection and clean with a HEPA vacuum rather than dry sweeping the debris around. The dust is not just a mess; it is a health issue.
Once those failure points are controlled, the final quality check is mostly about patience and detail.
The small details that keep the wall quiet for years
When I am close to the finish line, I slow down instead of speeding up. I check for straight joints, even spacing, clean edges, and any tile that sounds hollow when tapped. I also look at the corners again to make sure flexible sealant is where it belongs and grout is not trying to do a job it cannot do.
Cleanup matters more than it first appears. Mortar haze left on the face of the tile can make a good job look tired, and careless cleaning can pull material out of fresh joints. I prefer a damp sponge with a light touch, then a final wipe after the surface firms up. If the tile or grout calls for sealing, I wait for the proper cure time first. Sealing too early just traps moisture where it does not belong.
What I want, in the end, is a wall that stays flat, bonds well, and looks as calm three years later as it did on day one. That comes from treating the tile, the mortar, the backer, and the wet-area details as one system instead of a stack of unrelated products. If you keep that rule in mind, the job gets easier, and the result usually lasts longer than the room around it.