Replacing an old built-in unit is mostly a plumbing and fit check: the opening has to match, the shutoff valve has to work, the drain hose has to be routed high enough, and the new machine has to be leveled before you seal everything back up. This guide explains how to replace a dishwasher safely, what to measure first, and where the job usually goes wrong. I am focusing on the parts that matter most in a U.S. kitchen, where the plumbing and electrical setup is often already in place but still needs a careful reset.
What matters most before you start
- Most replacement jobs go smoothly when the opening is a standard 24-inch built-in space and the old hookups are still usable.
- Shut off the breaker and the water valve before disconnecting anything, then confirm the unit is actually dead and empty.
- Keep the drain hose looped high under the counter, or use an air gap if the manual or local code requires it.
- Level the dishwasher carefully; a unit that is slightly out of plumb is noisier, drippier, and harder on the door seal.
- Run a test cycle with the toe-kick still off so you can catch leaks before you close everything in.
Check the opening, hookups, and new unit specs first
I start with measurements because a dishwasher replacement is only simple when the new model fits the old cutout without improvisation. In most U.S. kitchens, that means confirming the cabinet width, height, depth, and door clearance, not just eyeballing the front panel that was visible on the old machine.
| What to verify | What I want to see |
|---|---|
| Opening width | A true 24-inch built-in opening, or the exact range listed in the new model’s installation manual |
| Opening height | Enough adjustment in the leveling legs to sit flush without forcing the cabinet |
| Opening depth | Room for the tub, the water line, and the drain hose without crushing anything |
| Water shutoff | An accessible valve under the sink that actually closes fully |
| Power | A cord-and-plug connection or a proper junction box, depending on the model |
| Drain path | A clear route to a disposer, waste tee, or air gap, with no kinks |
Once the fit and hookups make sense on paper, the rest of the job becomes a sequence problem rather than a guessing game.
The tools and parts I keep within reach
There is nothing exotic about the tool list, but having the right parts on hand saves a lot of trips out from under the sink. I like to stage everything before I pull the old appliance, because the messy part of the job is exactly when missing fittings become expensive.
| Tool or part | Why it matters |
|---|---|
| Adjustable wrench | For the water supply fitting and any compression nuts |
| Channel-lock pliers | Useful for drain clamps and stubborn fittings |
| Screwdrivers | Needed for mounting screws, toe-kick panels, and bracket adjustments |
| Bucket and towels | To catch the water that stays in the supply and drain lines |
| Flashlight or headlamp | Under-sink work is slow when you cannot see the fittings clearly |
| Level | Helps keep the tub stable and the door aligned |
| 90-degree elbow fitting | Gives the water supply line a clean turn into the dishwasher |
| Approved supply line | Usually braided stainless steel or copper, depending on the installation manual |
| Hose clamps or air gap parts | Needed if your drain setup uses an air gap or a disposer connection |
| Pipe thread sealant or PTFE tape | Used only where the fitting calls for it |
I also keep a small pan nearby for the water that drains out of the old line. That sounds minor, but it is one of the easiest ways to avoid a soaked cabinet floor and swollen particleboard.
Once the tools are staged, the old dishwasher can come out cleanly, which is where the job gets a lot easier.
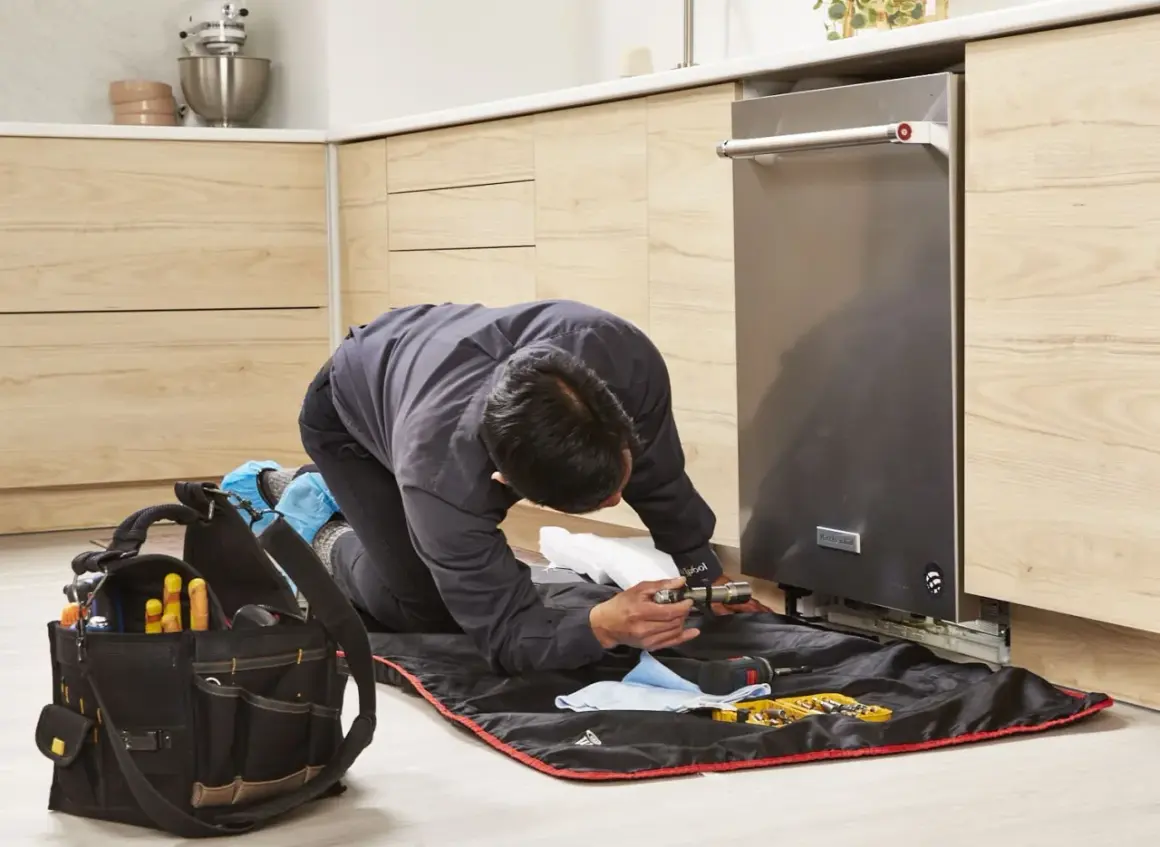
Shut down and remove the old dishwasher without flooding the cabinet
This is the stage where people move too fast. I do not disconnect anything until the power is off at the breaker and the water supply valve is closed under the sink. If the dishwasher is hardwired, I treat that box carefully and verify the circuit is dead before my hands go near it.
- Turn off the dishwasher at the breaker and confirm the power is off.
- Close the under-sink water shutoff valve.
- Place towels and a shallow pan beneath the supply line and drain connection.
- Remove the toe-kick or access panel so you can see the fittings.
- Disconnect the water supply line slowly and let the remaining water drain into the pan.
- Detach the drain hose from the disposer or tailpiece.
- Disconnect the electrical connection if the unit is hardwired or unplug the cord if it is cord-and-plug.
- Remove the mounting screws, then slide the dishwasher out with a helper.
I like to support the front of the unit as it comes out so the feet do not dig into the floor or catch the cabinet face. If the old drain hose is full of dirty water, I let it empty into the bucket instead of yanking it free. That small pause usually saves the cabinet from a nasty splash.
With the old unit out, the opening is finally visible, and that is the best time to correct any crooked shutoff valve, loose hose, or hidden water stain before the replacement goes in.
Set the replacement in place and level it carefully
A new dishwasher should slide into the opening, not fight it. I set it on a protected floor, route the supply line and drain hose through the cabinet opening, and then move it in slowly so nothing gets pinched behind the tub.
- Run the water line, drain hose, and power cord or wiring through the sink cabinet first.
- Keep slack in the hoses so the dishwasher can move into position without tugging on the fittings.
- Slide the unit in until the front sits nearly flush with the cabinet face.
- Adjust the front leveling legs until the tub is stable and the door swings freely.
- Check the top edge and side-to-side balance with a level.
- Secure the dishwasher with the mounting brackets only after the fit is right.
Before I tighten the brackets, I open and close the door a few times. If it rubs the adjacent cabinet or springs back unevenly, the unit is not level enough yet. That is worth correcting now, because a slightly crooked dishwasher often turns into a noisy one with a shorter seal life.
Once the machine sits square in the opening, the plumbing connections can be made with less strain and far fewer surprises.
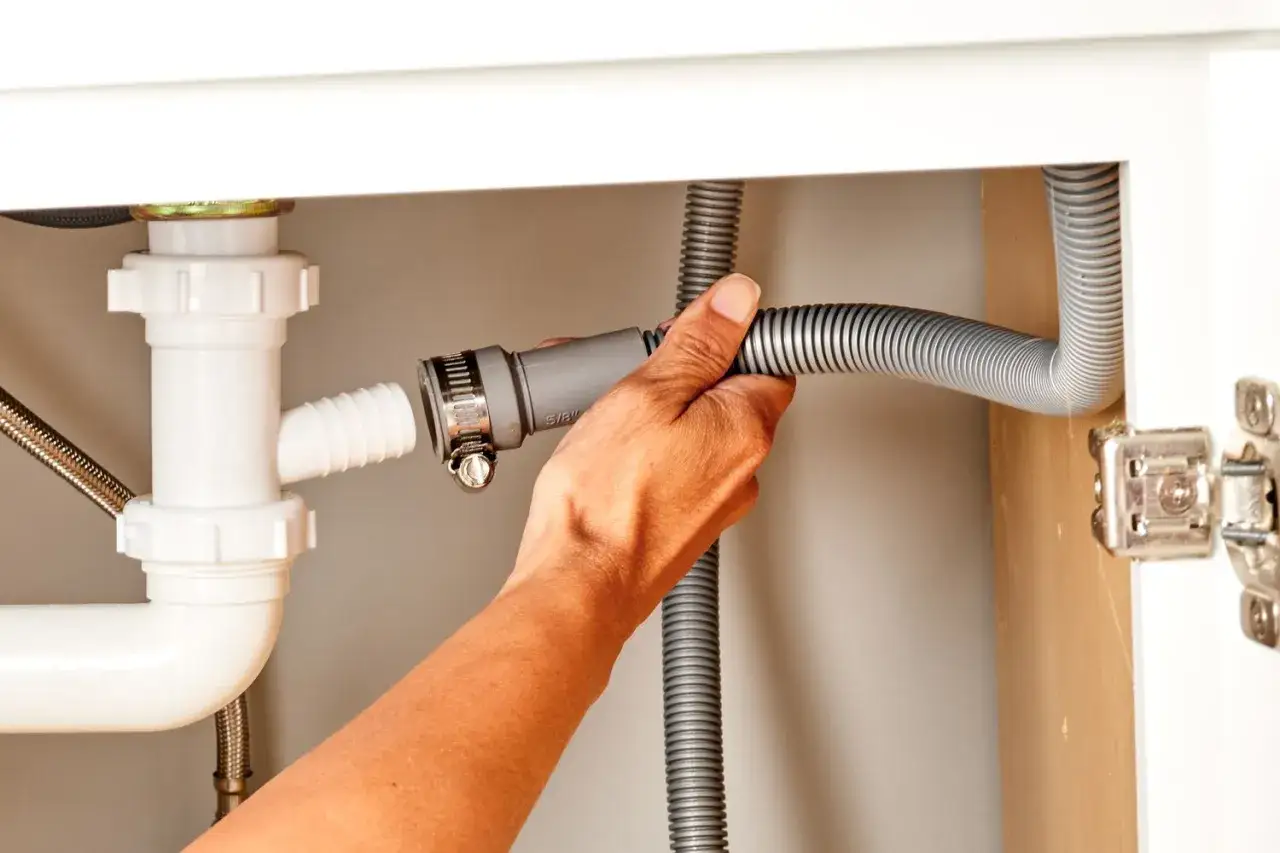
Make the water supply and drain connections the right way
This is the part that prevents callbacks. A dishwasher can look perfect from the front and still fail if the supply line is under tension or the drain hose sits too low. I treat the water and drain work as the real finish line, not an afterthought.
Water supply
I prefer a clean, accessible shutoff under the sink and a supply line that is made for dishwasher use. Many current installation guides call for hot water at roughly 120°F at the dishwasher and a supply pressure in the 20 to 120 psi range, but I always defer to the exact manual for the model I am installing. If the line needs soldering, I do that work before the dishwasher is in place, not in a cramped cabinet next to the appliance.
- Use the shutoff valve under the sink, not the main house valve, if the under-sink valve is present and reliable.
- Choose the correct 90-degree elbow so the inlet line turns cleanly without a kink.
- Do not over-tighten fittings; crushing a washer or overtightening a compression joint is how small leaks start.
- If the old supply line is corroded, brittle, or stained, replace it instead of reusing it.
- Flush the line briefly before final connection so grit does not clog the inlet valve.
Read Also: Are Shower Heads Universal? The Truth About Fit & Swaps
Drain routing
The drain hose needs a high path and a clean exit. Most manuals want a portion of the hose looped high under the counter, and many call for at least 20 inches above the cabinet floor. Some models or local codes call for an air gap, so I do not guess here. I check the manual and the local requirement, then I match the plumbing to that rule.| Drain setup | Best when | Why I use it |
|---|---|---|
| High loop | The manual and local code allow it | Simple, hidden, and effective when the hose is secured high under the counter |
| Air gap | Backflow protection is required or preferred | Strong defense against sink backup, though the cap is visible at the sink or counter |
| Direct to disposer or waste tee | The plumbing already has the right connection point | Clean and compact, as long as the knockout plug is removed first |
If the dishwasher connects to a disposer, I remove the knockout plug before attaching the hose. I also keep the hose away from the floor and out of the path of sharp cabinet edges, because a sagging or kinked drain line is one of the most common reasons a new unit seems to “not drain” when the real problem is the hose routing.
When the plumbing is routed correctly, the dishwasher is much less likely to leak, gurgle, or leave water in the tub after the cycle ends.
Run a test cycle before you button everything up
I never reinstall the toe-kick until I have watched the dishwasher run at least once. That test tells me more than the model label ever will. It shows whether the door seals correctly, whether the drain clears, and whether the under-sink connections stay dry under pressure.
- Turn the water back on and watch the supply connection for drips.
- Restore power at the breaker or plug the unit in, depending on the setup.
- Start a test or rinse cycle from the product manual.
- Check the inlet, elbow, drain hose, and shutoff valve for leaks while the machine fills and drains.
- Listen for grinding, knocking, or a drain sound that never quite finishes.
- Open the door after the cycle and look for standing water in the tub or around the base.
If the sink backs up or the dishwasher holds water, I check the drain hose height, the disposer knockout, and the house drain before I blame the appliance. A dishwasher often reflects the condition of the plumbing it is tied into. If the sink drains slowly, the new machine will usually show the same symptom.
When the test cycle passes cleanly, I dry the cabinet, reinstall the toe-kick, and leave the area open long enough to recheck for slow drips.
When I stop and bring in a plumber or electrician
There is a clear point where DIY stops being smart and starts being a repair call. I do not push through corroded plumbing, uncertain wiring, or a shutoff valve that will not close fully. Those are not cosmetic issues. They are the exact problems that turn a simple appliance swap into water damage.
| Situation | Why I would not ignore it |
|---|---|
| The shutoff valve does not close completely | You need a reliable way to isolate the dishwasher before final hookup |
| The supply line needs soldering in a cramped cabinet | Heat can damage nearby components, and the work is awkward enough to make mistakes more likely |
| The dishwasher is hardwired and the wiring looks unclear or damaged | Electrical guessing is the wrong place to save time |
| The cabinet floor is swollen, soft, or stained | That usually means there has already been leakage that needs to be traced and repaired |
| The drain keeps backing up even after a correct test install | The sink branch, disposer, or house drain may need separate attention |
In practice, the boundary is simple: if I can isolate the water, route the drain cleanly, and connect power according to the manual, the job is manageable. If any one of those three is compromised, I stop and hand it off before a small appliance project becomes a larger restoration job.
The last checks that save you from a second teardown
The details that matter most are usually the ones people skip because the dishwasher already looks installed. I make one last pass for stress points, pinched hoses, and anything that will be hard to reach after the toe-kick goes back on.
- Make sure the dishwasher is anchored but not twisted against the cabinet.
- Leave enough slack in the water line and drain hose for service, without letting either hang low.
- Confirm the toe-kick will reinstall without pinching wiring or hoses.
- Check that the door seal contacts evenly all the way around.
- Keep the shutoff valve accessible for the next repair.
When those checks are right, the replacement feels like it belongs there, not like it was forced into place. That is the difference between a quick swap and a job you only want to do once.