Installing luxury vinyl tile is one of those projects that looks simple until the first row drifts out of square or the subfloor shows every flaw. This guide walks through how to install LVT flooring the right way, from prep and layout to cutting, finishing, and the mistakes that usually cause trouble later. If the floor is meant to look sharp and stay quiet underfoot, the details matter more than the tile itself.
What matters most before the first tile goes down
- Match the installation method to the product: peel-and-stick, click-lock, glue-down, and groutable LVT all follow different rules.
- Make the subfloor dry, clean, flat, and solid before you start.
- Add about 10% extra material for cuts, waste, and future repairs.
- Use the manufacturer’s expansion gap and keep the layout square from the beginning.
- For adhesive-backed installs, a 100-pound roller is a real requirement, not an optional extra.
Start with the right LVT system for the room
I always begin by checking the installation method printed on the carton or product page, because luxury vinyl tile is not installed the same way across the board. Some products are peel-and-stick, some lock together as a floating floor, and others are fully adhered with glue. That choice changes the prep, the tools, the timing, and even how forgiving the job will be if something goes slightly off.
| System | Best fit | What to watch |
|---|---|---|
| Peel-and-stick | Small rooms, budget projects, quick DIY jobs | Needs a very flat subfloor and gives you less room to reposition once it grabs |
| Click-lock floating | Bedrooms, living rooms, remodels, and larger DIY projects | Needs perimeter expansion space and proper transitions between rooms |
| Glue-down | Large open areas, high-traffic rooms, and spaces where you want the floor to feel more fixed | Requires stronger substrate prep, adhesive timing, and a heavy roller |
| Groutable LVT | When you want a tile look with vinyl comfort and faster installation than ceramic | Use only the grout the product calls for, usually a vinyl-specific acrylic grout |
That choice matters because the room can be “fine” for one method and poor for another. A floating floor tolerates a different set of conditions than glue-down tile, and a peel-and-stick job is far less forgiving if the floor has dips or dust. Once the system is clear, the prep becomes much easier to judge.
Prepare the room and subfloor until it is boringly clean
This is the part that saves the job. I want the space empty, the old trim removed if I plan to reuse it, and the subfloor reduced to three things: dry, clean, and flat. If the floor squeaks, flexes, has loose fasteners, or carries old adhesive ridges, I deal with that now rather than hoping the LVT hides it.
In practical terms, I check for loose nails or screws, sand down high spots, and fill low spots with a suitable leveling compound. If I am installing over old vinyl, it has to be firmly attached and in good condition; any damaged texture or uneven areas need smoothing first. For glue-down products, I also pay attention to room temperature and storage conditions, because many manufacturers want the material, adhesive, and room to be stable before installation begins.
Here is the prep list I actually work through:
- Remove furniture, appliances if needed, and any baseboards or shoe molding I plan to reuse.
- Vacuum thoroughly and pick up every staple, nail head, and screw that could telegraph through the tile.
- Sand down high spots and fill low spots with a cementitious leveler or approved patching compound.
- Check door clearances before the first row goes in.
- Store the cartons flat in a dry, temperature-controlled room, not in a garage or next to a heat vent.
- Let the flooring acclimate if the manufacturer calls for it; a 48-hour window is common for some products.
For glue-down jobs, I treat 65 to 85 degrees Fahrenheit as the safe working zone when the product instructions call for controlled conditioning, because stable temperature is what helps keep the floor from moving after it is set. Once the substrate is ready, the next decision is layout, because every mistake there gets repeated across the room.
Plan the layout before you stick down the first row
If the floor starts crooked, the problem grows with every tile. I measure the room, add about 10% for waste and future repairs, and then decide where the grid should land so I do not end up with a tiny sliver of tile at the far wall. A 12-by-10 room is 120 square feet, which means I would plan for roughly 132 square feet of material before I even open the boxes.
The simplest layout method is to snap center lines or a starting line, then dry-fit a few pieces before adhesive or backing paper comes into play. I also open several cartons at once and blend tiles from them so slight color variation is spread across the floor instead of clustering in one area. That small habit makes a much bigger visual difference than most people expect.
My layout check list is straightforward:
- Measure the room and calculate total square footage.
- Add extra material for cuts, waste, and repairs.
- Mark a square starting grid with a chalk line.
- Dry-lay enough tiles to see where the border cuts will land.
- Shift the layout if one side ends up too narrow to look intentional.
- Pull from multiple cartons as you go so the pattern stays balanced.
I also pay attention to the direction of the floor. In many rooms, the best-looking result runs parallel to the longest wall or to the strongest light source, because that helps the joints read as part of the room instead of as a visual interruption. With the layout locked in, the actual setting process becomes much more predictable.
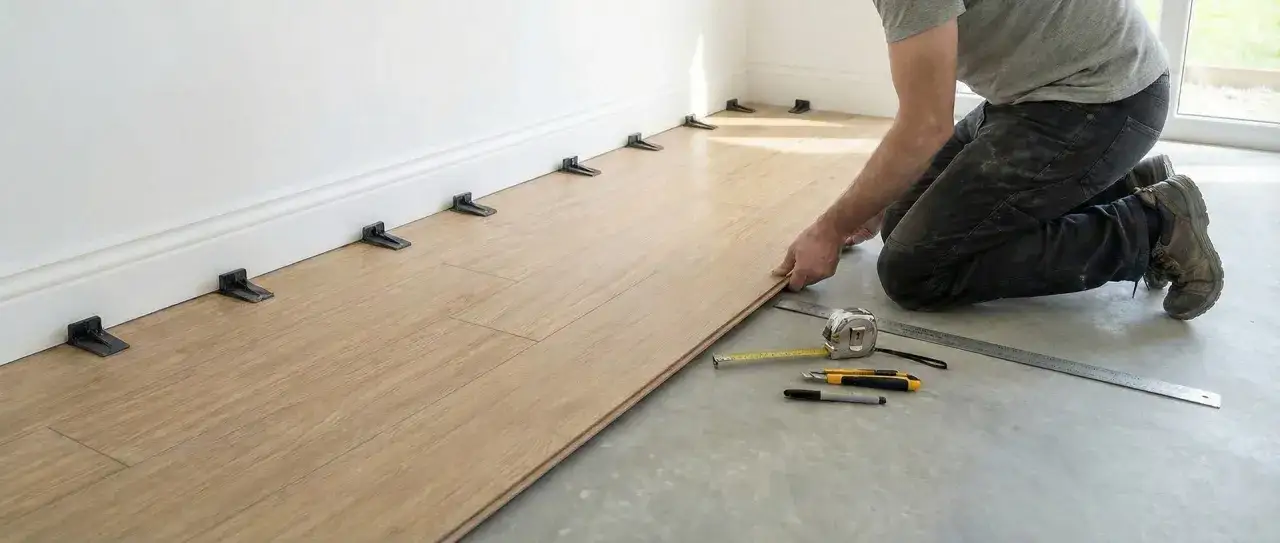
Set the field of tiles with steady pressure
This is the part most people picture first, but it only works if the prep and layout were already right. Whether the product is peel-and-stick, click-lock, or glue-down, I start at the reference line and keep checking alignment instead of trusting the eye alone. The first few tiles control the rest of the room, so I want them exact.
For floating click-lock flooring, I keep the perimeter gap open with spacers and lock the pieces without forcing the joints. For adhesive-backed tile, I only peel or spread enough adhesive for the section I can place confidently before it skins over. That pace matters more than speed; once a tile is committed, it should not need to be dragged around to “find” the line.
- Set the first tile or row directly on the marked line.
- Press each piece firmly before moving to the next one.
- Check the joints every few tiles so the pattern does not drift.
- Mix tiles from different boxes as you work to avoid noticeable shade grouping.
- Keep the manufacturer-recommended gap around walls, cabinets, and fixed objects if the system calls for one.
- Clean up adhesive squeeze-out immediately so it does not harden at the seams.
If the product is groutable, I still do not rush the field install. I want every tile fully seated and the pattern consistent before any grout enters the picture. That consistency makes the cuts and finish work much easier to handle next.
Cut edges and awkward spots without wrecking the pattern
Clean cuts are what separate a decent DIY floor from one that looks installed by someone who does this for a living. Straight wall cuts are usually easy: measure, mark, score with a sharp utility knife, and snap or trim as the product allows. The hard part is everything that is not a square room, which is most rooms in real houses.
For notches around door casings or cabinets, I use the tile itself or a cardboard template to transfer the shape before I cut. For angled walls, I measure from the last full tile, transfer both points, and connect them with a straightedge so I do not guess at the angle. If the door jamb can be undercut, I prefer that route because it lets the tile slide underneath and makes the edge disappear visually.
- Use fresh blades; dull blades tear vinyl and make the edge look fuzzy.
- Keep the cut edge against the wall whenever the layout allows it.
- Do not force a tile into a tight opening if the product needs movement space.
- Leave enough room under trim so the floor can move slightly without buckling.
- At thresholds, plan the transition strip before the last row is installed.
Once the cuts fit cleanly, the floor still needs the finish work that locks the job together and keeps it stable over time.
Finish with grout, rolling, and trim
On adhesive-backed projects, this is where the 100-pound roller earns its keep. I roll the floor in several directions so the tiles bond evenly and any air pockets are pushed out before they turn into hollow spots later. Renting the roller is usually worth it for a DIY install because hand pressure is not enough on a full adhesive job.
If the LVT is groutable, I use only the acrylic grout specified for vinyl tile and follow the product’s timing and cleanup instructions carefully. That grout is part of the look, but it is also part of the installation system, so I do not treat it like ceramic tile grout. After that, I reinstall shoe molding or baseboards so they cover the perimeter gap without pinching the floor.
Before I call the project finished, I make one more pass for the practical details:
- Recheck that the expansion gap is still open where the trim will cover it.
- Vacuum the surface and remove adhesive residue before it hardens.
- Keep heavy furniture and rolling loads off the floor until the adhesive or grout has cured.
- Save at least one extra carton for future patch repairs if the pattern ever gets damaged.
Those final steps do not take long, but they are the difference between a floor that just looks done and one that actually performs like it should.
The mistakes that usually cause LVT floors to fail early
The biggest problems I see are rarely dramatic. They are small decisions made too early or too fast. A floor can look good on day one and still fail because the installer skipped one boring step at the beginning.
- Skipping subfloor checks - vinyl is not generous about bumps, dips, or soft spots, and those flaws will show up under foot.
- Using the wrong adhesive or grout - the product instructions are part of the system, not a suggestion.
- Forgetting perimeter movement space - a tight floor can buckle, peak, or telegraph stress at the joints.
- Starting from a crooked line - every row repeats the mistake and makes it more obvious.
- Not blending cartons - the color difference may be subtle, but a grouped batch can still read as patchy in daylight.
- Rushing traffic back onto the floor - adhesive and grout need their full cure window, especially under heavy loads.
- Ignoring moisture issues - if the slab or underlayment is wet, the problem is not the tile, it is the substrate.
I would rather stop a job for a substrate problem than hide it under new flooring and hope for the best. That is the line between a floor that lasts and one that needs to be reopened later.
What I would double-check before calling the job done
Before I put the tools away, I walk the room slowly in good light and check for edge lift, hollow spots, uneven seams, or borders that look too narrow to be intentional. I also keep the leftover cartons, adhesive label, and any product paperwork in case I need to match a repair later. Those details are not glamorous, but they are exactly what saves time if a plank or tile ever gets damaged.
If the room is small, square, and dry, installing LVT is a manageable DIY project. If the floor has moisture problems, uneven concrete, moving subflooring, or complicated transitions, I treat the job as a substrate repair first and a flooring install second. That order usually gives the best result, and it is the reason a good LVT floor can look clean, feel solid, and stay that way for years.