Click-lock flooring is one of the easiest floating-floor systems to install, but it rewards careful prep more than fast hands. The real work is making the subfloor flat, choosing the right layout, and giving the floor room to move so the joints stay tight over time. This guide covers how to install click lock flooring the way I would approach it on a real job: step by step, with the practical details that prevent callbacks.
The essentials before you begin
- Click-lock floors float, so the subfloor must be clean, dry, and flat before the first plank goes in.
- A common tolerance is about 3/16 inch over 10 feet, but the product instructions always win.
- Leave a perimeter expansion gap, often around 1/4 inch, so the floor can move without buckling.
- The first row matters more than most people think; if it drifts, the whole room drifts with it.
- Use the right underlayment, but do not double it up if the planks already have an attached pad.
- Stagger end joints, avoid forcing the locks, and undercut door casings for a cleaner finish.
What click-lock flooring actually needs to work
Click-lock planks are designed to float, which means they lock to each other but not to the subfloor. That is why the surface underneath matters so much: the floor moves as one sheet, and any hump, dip, or trapped grit can telegraph through later as bounce, gaps, or a hollow sound.
I like this system because it is forgiving for DIY work, but it is not forgiving of bad prep. The product may be waterproof or scratch-resistant, but the locking edge still needs a clean, flat, stable base. That is the difference between a floor that feels solid and one that starts annoying you within a season.
Most click systems also come with product-specific instructions on underlayment, expansion gaps, and room-size limits. I start there every time, because the carton decides the details. Once that foundation is clear, the next job is prep, because a click floor only performs as well as the surface underneath it.
Prepare the room and subfloor before installation
Before I open the cartons, I want the room ready in the same way a mechanic wants the bay clean before a repair. Floating floors hide very little once they're down.
| Subfloor or existing surface | What I check before installing | What usually has to happen first |
|---|---|---|
| Plywood or OSB | Flatness, loose panels, squeaks, moisture | Fasten loose spots, sand high seams, fill low areas, and replace damaged sheets |
| Concrete slab | Moisture, flatness, cracks, dust | Test moisture if required, patch cracks, grind high spots, and use the specified barrier or pad |
| Ceramic tile | Grout depth, loose tiles, lippage, cleanliness | Secure or replace loose pieces and level deep grout lines if they will telegraph through |
| Existing vinyl or laminate | Flatness and firmness | Only keep it if the manufacturer allows it and the surface is stable |
| Carpet or cushioned flooring | Whether it is soft or resilient | Remove it; click-lock flooring should not go over a soft surface |
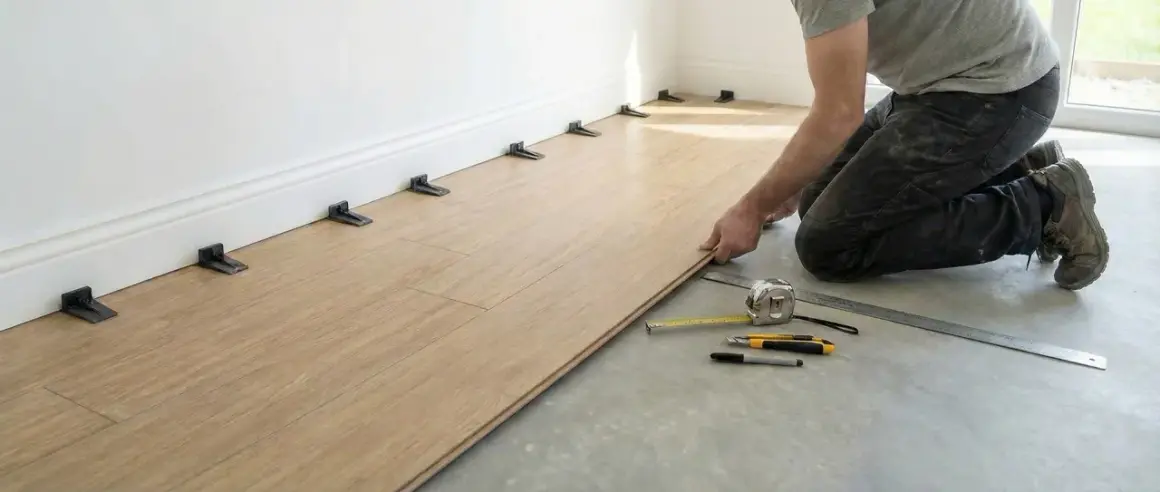
Plan the layout and start the first row
I usually start by deciding where the eye will land first. In a simple rectangle, that often means working along the longest straight wall, but I also look at the room's light and any built-ins so the cut edges end up where they are least visible.
- Measure the room width before you lay anything down. If the last row would end up too narrow, I adjust the starting line before the first plank is locked in.
- Snap a chalk line if the wall is not straight. Walls are often slightly crooked, and the floor should follow a visual line, not a bad wall.
- Dry lay a few planks to see how the ends stagger. I try to avoid a tiny sliver at the opposite wall, because that always looks like an afterthought.
- Set spacers around the perimeter. A common gap is 1/4 inch, but I always respect the package instructions if they call for more or less.
- Keep the first row oriented correctly. On many systems, the cut edge faces the wall and the tongue is trimmed off if needed so the perimeter trim can hide the edge cleanly.
I also plan the end-joint pattern before I commit to the first row. I like at least a 6-inch offset between end joints, and 8 to 12 inches looks even better when the plank length allows it. That stagger helps the floor look natural and reduces the chance of weak-looking seams. With the layout locked in, the actual snapping process becomes much easier, and that is where clean technique matters more than speed.
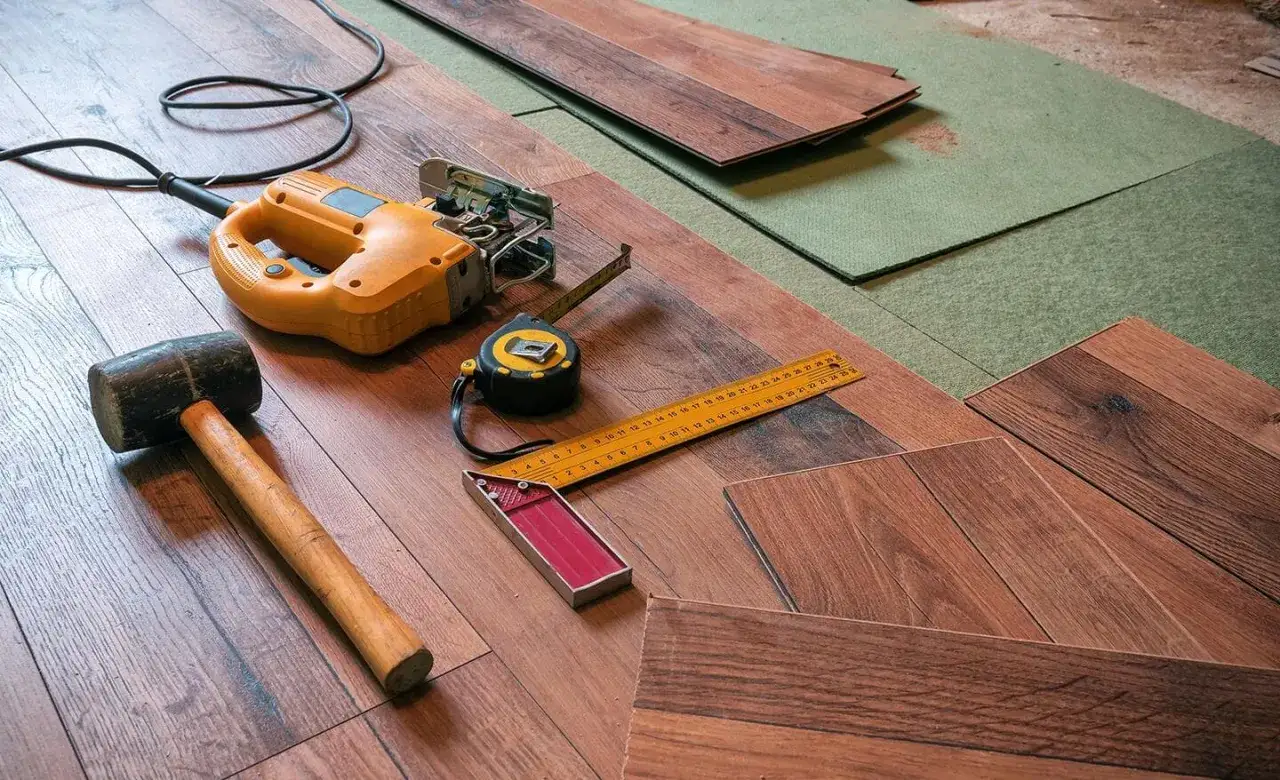
Lock the planks together row by row
Click-lock flooring should feel controlled, not forced. If a joint fights me, I stop and find out why, because forcing the locks is one of the fastest ways to damage a floating floor.
- Angle the long side of the next plank into the previous row and engage the groove and tongue according to the product design.
- Lower the plank gently until it sits flat, then check the seam with both your eyes and your fingertips.
- If the short end needs help seating, use a tapping block only if the manufacturer allows it, and tap lightly. I never hit the locking edge directly.
- Continue down the row, keeping the end joints staggered and the seams tight. A clean click should produce a flat joint, not a ridge.
- Use a pull bar for the last plank in a row, especially when the wall leaves too little room for a tapping block.
- If a joint will not close, back up one plank, clear debris, and re-seat it. A speck of grit can keep a seam from fully locking.
I pay close attention to the feel of the floor as I go. A joint that locks properly should sit flush, not bounce when I step on it. If I hear a hollow sound or feel a lip, I correct it immediately instead of hoping the trim will hide it later. Once the field is in place, the final cuts and transition details are what separate a passable DIY job from a floor that looks intentional.
Cut cleanly around doors, vents, and transitions
The last 10 percent of the room usually takes 40 percent of the time, and that is normal. Corners, trims, and doorway details are where a lot of otherwise good installs start to look rough.
I undercut door casings and jambs so the flooring can slide underneath and keep its expansion gap hidden. That gives a cleaner look than trying to scribe around every small irregularity, and it avoids tiny exposed notches that collect dirt.
- For vinyl click planks, I often score and snap with a utility knife and straightedge when the product thickness allows it.
- For laminate or engineered click flooring, I usually switch to a fine-tooth blade on a saw so the cut edge stays crisp.
- At vents and pipe penetrations, I leave the required movement gap and finish with the right trim piece instead of cutting the hole tight.
- At room transitions, I follow the product's maximum run length and doorway rules. Some floating floors need a transition strip even when the rooms are visually connected.
I also measure the last row in several places because walls are rarely perfectly parallel. A room can be a little wider on one end, and if I only measure once, I risk a narrow wedge that looks awkward. Careful cutting is where the floor starts to look built-in rather than assembled. Most early failures come from a small number of avoidable mistakes, and they usually show up faster than people expect.
The mistakes that shorten a click-lock floor’s life
When a click-lock floor fails early, the cause is usually not mysterious. It is almost always prep, spacing, or a joint that was forced into place.
- Skipping flatness checks means the floor can flex, squeak, or separate later. This is where telegraphing happens, which is the industry term for the floor copying the shape of what's underneath it.
- Leaving out the expansion gap can make the floor buckle against the walls when humidity changes.
- Using the wrong underlayment, or doubling it when the plank already has an attached pad, can make the floor too soft and unstable.
- Forcing tight joints can chip the locking profile, and once that edge is damaged, the seam tends to fail again.
- Ignoring moisture on concrete is a serious mistake in American homes with slabs, especially in basements or ground-level rooms.
- Staggering badly can leave weak-looking patterns and seams that seem to line up across the room.
When I see a floating floor starting to move, the first things I re-check are flatness, moisture, and perimeter clearance. Those three issues solve a surprising number of problems. Before I call the room done, I do a few checks that save a lot of annoyance later.
What I check before I call the room finished
A clean install is not just about the visible field of planks. It is also about the details that sit under trim, at the edges, and around the room's fixed points.
- I walk every seam and look for lifted lips, open ends, or spots that sound hollow.
- I remove the spacers only after the full floor is locked and stable.
- I reinstall baseboards or quarter round so they cover the expansion gap without pinning the floor down.
- I vacuum grit from the surface and from the perimeter before furniture goes back in.
- I keep a spare carton if possible, because matching exact color and finish later is harder than most people expect.
If I am unsure about one part of the room, I stop and read the product guide again rather than guessing. That is the habit that keeps click-lock installations clean, quiet, and durable. A floor like this does not reward shortcuts, but it does reward patience, and that is what makes the finished room hold up well over time.