Cutting wall tile cleanly is mostly about planning, not brute force. The right blade, the right mark, and the right sequence of cuts matter more than speed, especially with glazed ceramic and dense porcelain. If you are learning how to cut wall tile, start by matching the tool to the material and the shape of the cut. In this guide, I break down the tools, the cut types, and the habits that keep a backsplash or shower wall looking intentional instead of patched together.
The few decisions that matter before the first cut
- Pick the tool by cut type. Straight cuts call for a manual cutter or wet saw; curves, notches, and holes need nippers, a grinder, or a diamond hole saw.
- Measure from the wall layout, not just the tile edge. Grout joints, corners, and trim all change the final fit.
- Use slow, steady pressure. Chipping usually comes from forcing the cut, not from the tile itself.
- Practice on scrap. A test piece exposes bad marking, weak scoring wheels, and poor blade setup before you ruin visible tile.
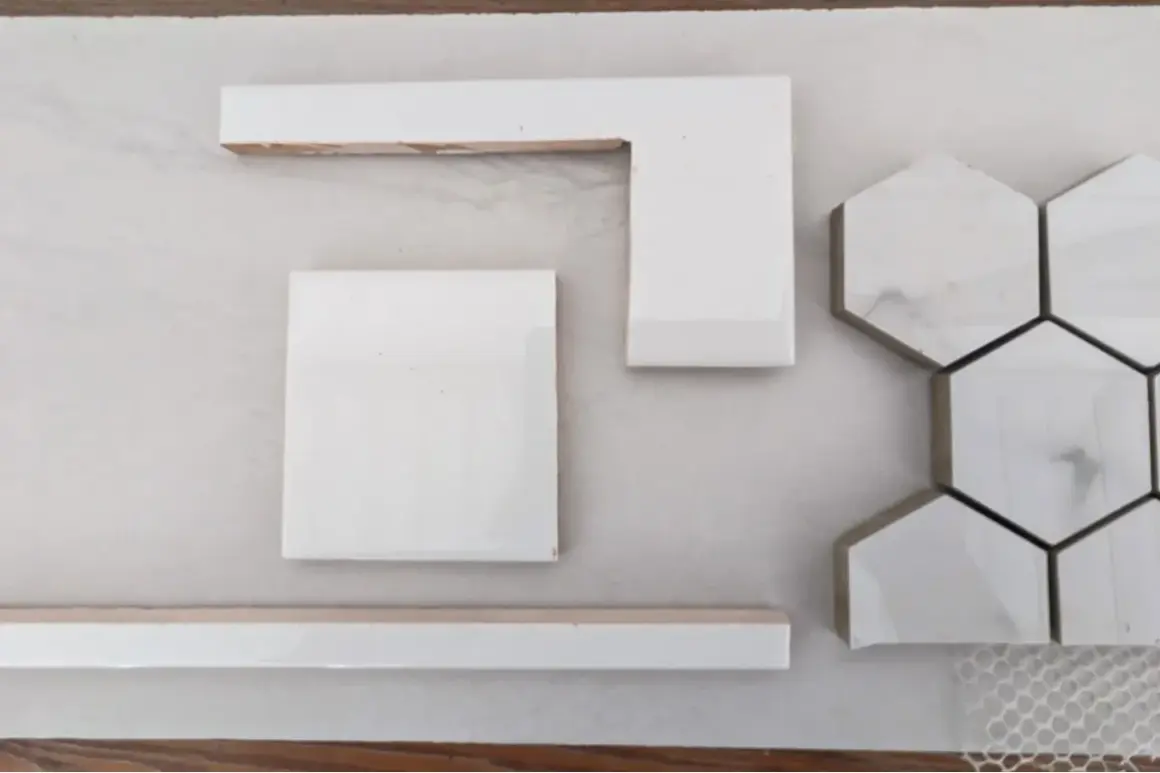
- Finish exposed edges. A rubbing stone or trim profile can turn a rough cut into a clean install.
Choose the right tool for the tile and the shape
I start every tile job by separating the cuts into three buckets: straight, shaped, and round. That sounds basic, but it saves time because the wrong tool is usually what creates chipped glaze, wasted pieces, and awkward patchwork. A manual cutter is fast for straight runs, a wet saw gives me the most control on harder tile, and specialty tools handle the small details that no straight cutter can solve.
| Tool | Best for | Strengths | Limitations |
|---|---|---|---|
| Manual snap cutter | Straight cuts in ceramic and many porcelain wall tiles | Fast, low setup, clean on repeated straight cuts | Limited to straight or diagonal cuts; dense porcelain can be stubborn |
| Wet saw | Hard porcelain, natural stone, and precise straight or angled cuts | Cleanest edge, better on brittle or expensive tile, handles more shapes | Slower setup, water cleanup, more equipment to manage |
| Tile nippers | Small curve corrections, mosaics, tiny bites around an edge | Cheap, useful for fine shaping, good as a secondary tool | Leaves a rough edge and is not suited to long cuts |
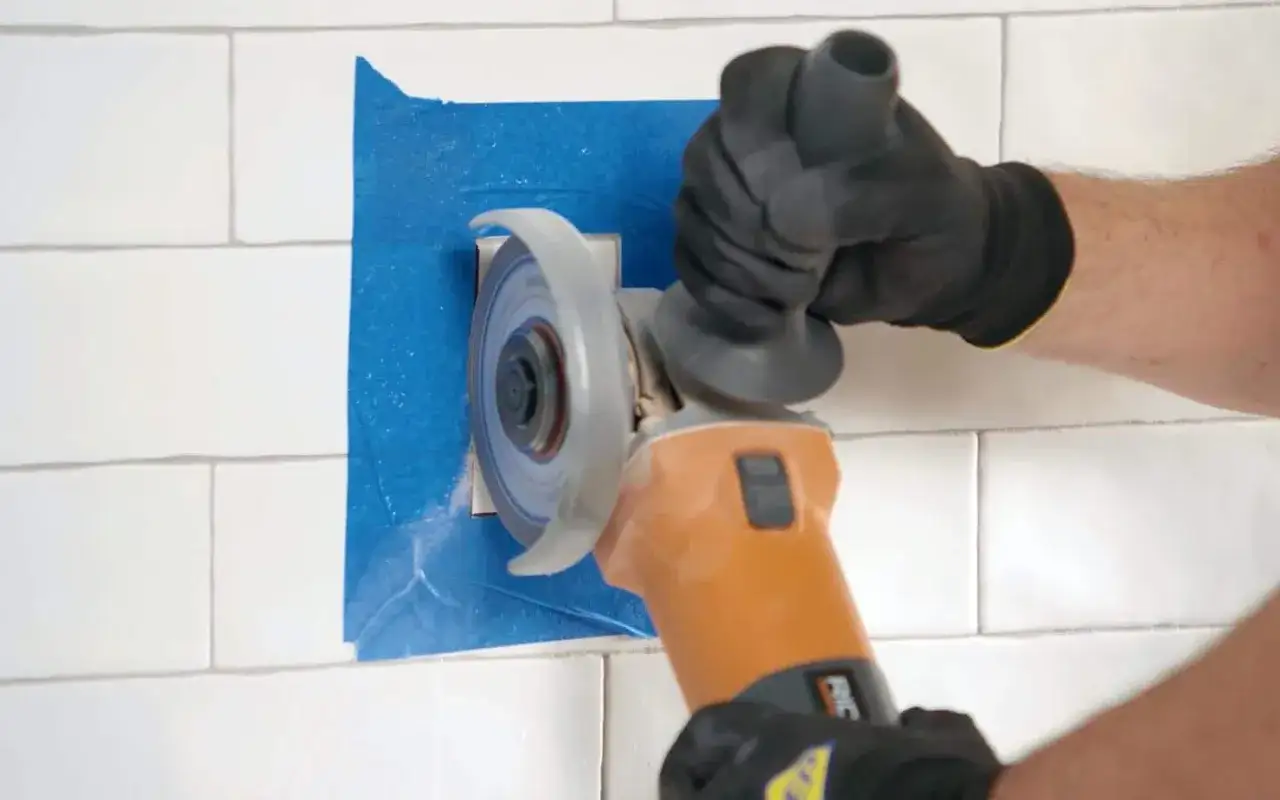
| Angle grinder with a diamond blade | Notches, L-cuts, and unusual openings | Flexible, good for rescue work and tight shapes | Dusty, loud, and easier to overcut if you rush |
| Diamond hole saw | Round holes for pipes, valves, and fixture penetrations | Best option for clean circles and bathroom wall details | Needs steady control and the correct size for the opening |
For straight wall cuts, I want the simplest tool that can do the job cleanly. For anything that bends, wraps, or opens around a fixture, I stop thinking like a cutter and start thinking like a fitter. Once I know which tool belongs to each cut, the layout becomes much easier to trust.
Mark the wall layout before you cut a single tile
The cut itself is only half the work. The better half is layout, because a beautiful cut in the wrong place still looks wrong once it is on the wall. I dry-fit the tiles first, check spacer width, and mark the actual line I need rather than guessing from the tile’s factory edge. On glossy surfaces, I like a wax pencil or fine marker; on matte tile, a regular pencil is usually enough.
There are a few rules I follow every time:
- Measure from the installed reference point, not from a random corner of the room.
- Account for grout joints and trim profiles before you mark the tile.
- Keep cut edges where they are least visible whenever the layout allows it.
- Use a test tile for anything repeated, such as outlet boxes or plumbing penetrations.
- Leave factory edges on the most visible side when you have a choice.
For a backsplash, I usually map the outlet locations first because those openings control the whole field. In a shower, I pay the most attention to the corners, niches, and valve positions. After the layout is fixed, the actual cutting is simpler and much less wasteful.
Make straight cuts with steady pressure
Straight cuts are where most DIY tile work either looks clean or starts to slip into amateur territory. The trick is not force. It is consistent pressure and a clean break or a slow, controlled feed through the blade. When a tile chips here, it is usually because the score was weak, the tile moved, or the cut was rushed.
Using a manual cutter
- Mark the cut line clearly and align it with the scoring wheel.
- Score once with even pressure from one end to the other.
- Use the breaker bar to snap the tile in one controlled motion.
- If the tile does not break cleanly, stop and inspect the score rather than forcing it again and again.
I like manual cutters for repetitive straight runs because they are quick and less messy than a wet saw. They are especially efficient on standard ceramic wall tile and many porcelain tiles. The tradeoff is that dense porcelain can expose a weak cutter wheel fast, so I do not pretend every snap cutter is equal.
Using a wet saw
- Check water flow before making the cut.
- Support the tile so it stays flat and stable through the blade.
- Feed the tile slowly and let the blade do the work.
- Keep the finished face protected from unnecessary vibration and avoid twisting the tile at the end of the cut.
A wet saw is the option I trust when I want the cleanest edge or when the tile is harder and more brittle. It is the better choice for porcelain that resists a manual cutter and for natural stone that would rather chip than snap. Once I have a reliable straight-cut routine, I move on to the awkward shapes that make wall layouts tricky.
Handle corners, outlets, and curves without cracking the tile
Most wall projects are not about one perfect straight cut. They are about all the small shapes that appear around receptacles, pipes, mirrors, cabinets, and edges. This is where the job gets slower, and it is also where planning matters most. I prefer to remove material in stages instead of trying to cut the entire shape in one pass.
For notches and L-cuts
I mark both legs of the cut, then make relief cuts toward the corner. After that, I remove the waste in small passes with a grinder or nippers. The point is to avoid overcutting the visible face. If a notch will sit behind trim or a cover plate, I still keep it neat, but I care more about fit than perfect cosmetics.
For circles and pipe openings
A diamond hole saw is the cleanest choice for round penetrations. I center the mark carefully, start slowly, and let the bit grind rather than hammer its way through the tile. For shower valves, supply lines, and similar openings, the fit matters more than speed. A sloppy circle can hide under a trim ring, but a cracked circle usually means starting over.
Read Also: LVP Flooring Direction - How to Lay Luxury Vinyl Plank
For curved edges and small corrections
Tile nippers are my last-mile tool. They are best for tiny adjustments, mosaic sheets, and soft curves where the main cut is already close. I use small bites and stop before the edge starts looking chewed up. If the curve is larger or visible, I usually switch to a grinder because it gives a smoother line and less drama.
For awkward shapes, I also like to make a cardboard template first when the opening is repeated or expensive to get wrong. That extra step feels slow, but it is faster than sacrificing three good tiles to one bad measurement.
Finish the cut so the wall still looks professional
A cut tile is not really done until the edge is ready for the wall. Sharp edges catch fingers, and rough glaze chips draw the eye. I keep a carborundum stone, or rubbing stone, nearby for exactly this reason. It does not reshape the tile; it simply knocks off the burrs and softens the edge enough to make it safe and cleaner-looking.
When the edge will remain visible, I think in this order:
- First, test-fit the tile dry and confirm the opening is correct.
- Second, smooth the edge just enough to remove sharpness.
- Third, decide whether the edge should be hidden with bullnose, metal trim, or a corner profile.
- Fourth, keep the cut edge away from the most visible run whenever the layout allows it.
On glazed wall tile, a small chip can stand out more than the cut itself, so I take edge finishing seriously. If the tile is part of a larger install, I also keep the broader schedule in mind: most setting materials need roughly 24 hours before grouting, although I still follow the package directions because formulas vary. That timing does not affect the cut directly, but it affects when you can evaluate the finished look.
Avoid the mistakes that make wall tile fail at the cut line
Most bad cuts come from a handful of repeatable mistakes, and I see the same ones over and over on DIY jobs. The good news is that they are easy to avoid once you know where the trouble starts.
- Rushing the mark. A tile can only be cut as accurately as it is marked.
- Using the wrong tool for the material. Dense porcelain exposes weak manual cutters and dull wheels.
- Forcing the tile through the blade. Pressure should guide the cut, not create it.
- Ignoring dust and blade condition. A dry grinder or a tired wheel makes the cut rougher than it needs to be.
- Skipping the scrap test. One practice piece can save a visible tile and a lot of frustration.
- Trying to rescue a bad line with a bigger cut. That usually turns a small mistake into a visible one.
My own rule is simple: if the tile is expensive, glossy, or patterned, I cut a practice piece first. That one habit catches bad assumptions early and keeps the visible work calm. When those errors are off the table, the remaining work is mostly disciplined planning.
The cleanest wall tile work comes from planning the hidden cuts first
The cleanest installation I have seen, and the cleanest ones I have personally cut, all share the same pattern: the awkward pieces were decided before the blade ever touched the tile. That means the layout was dry-fitted, the tool matched the cut, and the visible edges were protected instead of improvised later.
If I were doing a backsplash or shower wall today, I would follow the same sequence every time: plan the field, mark the cuts, use the simplest tool that fits the shape, and save the grinder for the details that really need it. That approach wastes less tile, reduces chipping, and makes the wall look deliberate instead of patched together.