The cleanest porcelain cuts come from setup, not force
- A continuous-rim diamond blade made for porcelain is the baseline; generic masonry discs chip more easily.
- Clamp the tile flat, support both sides of the cut, and mark the waste side clearly before you start.
- Work in shallow passes and let the blade do the cutting instead of forcing it through the tile.
- Use the grinder for curves, notches, and small corrections; use a wet saw for long straight production cuts.
- Dust control matters: use water only when the tool setup is designed for it, or keep the work contained and clean without blowing dust around.
When a grinder is the right tool
I reach for a grinder when the cut is irregular, the tile is already installed, or I need to trim a piece that a snap cutter cannot touch. It is not the fastest tool for long straight runs, but it is the most flexible tool in the kit.| Tool | Best use | Strength | Tradeoff |
|---|---|---|---|
| Angle grinder | Curves, notches, L-cuts, and last-minute fit-up work | Most flexible and easiest to maneuver | More dust and more room for edge chipping |
| Wet saw | Long straight cuts and repetitive production work | Cleaner, more stable straight cuts | Bulkier and slower to set up |
| Manual cutter | Repeated straight cuts on suitable porcelain | Fast, low mess, simple to use | Poor for curves and very dense or textured tile |
My rule is simple: if the cut has to be perfectly straight and repeated ten times, I do not start with a grinder. If the cut has to fit a pipe, an outlet, a corner, or a last-minute correction at the wall, the grinder earns its place. That decision matters because porcelain is dense and unforgiving, so the wrong tool creates chips before the cut is even finished.
Once I know the grinder is the right tool, the next question is whether the setup will help me or fight me.
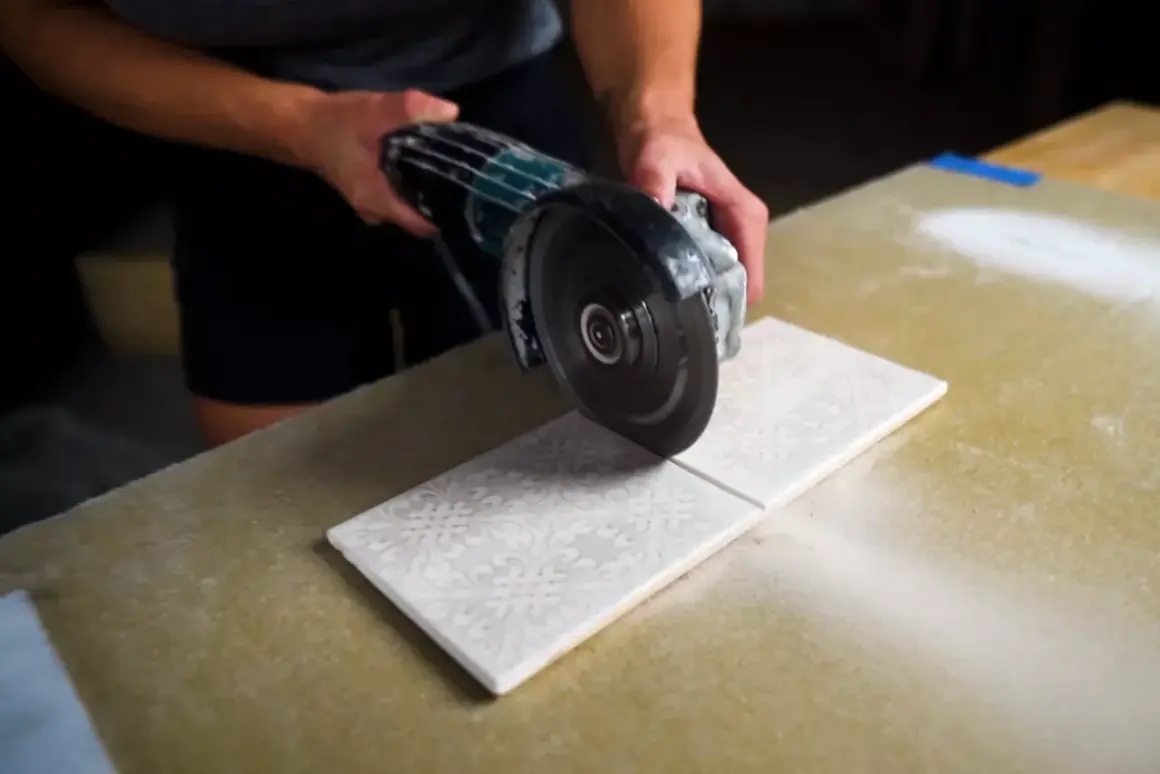
Set up the tile and the blade before you touch the line
A clean porcelain cut starts before the motor starts. I want a stable surface, a sharp blade, and a line I can actually trust. A continuous-rim diamond blade is usually the best choice for porcelain because the edge is unbroken and tends to leave a cleaner line than a segmented blade.
- Choose a blade that is rated for porcelain and matches the grinder arbor and speed requirements.
- Clamp the tile flat on a stable surface and support both sides of the cut so the piece does not vibrate.
- Mark the visible face clearly, and if the cut is tricky, repeat the line on the back side too.
- Keep the waste side accessible so the blade exits into scrap, not into finished tile.
- Wear eye protection, hearing protection, and a respirator suitable for fine dust when dust is present.
- Use dust control as a plan, not as an afterthought; OSHA's general direction on silica dust is to avoid dry cutting and dry sweeping where practical.
I also like to think about the kerf, which is the width of material the blade removes. On a visible cut, that narrow strip matters more than people expect, especially if the tile has to land tight against trim or a finished edge. If the glaze is especially slick, a strip of painter's tape can make the mark easier to read, but I still rely on the actual pencil line rather than the tape alone.
With the tile stable and the blade chosen, the actual cut becomes much easier to control.
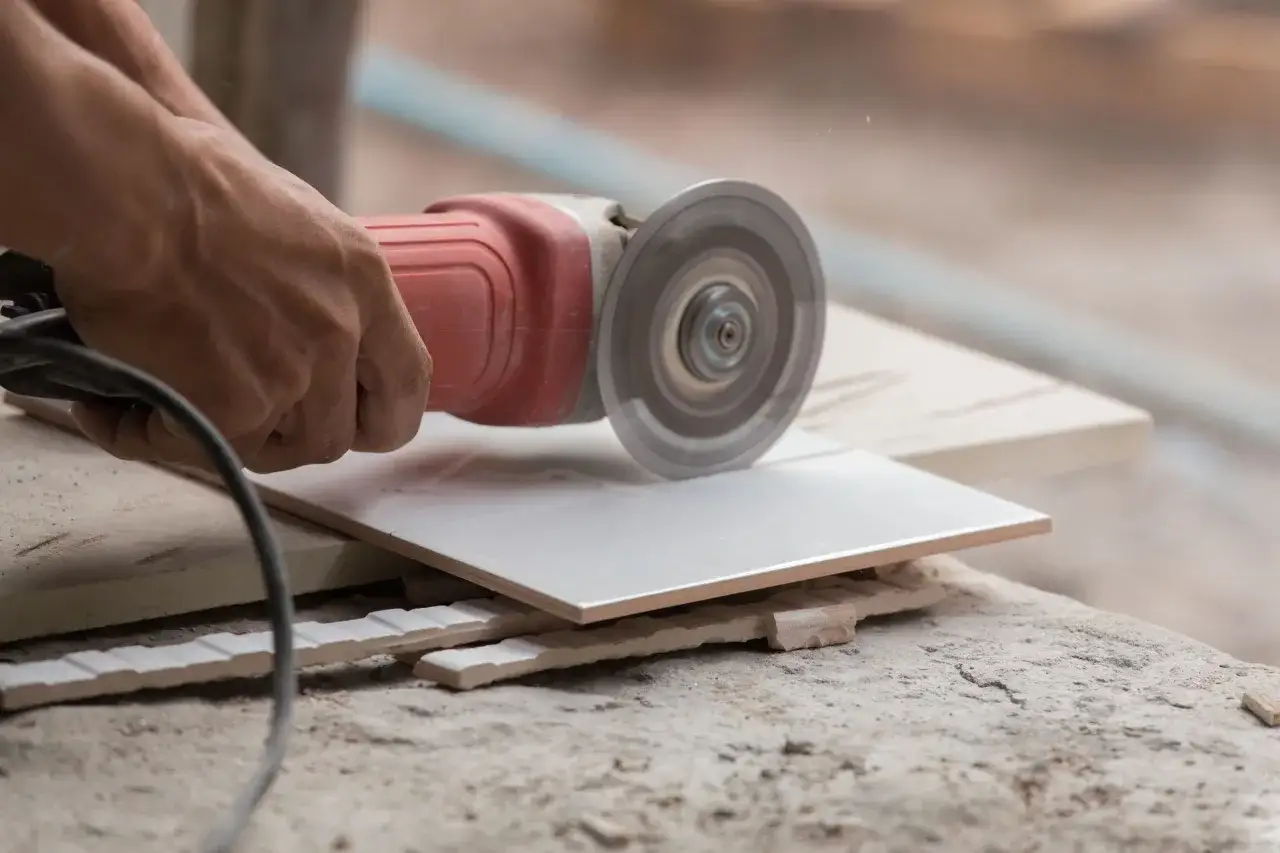
Make the cut in shallow passes, not one aggressive sweep
The biggest mistake I see is trying to force porcelain in a single pass. I get better results when I use the first pass to establish a path, then deepen the cut in controlled stages. That approach keeps the blade cooler, gives me more control, and reduces chipping at the edge.
- Start the grinder off the tile and let the blade reach full speed before it touches the surface.
- Enter from the waste side and lightly kiss the glaze so the blade scores the line instead of hammering into it.
- Move along the line with steady hands and very little downward pressure; the blade should cut, not be shoved.
- On dense floor porcelain, make two to four shallow passes rather than trying to finish the cut in one hard push.
- Keep the blade perpendicular unless you are intentionally beveling or mitering the edge.
- If the offcut is large, support it so it does not tear free at the end and chip the visible face.
- Stop if the blade starts to bind, wander, or overheat, then reset and continue instead of correcting with force.
For a visible cut, I often stop just short of the finish line on the face and clean the last bit from the back or from the waste side if access allows. That small adjustment is often the difference between a tile that looks installed and a tile that looks repaired. The technique changes a little when the shape is not straight, and that is where the grinder becomes especially useful.
Handle curves, notches, and outlet openings carefully
An angle grinder earns its keep on cuts that a snap cutter cannot touch. It handles L-cuts, pipe notches, and odd trim pieces far better than a rigid straight-line tool. The trick is to break complex shapes into small, readable moves instead of trying to carve the whole outline in one motion.
- L-cuts and inside corners - Make the long leg first, then the return leg, and clean the corner with a short relief pass instead of trying to pivot the blade through the corner.
- Pipe openings - Start with a hole saw when the opening needs to look finished; use the grinder to enlarge or connect the cut only after the starter hole is made.
- Outlet boxes - Cut the perimeter in small sections, then square the corners carefully so the cover plate has consistent clearance.
- Curved trim - Sneak up on the line from the waste side and finish with a diamond hand pad if the edge will stay visible.
For inside corners, I do not try to turn the grinder on a dime. I make two straight approaches that meet cleanly, then remove the tiny leftover triangle with a light pass. If the cut will be hidden by trim, I care more about fit than cosmetics; if it will remain exposed, I spend the extra minute to make the edge look intentional. That balance between speed and finish is where experience pays off.
Even when the shape is right, a few predictable mistakes still ruin the result.
Avoid the mistakes that chip porcelain fast
Most bad cuts are not caused by porcelain being impossible. They come from the wrong blade, too much pressure, or a setup that lets the tile move. I see the same failures over and over, and they are easy to avoid once you know what to watch for.
- Using the wrong blade - A cheap segmented masonry disc will cut, but it usually leaves a rougher edge on porcelain.
- Forcing the blade - Pushing harder does not make the cut cleaner; it usually creates heat, wandering, and chipped glaze.
- Letting the tile vibrate - A tile that is not fully supported will chatter, and chatter becomes edge damage.
- Twisting mid-cut - Side pressure bends the blade off line and can score the finished face.
- Ignoring the exit side - Many chips happen when the blade breaks through the back of the tile and pulls material out with it.
- Dry sweeping the dust - Fine silica dust does not disappear just because it is no longer visible; it has to be managed.
When I hear the grinder labor, I back off immediately. When the line starts to wander, I stop and reset rather than trying to rescue the cut with more force. That discipline is boring, but boring is usually what keeps expensive tile out of the trash.
Once the shape is right, the last job is to make the edge feel deliberate and keep the dust under control.
Finish the edge and keep the job dust-aware
After the cut, I knock off the sharp edge with a rubbing stone or a diamond hand pad. That tiny step matters more than people think because it removes the burr that can cut fingers, snag grout, or catch the light as a bright chipped line. If the edge will be hidden by baseboard or caulk, I only ease it enough to make it safe; if it will stay visible, I spend a little more time on the arris, which is the sharp outer edge where the tile meets itself.
For dust, I follow the same logic I use on other silica-producing jobs: keep the dust local, do not blow it around with compressed air, and use water only if the grinder, blade, and work setup are designed for wet cutting. On real jobsites, that approach is more practical than trying to clean up a cloud after the fact. It also makes the workspace safer to move around in while the rest of the tile work is still going on.
A small amount of edge finishing and dust discipline usually does more for the final look than another round of aggressive cutting ever will. Once that part is handled, the only thing left is having the right kit ready before the first tile comes off the stack.
What I keep on the bench before I start
For a typical residential porcelain job, I keep a 4-1/2-inch grinder, a porcelain-rated continuous-rim blade, clamps, a straightedge, a pencil or fine marker, a rubbing stone, a vacuum, eye protection, hearing protection, and a respirator ready before I touch the tile. I also keep a spare blade close by because a worn disc can turn a clean cut into a chipped one faster than most DIYers expect.
If the layout includes a lot of long visible straight cuts, I still move the heavy lifting to a wet saw and reserve the grinder for the awkward shapes and final fit-up. That split usually gives me the best balance of speed, control, dust management, and edge quality, which is exactly what porcelain work demands.