The key details that make a tub surround hold up
- Use a rigid cement board wall system, but do not treat the board itself as waterproof.
- Keep the bottom edge clear of the tub flange by about 1/4 inch and keep the wall plane flat.
- Fasten panels about every 8 inches on center, with screw heads flush and corners reinforced.
- Embed all seams in thinset with alkali-resistant mesh tape before tile goes on.
- Use either a code-compliant moisture barrier behind the board or a surface waterproofing membrane, depending on the system.
Get the wall ready before you cut a sheet
I always start by checking the framing, not the cement board. If the studs are bowed, twisted, or out of plane, the tile will show it later, and a tub surround is too visible to hide that kind of mistake. For a clean install, I want the wall flat, plumb, and structurally sound before a single panel goes up.
In U.S. tub surrounds, 1/2-inch cement board is the common wall choice unless a specific system calls for something different. I also make sure the board edges that run parallel to framing have proper support, because unsupported edges invite movement and cracked grout joints. If the tub is on an exterior wall, I also seal obvious penetrations and confirm the cavity has been insulated before I close it in.
- Check studs with a long level or straightedge.
- Shim or fur low spots so the finished wall stays flat.
- Replace damaged framing before installing any backer board.
- Plan the layout so seams do not land on weak framing patterns.
Once the wall is true, the rest of the job becomes a fitting exercise instead of a correction exercise, which is exactly where you want to be before you start cutting panels.
Gather the right materials before you start
A tub surround goes smoother when every material is on hand before you open the board packaging. The tools are simple, but the details matter: the wrong tape, the wrong fastener spacing, or the wrong sealant at the tub line can undo a lot of good work.
| Item | Why I use it |
|---|---|
| 1/2-inch cement board | Provides the rigid substrate tile needs on the walls around the tub. |
| Alkali-resistant mesh tape | Reinforces seams so they do not crack through the tile layer. |
| Thinset mortar | Used to embed tape and bond tile; this is not the place for drywall compound. |
| Waterproof membrane or approved vapor barrier | Protects the assembly in the wet zone, depending on the system you choose. |
| Backer board screws or approved nails | Hold the panel tight to the framing without overdriving the surface. |
| Utility knife, scoring tool, hole saw, and dust protection | Makes cutting cleaner and reduces the dust you breathe. |
| 1/4-inch spacer strips or shims | Helps keep the board off the tub flange so the bottom edge does not bind. |
Cut and dry-fit every panel before you fasten it
I dry-fit the board before I drive any fasteners. That sounds basic, but it saves time because tubs are rarely as square as the opening around them. Measure each wall separately, transfer the layout to the board, and mark any fixtures or plumbing penetrations before you cut.
Most cement board can be scored and snapped, then cleaned up with a rasp. For holes, I use a hole saw or a utility knife to score both sides and break the cutout free. Keep the edges neat, because rough cuts can make the panel sit crooked or crack when you drive the screws.
- Stagger vertical seams so they do not line up with each other or with other joints in the wall.
- Do not let four corners meet at one point.
- Keep board edges supported by framing where possible.
- Leave small movement gaps between sheets instead of forcing the edges tight together.
The dry-fit step is where I catch almost every problem that would be annoying to fix after fastening, especially around the valve, spout, and the tub end walls. After that, the flange detail is the part that deserves the most care.
Set the bottom edge correctly at the tub flange
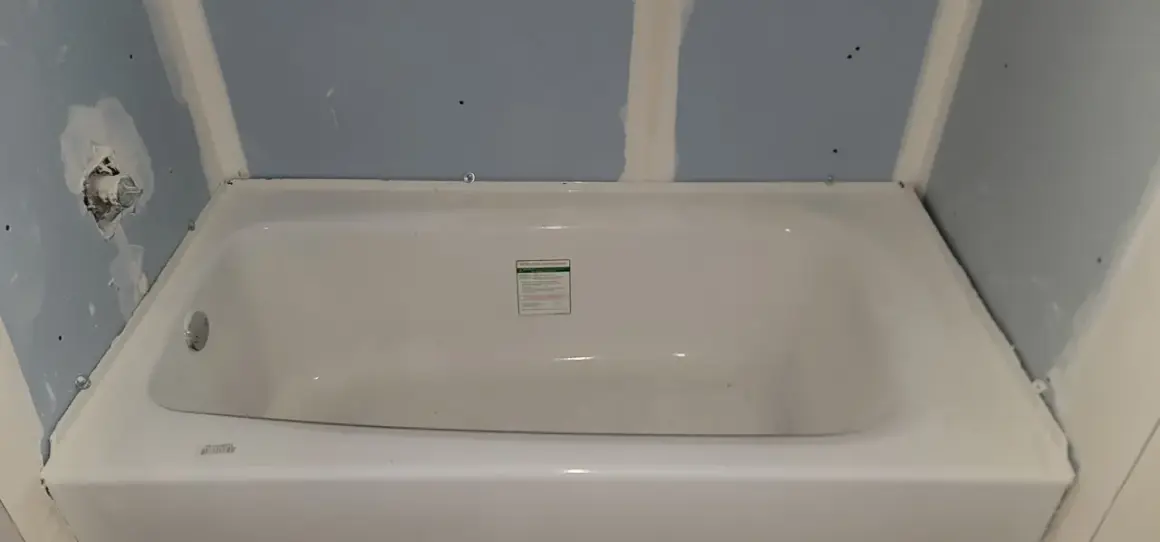
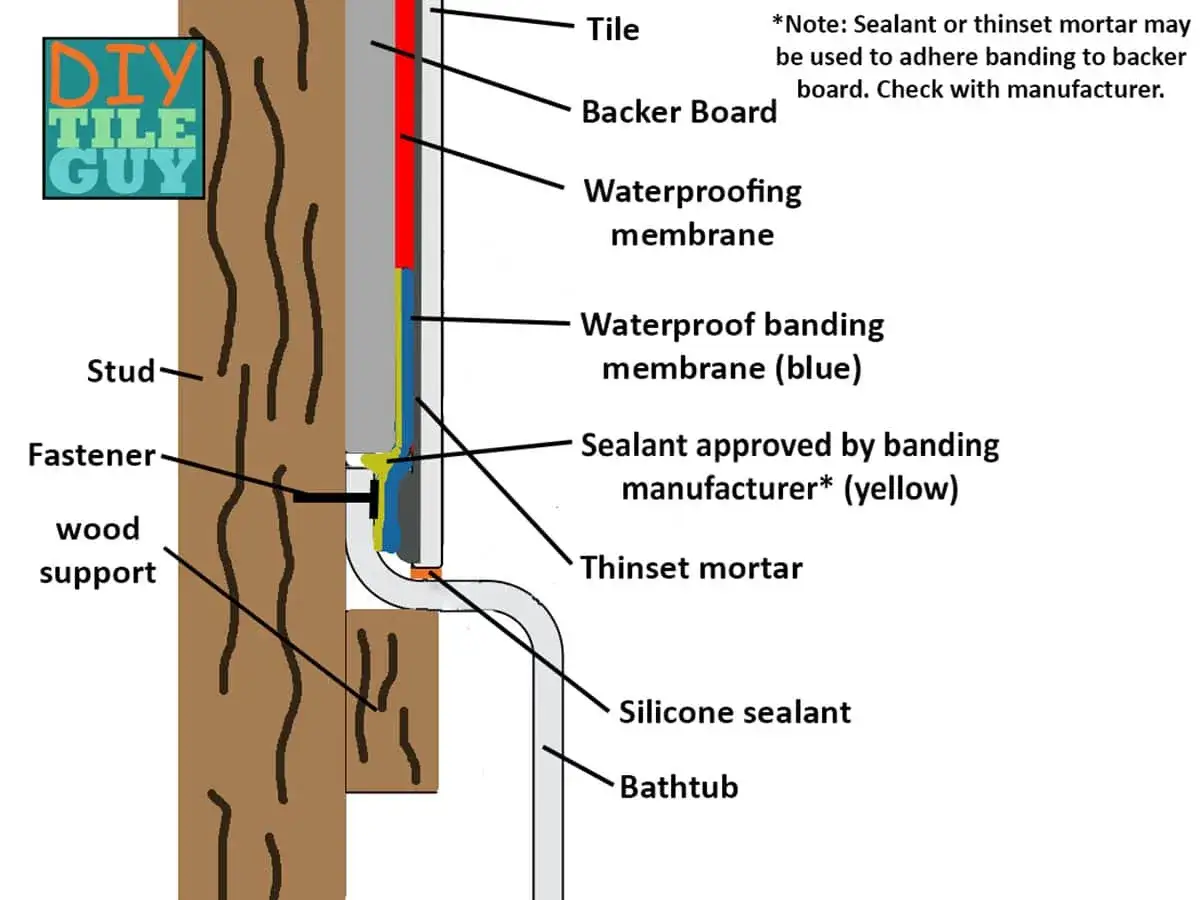
The tub flange is where many surround installs go wrong. I do not want cement board sitting hard on the tub or forced to bend over the flange, because that can telegraph a hump through the tile or create a wicking path for water. The better move is to keep the board plumb and hold the bottom edge off the tub with a consistent gap, usually around 1/4 inch, then finish the joint as part of the waterproofing and tile system.
If the flange projects far enough to push the board out of plane, I fur out the studs instead of making the board bend. That keeps the wall flat and lets the tile ride a clean surface. In practice, that matters more than trying to force a perfect fit at the tub lip.
| Situation | What I do | Why it matters |
|---|---|---|
| Flange sits mostly in plane | Hold the board off the tub lip with a 1/4-inch spacer. | Keeps the board from touching the tub and reduces moisture transfer. |
| Flange pushes the wall outward | Fur the studs until the finished wall stays flat. | Prevents a visible bulge in the tile work. |
| Board ends near the tub corners | Support the ends well and keep seams staggered. | Reduces weak points where cracking often starts. |
| Joint at the tub line | Finish it as a movement joint, not as hard grout. | The tub and wall move differently over time. |
That flange detail is one of the reasons I slow down on tub surrounds. Once the bottom edge is handled correctly, fastening and waterproofing become straightforward instead of improvisational.
Fasten the board and reinforce the seams
With the panels dry-fitted, I fasten them at the spacing the manufacturer calls for, which is typically every 8 inches on center at supports. I keep fastener heads flush with the surface, not sunk below it, because overdriving can weaken the board and leave a divot that shows through the tile layout.
At seams, I fill the joints with thinset mortar and embed alkali-resistant mesh tape. That tape is not optional in a real tile surround if I want the joints to stay stable. I also like to check each screw line one more time after fastening, because a single loose edge can make tile installation annoying later.
- Use the correct screws or nails approved for the board and framing type.
- Keep fasteners away from edges and corners as directed by the board maker.
- Do not leave fastener heads proud of the surface.
- Do not use drywall tape or drywall mud on cement board seams.
I treat this stage as structural, not cosmetic. If the board is secure and the seams are reinforced, the tile layer will behave much better over the life of the bathroom.
Waterproof the surround the way the system expects
This is the point most people misunderstand: cement board is moisture-tolerant, but it is not the same thing as a waterproof wall. In a tub area, I want one complete moisture strategy, not a patchwork of products that were never meant to work together. That usually means either a barrier behind the board or a surface-applied waterproofing membrane, depending on the system and local code.
When I choose between those approaches, I think about exposure and access. A surface-applied membrane keeps water closer to the tile face, which is why I prefer it in a tub-shower surround when the budget allows. A behind-the-board barrier is more traditional and can work well too, but only if it is detailed correctly and continuous behind the board. What I do not want is a random hybrid that traps moisture or leaves gaps unprotected.
| Waterproofing method | Best for | Main tradeoff |
|---|---|---|
| Behind-the-board barrier | Traditional tub surrounds and assemblies built to that detail | Water can still get into the board before it is redirected |
| Surface-applied membrane | High-exposure wet zones and tile-heavy surrounds | More steps, more product, and stricter installation discipline |
Whichever method I use, I let it cure exactly the way the product instructions require before tile goes on. That wait is boring, but it is cheaper than ripping out a failed surround later.
Common mistakes that turn into repairs later
I see the same mistakes over and over in failed tub surrounds, and they usually start with one small shortcut. Most of them are easy to avoid if you understand why they fail, not just what the “right” answer is.
| Mistake | Why it causes trouble | Better move |
|---|---|---|
| Board touching the tub | It can wick moisture and create a rigid joint that cracks | Keep the bottom edge off the tub and seal the finish joint correctly |
| Using regular drywall tape | It is not made for cement board seams in wet areas | Use alkali-resistant mesh tape with thinset mortar |
| Overdriving screws | It weakens the board face and can create surface failures | Set heads flush, not buried |
| Skipping waterproofing | Moisture can reach framing and insulation | Use a full waterproofing plan, not just cement board |
| Ignoring a crooked flange | The tile surface telegraphs the defect | Fur the wall so the finished plane stays flat |
The short version is simple: most surround failures are not caused by the tile. They are caused by the layer underneath it, which is why I take the backer board stage seriously and do not rush it.
The checks I make before tile goes on
Before I set tile, I run one last physical check over the whole surround. I want the board flat, the screws secure, the seams taped, the membrane continuous, and the bottom edge behaving like a movement joint rather than a hard stop against the tub. If any of those pieces feel off, I fix them before I move forward.
That final walkthrough takes only a few minutes, but it protects the rest of the project. A good cement board install around a tub is not complicated; it is just unforgiving of shortcuts. When the framing is true, the flange is handled cleanly, and the waterproofing is continuous, the tile work has a solid base and the bathroom has a much better chance of staying dry for the long haul.