A metal fence installation looks simple on paper, but the details decide whether it ends up straight, durable, and worth the money. The right fence can frame a yard, protect a pool, keep pets in, and survive weather with far less upkeep than wood. I’ll walk through the decisions that matter most: which metal fits the job, what to check before digging, how the posts and panels go together, where projects usually fail, and what the real budget looks like in 2026.
The choices you make before the first hole matter most
- Choose the metal by function first: containment, security, curb appeal, or low maintenance.
- Call `811` before you dig, then verify local permits, HOA rules, and setback limits.
- Set corner, end, and gate posts first; the line posts follow the string line.
- On slopes, decide early whether the fence will step or rake, because that affects panel choice.
- Budget separately for gates, permits, and removal of an old fence.
- Cleaning, coating touch-ups, and hardware checks do more for lifespan than most people expect.
Choose the metal that matches the job
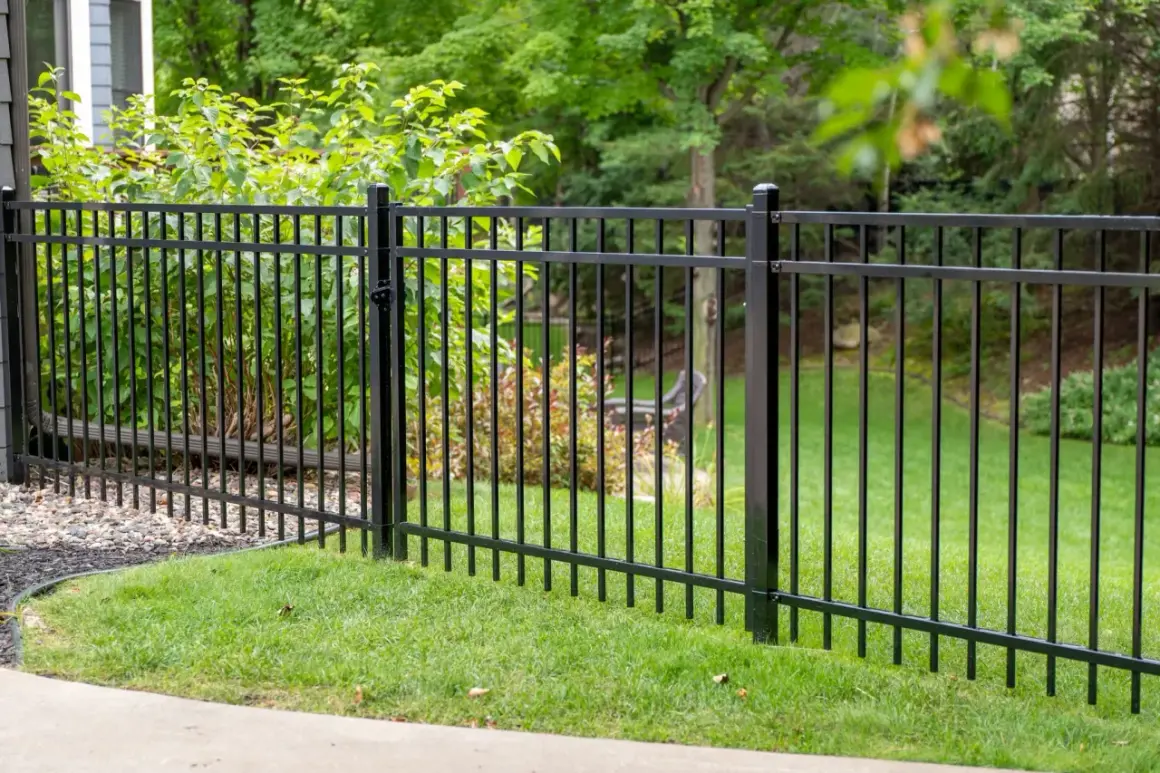
I start every project by asking what the fence has to do. A backyard fence that mostly defines space does not need the same build as a front-yard security line or a pool barrier. For most residential work, I think in four buckets: chain link solves containment cheaply, aluminum gives a clean look with very little rust risk, steel adds rigidity and security, and wrought iron brings the most character but also the highest maintenance burden.
One practical note: a lot of residential "wrought iron" is actually ornamental steel. The style looks traditional, but the material is usually modern steel sections with a protective finish, which is easier to source and more consistent than true forged iron.
| Material | Best for | What it does well | Watch-outs | Typical installed cost |
|---|---|---|---|---|
| Chain link | Utility areas, pets, budget projects | Fast to install, durable, affordable | Least decorative, little privacy | $10-$40 per linear foot |
| Aluminum | Front yards, pool areas, coastal climates | Lightweight, rust resistant, tidy appearance | Less rigid than heavier steel systems | $25-$75 per linear foot |
| Steel / ornamental steel | Security, formal landscaping, long runs | Strong, stiff, good visual lines | Finish quality matters a lot | $20-$80 per linear foot |
| Wrought iron | Premium decorative projects | Classic look, heavy, very substantial | Most upkeep, highest cost | $50-$85 per linear foot |
If the yard is exposed to salt air, sprinklers, or freeze-thaw cycles, I lean toward aluminum or coated steel because finish quality matters more than raw weight. Once the material is chosen, the next bottleneck is almost always the layout and the paperwork, not the digging itself.
Map the line, the gates, and the permits
The fence line should be settled before any hole is dug. I want the property line confirmed, the corners marked, and the gate locations fixed early, because changing those decisions after the posts are in place is expensive. If a survey pin is missing or uncertain, I stop and verify it instead of guessing.
I also call `811` a few business days before digging so buried utilities can be marked. That step is not optional in my book. It protects the crew, avoids service outages, and keeps a fence project from turning into a repair job before the first post is even set.
Permits vary by city, but I always check local rules before buying panels. Front-yard height limits, setback rules, corner-lot sight lines, pool-barrier hardware, and HOA approvals can all change the plan. Setback means the required distance from a property line, road, or structure, and it is one of those details that can quietly ruin a layout if you skip it.
- Survey the line - confirm corners, fences on shared boundaries, and any encroachments.
- Mark gate swing - a gate that hits a walkway, wall, or slope creates problems later.
- Check height rules - many towns are stricter in front yards than back yards.
- Verify pool rules - fence spacing, latch height, and self-closing hardware can matter more near water.
- Walk the ground - low spots, roots, and drainage patterns are easier to solve before posts go in.
When I see a slope or a tricky corner, I decide on the fence behavior before I order materials, because that choice affects the whole installation sequence.
The installation sequence I use on a normal yard
I start with a taut string line, not with the first hole. A straight, well-marked line gives every other step a reference, and it keeps the posts from drifting as the work moves along. Mason's string and stakes are boring tools, but they are the reason a finished fence looks intentional instead of improvised.
- Set stakes at the corners, ends, and planned gate openings.
- Run the string line tight so it shows the finished fence path.
- Mark the post centers before any digging starts.
- Dig the corner, end, and gate post holes first.
- Set those anchor posts plumb, which means perfectly vertical, and brace them while the concrete begins to hold.
- Install the line posts and panels to match the manufacturer spacing.
- Hang the gate and adjust hinge height, latch engagement, and swing clearance.
- Seal cut edges, cap posts, and backfill only after the structure is stable.
Read Also: Level Your Yard Right - Avoid Drainage Nightmares!
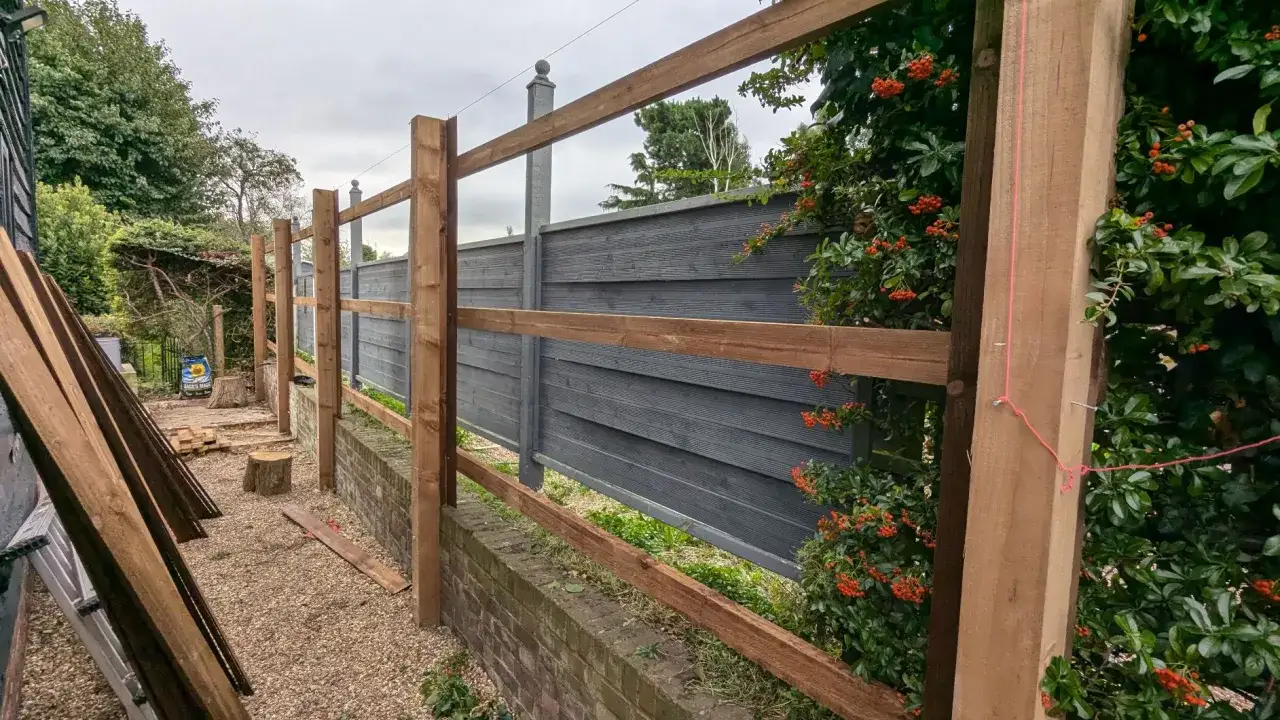
Handle slopes deliberately
On a sloped yard, I choose between stepped and raked layouts. A stepped fence keeps each section level and drops in increments, while a raked fence follows the contour of the ground; the right answer depends on the system, the gate location, and how formal you want the line to look.
I keep the posts just touching the string line instead of pushing it, because even a small bow becomes obvious over a full run. I also respect cure time before hanging a heavy gate, since rushed concrete is a common reason posts drift or lean after the job is "finished."
The mistakes that usually show up later
Most metal fence failures are planning problems that show up months later. The installation might look fine on day one, but the real test is whether the fence still looks square after rain, wind, and routine use.
- Skipping the utility locate - one missed line can stop the job and create a serious safety problem.
- Guessing at gate spacing - hinges and latches need exact clearance, not a close estimate.
- Setting shallow posts - frost, soft soil, and wind load will find weak anchors.
- Ignoring drainage - standing water at the base shortens the life of any coating.
- Mixing incompatible metals - dissimilar fasteners can speed up galvanic corrosion when moisture is present.
- Leaving cut edges exposed - bare metal is where rust usually starts, even on coated systems.
- Choosing the wrong finish for the climate - salt, irrigation overspray, and winter road treatment are hard on weak coatings.
The pattern here is simple: the fence rarely fails because the panels were the wrong shape. It fails because the posts, finish, or drainage were handled as an afterthought, which is why budget planning deserves its own section.
Budget for more than panels and posts
HomeGuide’s 2026 data puts metal fence projects broadly at $20 to $85 per linear foot installed, depending on the material and finish. I treat that as the starting band, then I add the items that usually change the final invoice.
| Budget item | Planning range | What changes it |
|---|---|---|
| Chain link | $10-$40 per linear foot | Gauge, coating, height, and whether the run is residential or security-focused |
| Aluminum | $25-$75 per linear foot | Panel style, slope, powder coat quality, and gate count |
| Steel / ornamental steel | $20-$80 per linear foot | Thickness, welding, finish, and how much custom fitting the yard needs |
| Wrought iron | $50-$85 per linear foot | Detail level, coating, and repair work on old or damaged sections |
After the fence itself, I budget separately for a permit, a gate, and any removal work. In many places, a simple fence permit is only a small flat fee, often around $20-$60, but some cities charge more when the fee is tied to project value or inspection complexity.
- Gate - a pedestrian gate may stay in the low hundreds, while driveway or automated gates can move into the thousands.
- Permit - local fees can be modest or surprisingly high, so I never assume the project is exempt.
- Removal - taking out an old fence adds labor, hauling, and disposal.
- Finish upgrades - powder coating, post caps, and decorative tops improve lifespan and appearance.
When I compare bids, I want to know whether those extras are included or merely assumed. That habit saves more money than shaving a dollar or two off the per-foot number, and it sets up the maintenance conversation that follows.
Keep the fence looking good after the install
The good news is that metal fencing does not need much routine work, but it does need consistent attention in the places where water and abrasion win. I wash the fence once or twice a year, inspect hinges and latches after storms, and touch up scratches before they turn into rust blooms.
- Aluminum - rinse off dirt and sprinkler residue, then check fasteners and gate hardware.
- Steel or ornamental steel - inspect coating chips, especially near cuts, welds, and fastener holes.
- Wrought iron - repaint or refinish sooner if the fence lives in humid, coastal, or winter-salt conditions.
- Chain link - look for rust at ties, caps, and tension hardware, and keep vegetation from trapping moisture.
Powder coating is worth paying for because it gives the fence a more durable skin than a thin decorative paint layer, and it slows the maintenance cycle down in a way you can actually feel. I also keep sprinklers off the fence line whenever possible, because constant wetting does more damage than most owners expect.
The details I check before I call the job finished
Before I call the job done, I check three things: the gate swing, the post bases, and the paperwork. The gate should close without dragging, the posts should stay plumb after cure, and the permit or warranty records should be easy to find if there is ever a dispute or repair claim.
- Gate alignment - verify latch height, hinge clearance, and movement over pavers or mulch.
- Drainage - keep soil, mulch, and irrigation from pooling around the posts.
- Hardware finish - seal cut edges and replace any fasteners that do not match the coating.
- Documentation - keep the survey, permit, and product paperwork together.
If I had to reduce the whole process to one rule, it would be this: the fence succeeds or fails at the posts, not the panels. Get the layout right, choose a metal that fits the climate, and the fence becomes a long-term part of the landscape instead of a recurring repair project.