A solid sump pump installation is one of those projects that only looks simple until water starts rising in the basement. I treat it as a plumbing-and-drainage system, not just a pump in a hole: the basin, float switch, check valve, discharge line, and power supply all have to work together. In this guide, I walk through how the system works, how to choose the right setup, the steps I would follow, and the mistakes that usually cause failures later.
These details make the system work
- A sump system is only as reliable as its weakest part, especially the float switch, check valve, and discharge route.
- For most basements, I prefer a submersible primary pump and a battery backup if outages are a real risk.
- A dedicated GFCI outlet and a discharge line that moves water well away from the foundation matter more than many people think.
- New pit cutting, rerouting pipes, or adding a new circuit usually pushes the job beyond a comfortable DIY project.
- Testing the pump with water and cleaning the pit on a regular schedule prevent most surprise failures.
How the system protects a wet basement
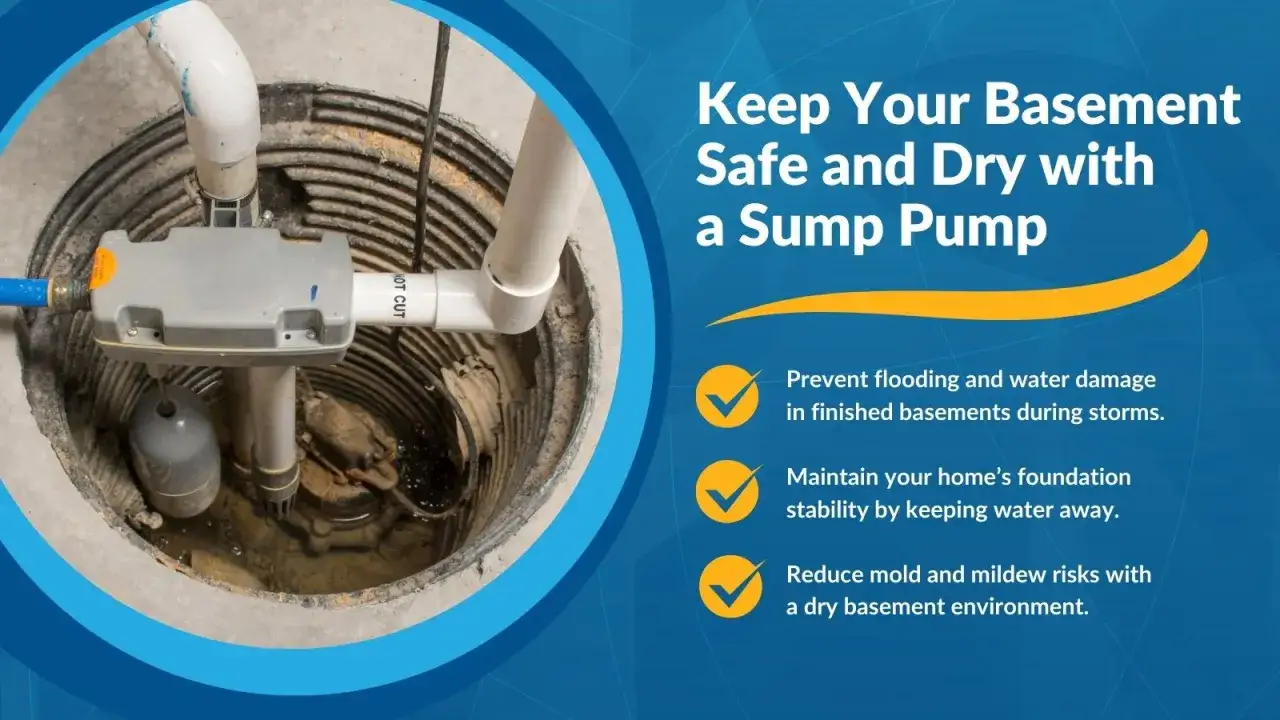
When groundwater, seepage, or storm runoff collects below the slab, the sump pit becomes the low point that gathers water before it can spread across the basement floor. The float switch tells the pump when to start, the motor sends water up the discharge line, and the check valve keeps the line from draining back into the basin when the pump stops. That one-way movement is the heart of the system, and it is exactly why a sloppy discharge layout creates trouble.
If the pit is undersized, the discharge line is too narrow, or the pump is starved for power, the system starts short-cycling or simply falls behind. Once I understand that loop, the next step is choosing equipment that matches the way the house actually floods.
Choosing the right pump and backup setup
For most homes, I lean toward a submersible primary pump because it is quieter, handles heavier use, and is less exposed than a pedestal unit. Pedestal pumps still make sense in some tighter or budget-conscious setups, but they are louder and usually less forgiving if debris gets into the pit. A battery backup is not the primary workhorse; it is the part that keeps the basement protected when the power fails or the main pump is overwhelmed.
| Option | Best fit | Main tradeoff |
|---|---|---|
| Pedestal pump | Simple pits, lower budgets, easy motor access | Louder and less tolerant of debris |
| Submersible pump | Most basements and crawl spaces | Higher upfront cost and harder service access |
| Battery backup | Power outages, fast-moving storms, extra protection | Limited runtime and battery upkeep |
As a practical sizing rule, a 1/3 HP pump is often enough for normal groundwater, while a 1/2 HP unit makes more sense for homes that see heavier inflow or repeated cycling. I also prefer a 1 1/2-inch discharge line when the manufacturer allows it, because undersized piping slows the pump down and makes the motor work harder. That brings me to the part that causes the most avoidable failures: the layout around the pump itself.
Planning the pit, power, and discharge route
Before I cut concrete, I want three things settled: where the pit will sit, how the pump will get power, and where the water will go once it leaves the house. I want the outlet on a dedicated GFCI circuit, a ground-fault circuit interrupter that cuts power fast if it detects leakage, and I never rely on an extension cord for a pump. Good routing matters too: the discharge line should leave the foundation cleanly, avoid freeze points where possible, and send water far enough away that it cannot run straight back toward the wall.
| Planning item | What I check | Why it matters |
|---|---|---|
| Pit location | Lowest accessible point where water naturally collects | Makes the pump react to water before it spreads |
| Power | Dedicated GFCI outlet, no switched outlet, no extension cord | Keeps the pump on a reliable circuit |
| Discharge route | Through the wall and out to a point 10 to 20 feet from the foundation if the site allows it | Reduces the chance of backflow and recirculation |
| Backup space | Dry, elevated spot for the controller and battery | Protects the backup gear from water |
Once those pieces are mapped out, the physical work is much easier to sequence, which is why the next section helps more than a generic tool list ever will.
Installing the pump step by step
The sequence below is what I use for a new basin or a major replacement. Dry-fitting the PVC first saves a lot of grief later, because solvent cement grabs fast and does not forgive a bad angle.
- Shut off power at the breaker and confirm the circuit is dead before touching the old pump or any wiring.
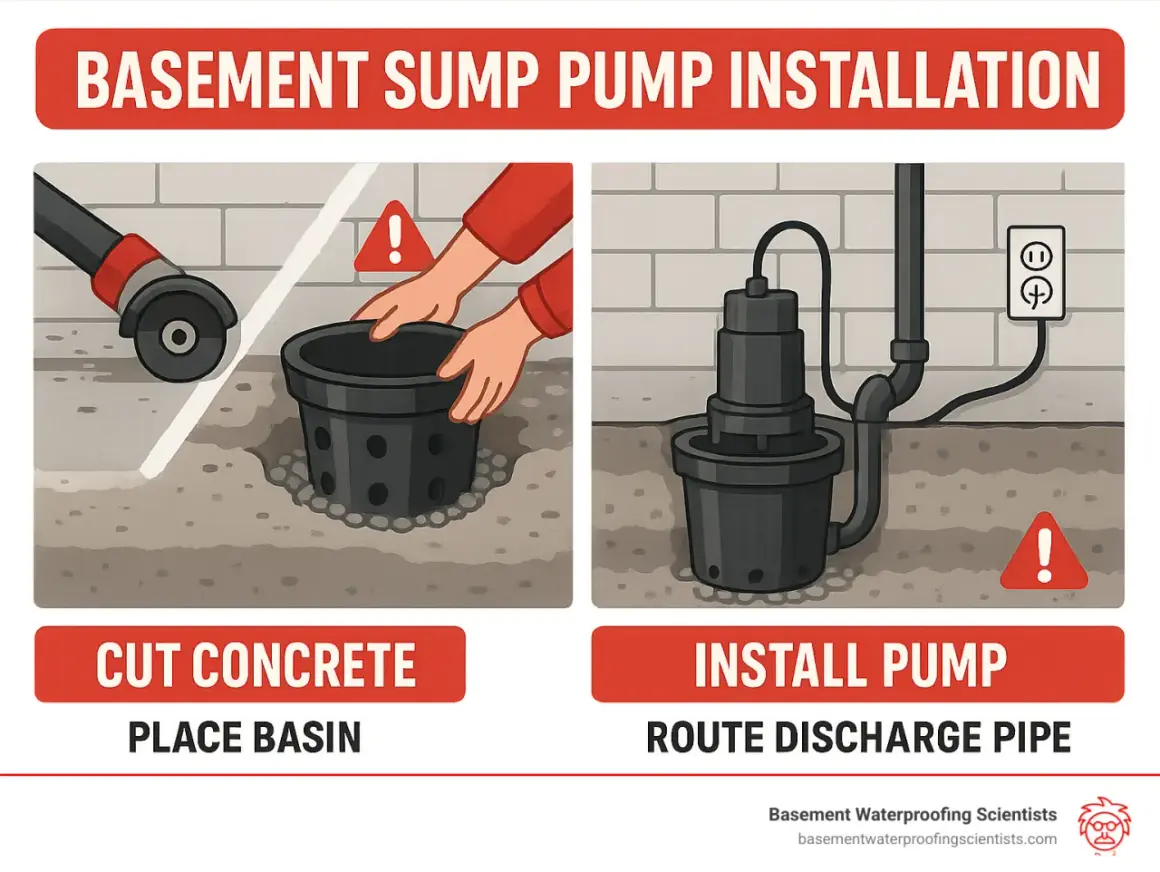
- Mark the basin location, then cut and break the slab only where the pit will go.
- Excavate the hole slightly deeper than the basin so the lip ends up flush with the floor.
- Wrap the basin with filter fabric, set it in place, and level it before you backfill.
- Add gravel or another stable base so the pump sits firmly and does not suck in debris.
- Set the pump, attach the discharge piping, and install the check valve with the arrow facing the correct flow direction.
- Run the discharge line through the wall to the outside, then seal the penetration so water and pests do not travel back inside.
- Restore power, fill the pit with water, and watch the float switch cycle the pump on and off.
- If you are adding backup, mount the controller and battery in a dry, elevated spot and test the backup separately.
The goal is not just to see the motor spin once. I want the float to move freely, the pump to shut off cleanly, and the discharge line to clear water without leaks or backflow. Once that works, I look for the small mistakes that turn a decent install into a future headache.
The mistakes that cause most pump failures
Most failures I see are not dramatic. They are small installation choices that create nuisance cycling, noise, or a dead pump when the first serious storm arrives. These are the ones I avoid:
- Letting the float switch touch the pit wall or the pump body, which keeps it from moving freely.
- Skipping the check valve, which lets water fall back into the pit and makes the pump restart too often.
- Plugging the pump into a switched outlet or sharing it with other loads, which invites accidental shutoff.
- Ending the discharge too close to the foundation, where the water can simply seep back to the house.
- Ignoring battery backup in an outage-prone neighborhood, where the main pump can lose power at the worst moment.
- Leaving sediment, stones, or trash in the pit, which can jam the impeller or clog the inlet.
- Never testing the pump with a bucket of water after the job is done.
Once those weak points are clear, the next question is whether the job is worth doing yourself or handing off to a plumber.
What the job usually costs and when DIY makes sense
In 2026, I would budget roughly $600 to $1,800 for a basic professionally installed primary pump. HomeAdvisor places replacement work in a wider $645 to $2,120 band, and Forbes pegs a typical installed primary-pump range around $600 to $1,800; the difference usually comes down to access, labor, and whether the project starts from scratch. A battery backup or full dual-pump setup adds more, especially when slab cutting, rerouting, or new electrical work is involved.
| Situation | My take | Why |
|---|---|---|
| Clean replacement in an existing pit | Reasonable DIY for a confident homeowner | No slab demolition, limited plumbing changes, and the main risk is wiring or a poor connection |
| New pit and discharge route | Hire a plumber | Concrete work, drainage layout, and code compliance make the job more demanding |
| Primary pump plus battery backup | Borderline DIY only if you already know the system | The plumbing is manageable, but battery placement and electrical details still matter |
| Flood-damaged basement or new electrical circuit | Hire a pro | The chance of hidden problems is high, and mistakes get expensive fast |
My rule is simple: if I have to cut concrete, run a new circuit, or solve chronic seepage, I stop treating the project like a weekend swap. That is a good handoff point to maintenance, because even the best install still needs a little attention.
How I keep a new system ready for the next storm
The first season after the install tells me more than the checkout test ever will. I want the system to stay quiet, move water quickly, and keep working after a few months of dust, sediment, and temperature swings.
- Pour water into the pit every few months to confirm the float switch and shutoff point.
- Clean out sediment, stones, and debris at least once a year.
- Check the battery charge and charger before storm season if the system has a backup.
- Make sure the discharge outlet is still clear of leaves, mulch, snow, and ice.
- Listen for new noise, slow cycling, or short bursts of running, because those are early signs of wear.
- Replace a weak pump before the next wet season instead of waiting for a failure during a storm.
That routine is what turns a pump from a piece of equipment into something I would actually trust when the weather changes.