
A worn faucet cartridge usually announces itself in one of three ways: a steady drip, a handle that feels gritty or stiff, or water temperature that refuses to stay put. The repair is straightforward when you match the right part and work in the right order, but it gets messy fast if you force a stuck stem or skip the pressure-relief step. I am going to walk through the full replacement process, the tools that actually matter, and the checks I use before I call the job finished.
The fast version is that fit, access, and patience decide the repair
- 20-60 minutes is typical for a clean cartridge swap; corrosion or a discontinued part can stretch the job.
- Common replacement cartridges usually cost $10-$40; specialty or brand-specific parts are often $40-$80.
- Shut off the supply valves and open the faucet to release pressure before you remove the handle.
- Photograph the cartridge orientation before removal so the new part goes back in the same way.
- Use silicone plumber's grease on O-rings, not petroleum grease, and do not force a stuck cartridge.
What the cartridge is actually doing inside the faucet
The cartridge is the internal assembly that controls flow and, in many faucets, mixes hot and cold water. If it wears out, the faucet can drip from the spout, leak around the handle, or feel jumpy when you move it. I also treat this as the likely failure point when a faucet has a smooth exterior but unreliable performance, because the problem is usually hidden inside the valve body rather than in the supply line underneath the sink.
Not every faucet uses the same internal design, and not every leak points to the cartridge, so I like to diagnose the symptom first.
| Symptom | What I suspect | Why it matters |
|---|---|---|
| Drip continues after the handle is closed | Worn seals or damaged internal surfaces | The cartridge is no longer shutting off cleanly |
| Handle feels stiff, rough, or sticky | Mineral buildup or a swollen seal | The stem may still move, but it is not moving freely |
| Hot and cold mix poorly | Misaligned or failing mixing mechanism | Temperature control becomes inconsistent |
| Leak appears around the handle | O-rings or stem seals are failing | Water is escaping before it reaches the spout |
| Squeal, chatter, or vibration | Debris, worn surfaces, or scale inside the cartridge | These are early warnings, not just nuisance noises |
A faucet that drips once per second can waste more than 3,000 gallons a year, so I do not treat a small leak as cosmetic. Once the symptoms point to the cartridge, the next step is preparation, because the repair goes much smoother when the faucet is isolated first.
Gather the right tools and shut the water down cleanly
For most cartridge swaps, I keep the tool list short: an adjustable wrench, the right Allen wrench or hex key for the handle screw, a flat screwdriver for trim caps, needle-nose pliers, a flashlight, a towel, and a small tray for screws and clips. I also keep the old cartridge nearby until the new one is seated, because visual comparison catches mistakes that measurements miss.
That part matters more than it sounds. A basic replacement cartridge usually costs about $10-$40, while specialty or brand-specific parts can climb to $40-$80 or higher, so I want the right piece in hand before I tear the faucet apart.
Turn off both hot and cold supply valves under the sink, then open the faucet to bleed off pressure. If those valves do not close fully, shut off the main supply before you continue. I also plug the drain, because one dropped screw is enough to turn a routine repair into a long retrieval job.
Before I loosen anything, I take one clear photo of the handle stack and one of the cartridge area. That simple habit saves time later when the trim ring, bonnet nut, retaining clip, or decorative collar needs to go back in the same order.
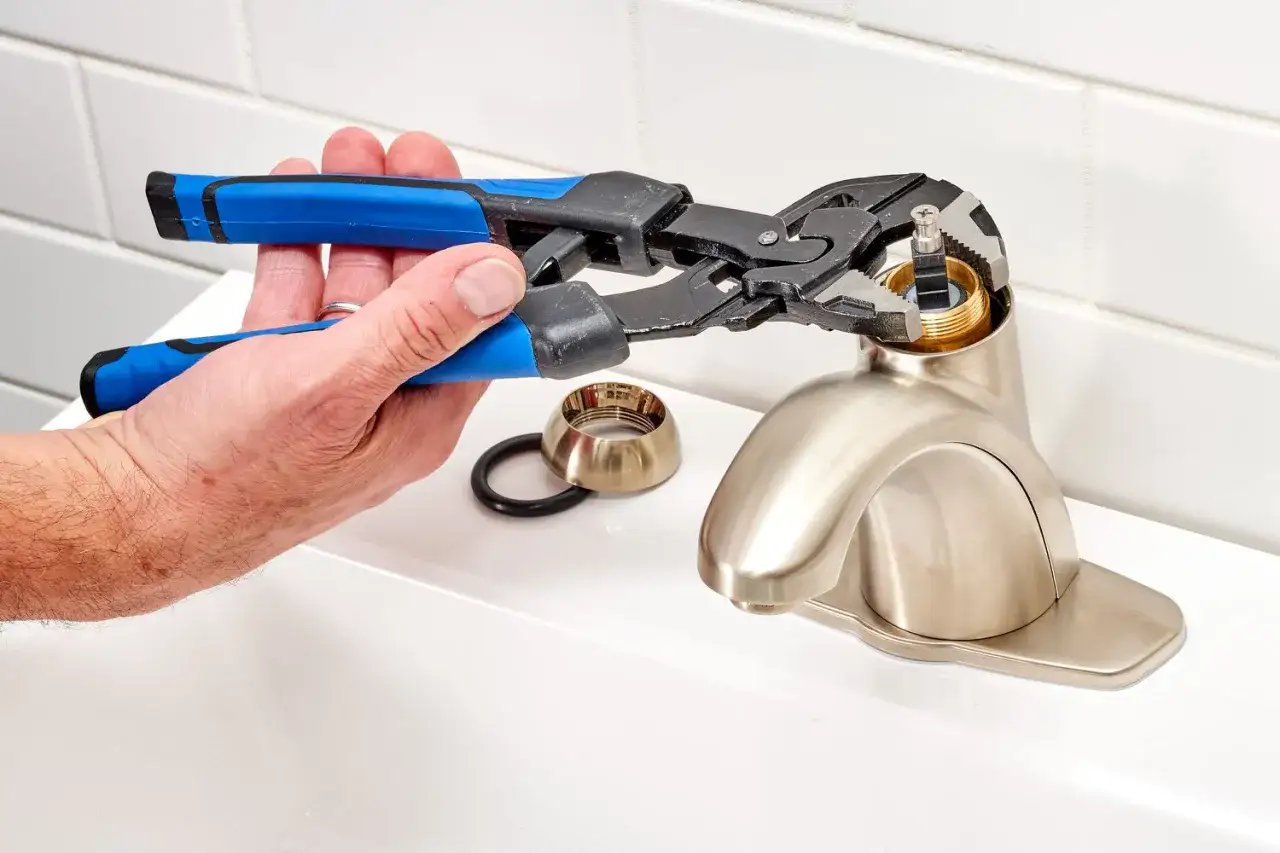
Remove the old cartridge without damaging the valve body
- Pop off the decorative cap, loosen the handle screw, and lift the handle away.
- Remove the trim ring, bonnet, retaining clip, or retaining nut, depending on the faucet design.
- Mark or photograph the cartridge orientation before pulling anything.
- Grasp the stem and pull straight out with steady pressure. If it is stuck, wiggle gently and use the correct puller instead of prying against the valve body.
- Clean the inside of the valve with a cloth and inspect the seat area for mineral buildup or cracked plastic.
The mistake I see most often is using a screwdriver as a lever against the valve body. That can scar the sealing surface, and once that happens a new cartridge may still seep. If the old part breaks apart on the way out, remove every fragment before the replacement goes in, because leftover pieces can jam the seals or prevent the new cartridge from seating fully.
When a cartridge refuses to move, I slow down and look for the real holding point: a hidden screw, a retaining clip, or a model-specific extraction tool. The right pull is firm, not violent, and that difference matters more than most DIY guides admit. Once the old part is out and the housing is clean, installation is usually the easy half of the job.
Install the new cartridge and test it before you reassemble everything
- Compare the new part with the old one side by side.
- Lightly coat the O-rings with silicone plumber's grease.
- Align tabs, flats, or splines exactly as the old cartridge sat, then push the new one fully into place.
- Reinstall the retaining clip or nut and make sure it seats cleanly.
- Put the handle back on, turn the water on slowly, and check both hot and cold operation.
After the faucet runs, I let it flow for 30-60 seconds to flush grit and trapped air. Then I dry the body and watch the base, stem, and spout for another minute. A new drip right after installation usually means the cartridge is not fully seated or the retaining hardware is loose, while a leak from the handle often points to an O-ring that was pinched during assembly.
If the hot and cold directions feel reversed, some cartridges can be reindexed, but not all can. I would rather stop and confirm the exact orientation than force the handle and damage a part that was otherwise correct. The goal is not just to make the faucet work today; it is to make it stay dry after the cabinet closes and the sink gets used normally again.
Choose the right replacement and know when the repair should stop
The safest way to buy the correct part is to match the old cartridge by part number, not by shape alone. If the faucet is older, I take the cartridge with me to a plumbing supply counter and compare the stem length, splines, retaining notch, and seal layout. That is especially useful when the model number is gone or the faucet was installed by a previous owner.
| Situation | What I would do | Why |
|---|---|---|
| You have the exact part number | Buy the same cartridge and install it | Lowest risk of fit problems |
| The cartridge is seized in a corroded body | Stop and evaluate the valve body or call a plumber | Forcing it can crack the faucet |
| The shutoff valves do not close | Repair the valves first or shut off the main | You need a safe, dry workspace |
| The faucet is very old or heavily worn | Compare repair cost with a full replacement | Sometimes the labor is not worth it |
For labor, a simple cartridge swap is often cheaper than a full faucet replacement, but not always cheap enough to justify fighting a corroded assembly. In the US, leak repair commonly falls around $60-$500, with an average near $270, and hourly plumbing rates often run about $45-$200. If the faucet is brittle, the finish is failing, or the body shows corrosion, I would rather replace the whole unit than spend time on a repair that may not hold.
That is where the job stops being a cartridge job and becomes a fixture decision, which is why I like to make that call before I buy parts twice.
Keep the new cartridge alive longer than the old one
- Operate the handle gently. Fast, hard slams wear the seals faster than most people expect.
- Flush debris after the repair and clean the aerator if flow looks uneven.
- Use silicone-based grease only on rubber parts, not petroleum grease.
- Watch for recurring sediment or hard-water scale if the old cartridge failed early.
- Fix small drips quickly; they rarely get better on their own.
I also like to recheck the faucet after a day or two, because a minor seep sometimes shows up only after the lines pressurize again. EPA notes that a faucet dripping once per second can waste more than 3,000 gallons a year, which is why I treat this as a practical water-saving repair, not just a noise problem. A clean install, the correct orientation, and a little restraint when tightening usually make the difference between a one-time fix and a repeat call.