A bathtub drain is one of those repairs that looks simple until a hidden set screw, old putty, or a corroded crossbar turns it into a fight. I focus on the real job here: identifying the stopper style, removing the drain basket or overflow-linked assembly without damaging the finish, and knowing when the hardware has crossed the line from stubborn to disposable. In a healthy tub, the work can take 5 to 15 minutes for the stopper and about 20 to 45 minutes for the full drain; seized parts can take longer, and that is where patience matters more than force.
The fastest path is to match the drain style before you apply torque
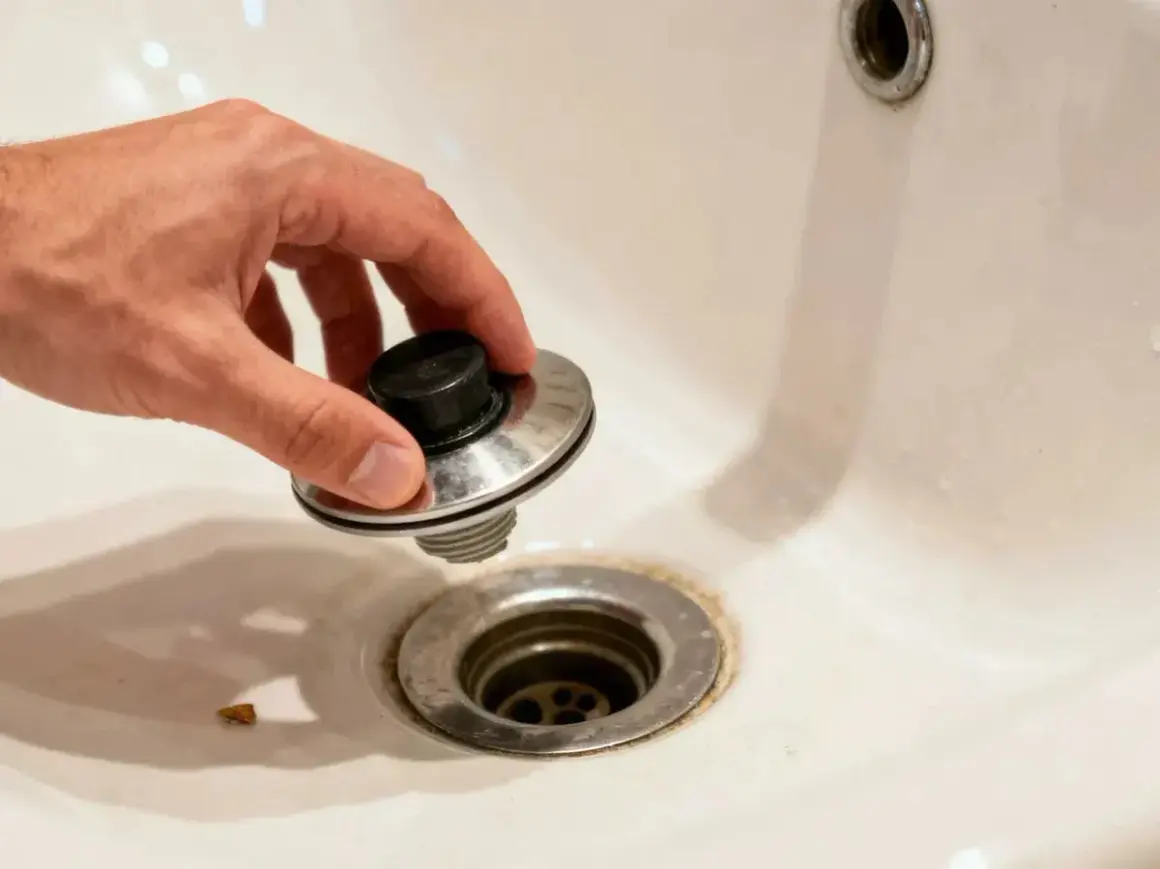
- Stopper style changes the method. Toe-touch, lift-and-turn, push-pull, flip-it, and trip-lever drains do not come apart the same way.
- A tub drain wrench is the right removal tool. It fits the crossbars inside the drain basket and reduces the risk of breaking them.
- Trip-lever and pop-up parts usually come out through the overflow. That hardware is tied to the waste-and-overflow line, not just the drain opening.
- Stuck drains are often a seal or corrosion problem. Old plumber’s putty, rust, or a damaged flange can make the drain feel glued in place.
- Budget for small parts if needed. A drain wrench is usually about $13, plumber’s putty around $5, and a basic replacement stopper often runs about $10 to $20.
Identify the stopper style before you turn anything
I start here because the wrong assumption is what breaks chrome crossbars and scratches enamel. A toe-touch or lift-and-turn stopper comes out from the top, while a trip-lever or pop-up setup is tied into the overflow opening, which means the hardware lives partly inside the waste-and-overflow line. If you can see crossbars inside the drain opening, you are usually removing the basket itself, not just the stopper.
| Style | How it usually comes out | Best tool | Common mistake |
|---|---|---|---|
| Toe-touch | Push it open, twist counterclockwise, then lift it out | Hand or padded pliers | Trying to remove it while it is still closed |
| Lift-and-turn | Remove the top cap or set screw, then unthread the body | Hex key, small screwdriver, cloth-wrapped pliers | Missing the hidden set screw under the knob |
| Push-pull | Unscrew the knob or lid, then back out the fastening bolt | Screwdriver and pliers | Pulling before the top piece is removed |
| Flip-it | Flip it open, twist, and pull the whole piece free | Hand | Using tools when the design is meant to come out by hand |
| Trip-lever or pop-up | Remove the overflow plate and pull the linkage out through the overflow opening | Screwdriver | Trying to drag it through the floor drain |
| Drain basket with crossbars | Back out the basket from above | Tub drain wrench | Grabbing the crossbars with regular pliers |
If the drain does not match one of these patterns, I stop and look again instead of improvising. Old tubs often combine replacement parts from different brands, and the wrong tool can turn a simple removal into a replacement job. Once you know which mechanism you have, the actual removal becomes much more predictable.
Remove the stopper assembly without damaging the finish
I prefer to clear the stopper first because it gives me room to see what the drain is really doing. For the simple top-mounted styles, the job is usually about unthreading a cap, backing out a tiny set screw, or lifting the body straight up.
- Set the stopper in the open position so you are not fighting spring pressure or a closed seal.
- Look for a small set screw under the top cap or knob. A tiny screwdriver or hex key is usually enough.
- Unscrew the knob or twist the stopper counterclockwise if the design threads out from the drain body.
- For trip-lever and pop-up hardware, remove the overflow faceplate and pull the linkage straight out through the overflow opening.
- Set every part on a towel and inspect the threads, O-rings, and finish before you decide whether to reuse anything.
If the stopper is chipped, corroded, or stripped, I replace it instead of forcing it back into service. A basic replacement stopper is usually only about $10 to $20, which is cheaper than scratching a tub for the sake of a worn piece. With the stopper out, the drain basket itself is usually next.
Back out the drain basket or flange from above
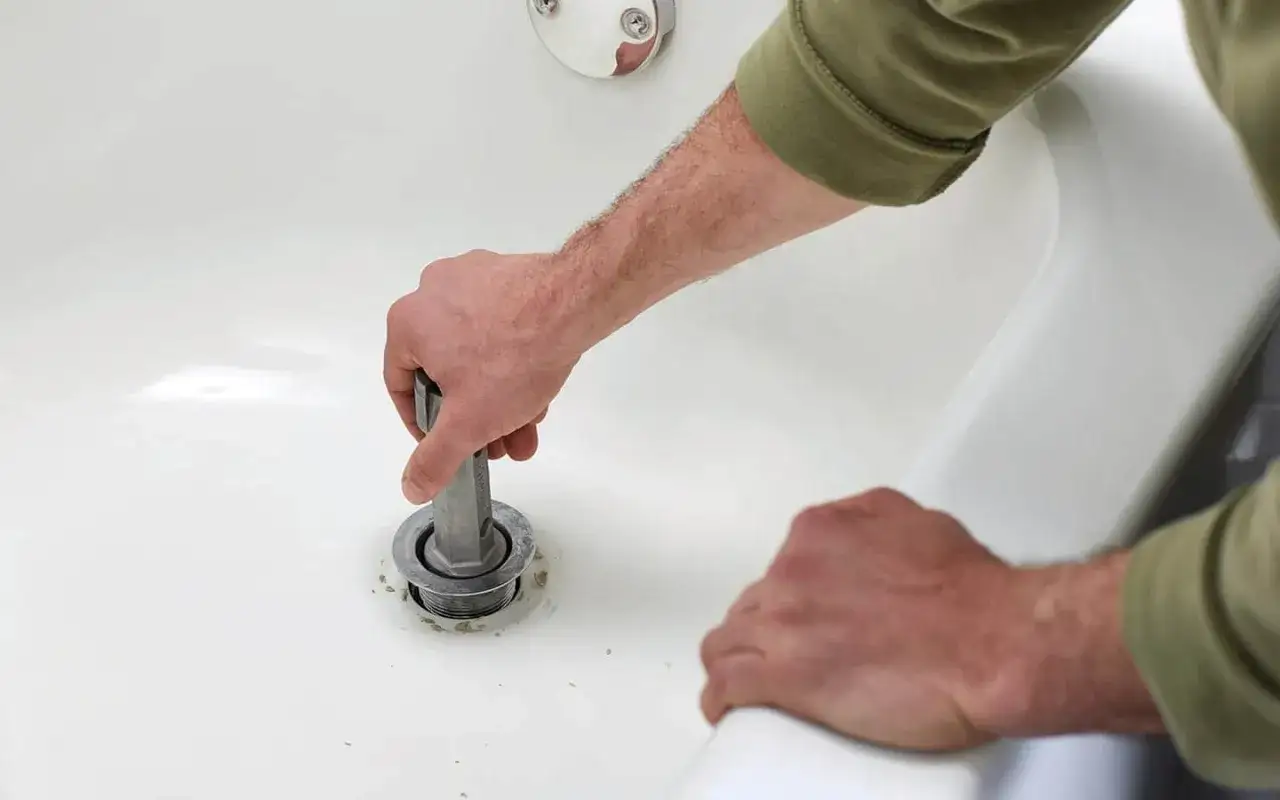
This is where the right tool matters most. A tub drain wrench fits the crossbars inside the basket and lets me turn the drain counterclockwise with steady pressure instead of crushing the metal with pliers. I keep a rag in the tub opening, choose the wrench end that bites best, and use controlled force rather than a hard jerk.
- Wipe the drain opening clean so grit does not hide the crossbars or scratch the finish.
- Insert the drain wrench into the basket and make sure it sits squarely in the crossbars.
- Use a ratchet, adjustable wrench, or the driver style that matches your tool and turn counterclockwise.
- Keep the pressure steady until the basket breaks loose, then finish by hand if it will.
- Lift the basket out and scrape away any old plumber’s putty or sealant from the opening.
If there are no visible crossbars, I do not force the issue with pliers. Older drains may use a notched design or a different extractor, and that is a better fit than improvising with the wrong jaws. A drain wrench usually costs about $13, which is cheap insurance against a bent flange or a chipped tub.
When a drain is stuck, corroded, or missing its crossbars
Stubborn drains are usually stubborn for one of four reasons: corrosion, old sealant, broken crossbars, or a linkage that is still partially engaged. I treat each one differently because brute force is how a removal job becomes a repair job.
| Symptom | Likely cause | Best next move |
|---|---|---|
| The basket turns but does not rise | Old plumber’s putty or thread sealant is holding it in place | Apply gentle heat with a hair dryer for a minute or two, then retry with steady pressure |
| The crossbars flex or start to crumble | Rust or the wrong tool is deforming the fitting | Switch to a proper extractor or stop before the crossbars fail completely |
| The stopper hardware binds at the overflow | The trip-lever linkage is still connected | Remove the faceplate and pull the rod straight out instead of tugging harder |
| The tub creaks or flexes under leverage | Too much side pressure on acrylic or fiberglass | Stop and work from above only; avoid prying sideways on the shell |
I back off sooner on acrylic and fiberglass tubs because side pressure can crack the shell. Cast iron is tougher, but a frozen brass fitting can still strip before it moves. If the drain spins in place, the shoe or seal below the tub may be the real problem, and that is the point where I would rather call a plumber than keep forcing metal against porcelain or enamel. After the basket is free, the opening tells you whether the old parts can be reused.
Choose the replacement that matches the drain you just removed
Once the drain is out, I clean the rim, inspect the threads, and compare the removed parts before buying anything new. The finish matters, but fit matters more. A nice-looking replacement is useless if the threads do not match or the seal style is wrong.
- Keep the old stopper, basket, screws, and overflow plate together so you can compare them at the store.
- Check whether the replacement uses plumber’s putty, a rubber gasket, or a manufacturer-specific seal.
- Match the thread style and the way the drain sits in the tub, not just the visible diameter.
- Replace rusted linkage, stripped screws, and cracked gaskets now instead of reopening the job later.
For most U.S. tubs, a basic replacement stopper is inexpensive, but a full drain kit is still cheaper than repairing a finish you damaged while trying to save a worn part. I usually tell people to take photos before they leave the bathroom and to keep the old hardware in a small bag until the new part is fully installed. If the drain came out cleanly, the job was mostly about using the right tool; if it fought back, the real win is stopping before the tub itself becomes part of the repair.