Mounting a TV changes how a room works, not just how it looks. The right setup depends on the wall behind the screen, the bracket’s compatibility, the viewing height, and how much storage you still need underneath for consoles, speakers, and cables. I treat it like a small carpentry project with a safety checklist, because the details matter more than the marketing on the box.
The safest installation starts with the wall, the bracket, and the cable plan
- Match the hardware first. VESA pattern and weight rating matter more than TV size alone.
- Use real structure. On drywall, I want solid anchoring into studs whenever possible.
- Choose the right format. Fixed, tilt, and full-motion mounts solve different room problems.
- Plan power and cables before drilling. The cleanest setup is the one that still lets you service devices later.
- Budget realistically. Professional mounting in the U.S. often lands around $150 to $350, with more for hidden wiring or tricky walls.
Wall mount or stand, and when each makes more sense
I always start with the room, not the bracket. A wall-mounted television clears floor space, makes cleaning easier, and works well when the goal is a lighter visual footprint. A stand or console, on the other hand, usually wins when the room needs storage for game consoles, streaming boxes, books, or decor, or when the wall is rented, fragile, or awkwardly framed.
That tradeoff matters in U.S. homes because the right answer is often less about style and more about what the space has to do every day. If you need hidden wiring, a floating look, and fewer surfaces to collect clutter, the wall is the obvious path. If the room needs shelves, a soundbar shelf, or a stable place for media gear, a good console can be the smarter carpentry choice.
| Option | Best for | Main advantage | Main tradeoff |
|---|---|---|---|
| Wall mount | Clean look, tighter rooms, child- or pet-heavy spaces | Frees floor space and reduces visible clutter | Requires drilling, alignment, and structural support |
| Stand or console | Renters, frequent rearranging, gear-heavy setups | Easy installation and built-in storage | Takes floor space and can become visually busy |
Once that choice is clear, the next step is not drilling. It is picking hardware that actually fits the television and the wall.
Pick the right bracket or stand before you touch the wall
The two compatibility checks that matter most are VESA and weight rating. VESA is the hole pattern on the back of the TV, usually measured in millimeters, and the mount has to match that pattern. Weight rating is the other half of the equation: a bracket that fits the holes can still be the wrong bracket if it is not rated for the panel.
I also look at how the room is used. A fixed mount gives the cleanest profile and is usually the least expensive. A tilt mount is useful when the screen sits a little high or glare is a problem. A full-motion arm is the most flexible, but it adds leverage, bulk, and installation complexity, so I only choose it when the room really needs that movement.
| Mount type | Best use | Strengths | Tradeoffs | Typical U.S. price range |
|---|---|---|---|---|
| Fixed | Eye-level viewing, minimalist setups | Slim, simple, stable | No angle adjustment | $20-$60 |
| Tilt | Higher placement or glare control | Small vertical adjustment | Still limited range | $30-$100 |
| Full-motion | Corner rooms, wide seating, frequent screen access | Swivels, extends, and repositions easily | More expensive and more demanding to install | $70-$250+ |
If you are using a stand instead of a wall mount, I still check the same logic: the TV base has to sit fully supported, the furniture has to handle the load, and the room still needs room to breathe. Once the hardware is chosen, I move on to the wall itself, because that is where most mistakes start.
Measure the wall and confirm what is behind it
This is the step that saves drywall, time, and frustration. I map the screen position first, then I verify the structure behind it. In a typical U.S. wood-framed wall, studs are often spaced 16 inches on center, but I never assume that pattern is perfect. Older homes, corners, fireplaces, and exterior walls can all break the pattern.
For a seated living room, the center of the screen often lands somewhere around eye level, frequently in the 42 to 48 inch range from the floor, but the right height depends on sofa height, screen size, and whether the TV is meant to be viewed straight on or from multiple spots. Above a fireplace is a special case, not a default. It usually pushes the screen too high unless the room leaves no better option.
Here is the basic layout I mark before I drill:
- Centerline of the seating area so the TV does not drift left or right.
- Stud locations confirmed with a stud finder, magnet, or both.
- Top and bottom clearance for the wall plate, the TV, and any soundbar or shelf below.
- Outlet and cable path so cords do not end up stretched, kinked, or visible by accident.
- Motion clearance if the mount will swivel or pull away from the wall.
If the wall is masonry, the process changes. Brick, concrete, and stone need masonry-rated anchors and the right drill bit, and the wall condition matters more than the TV size. When the layout is mapped cleanly, the actual installation becomes much more predictable.
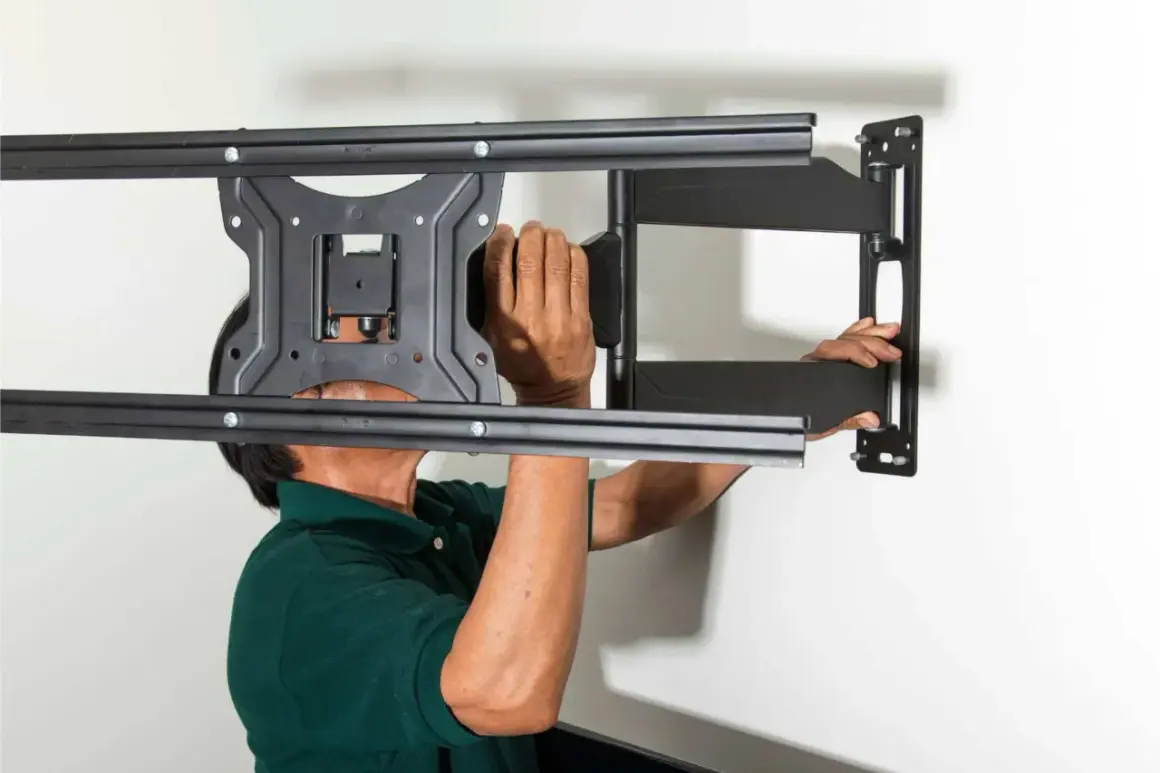
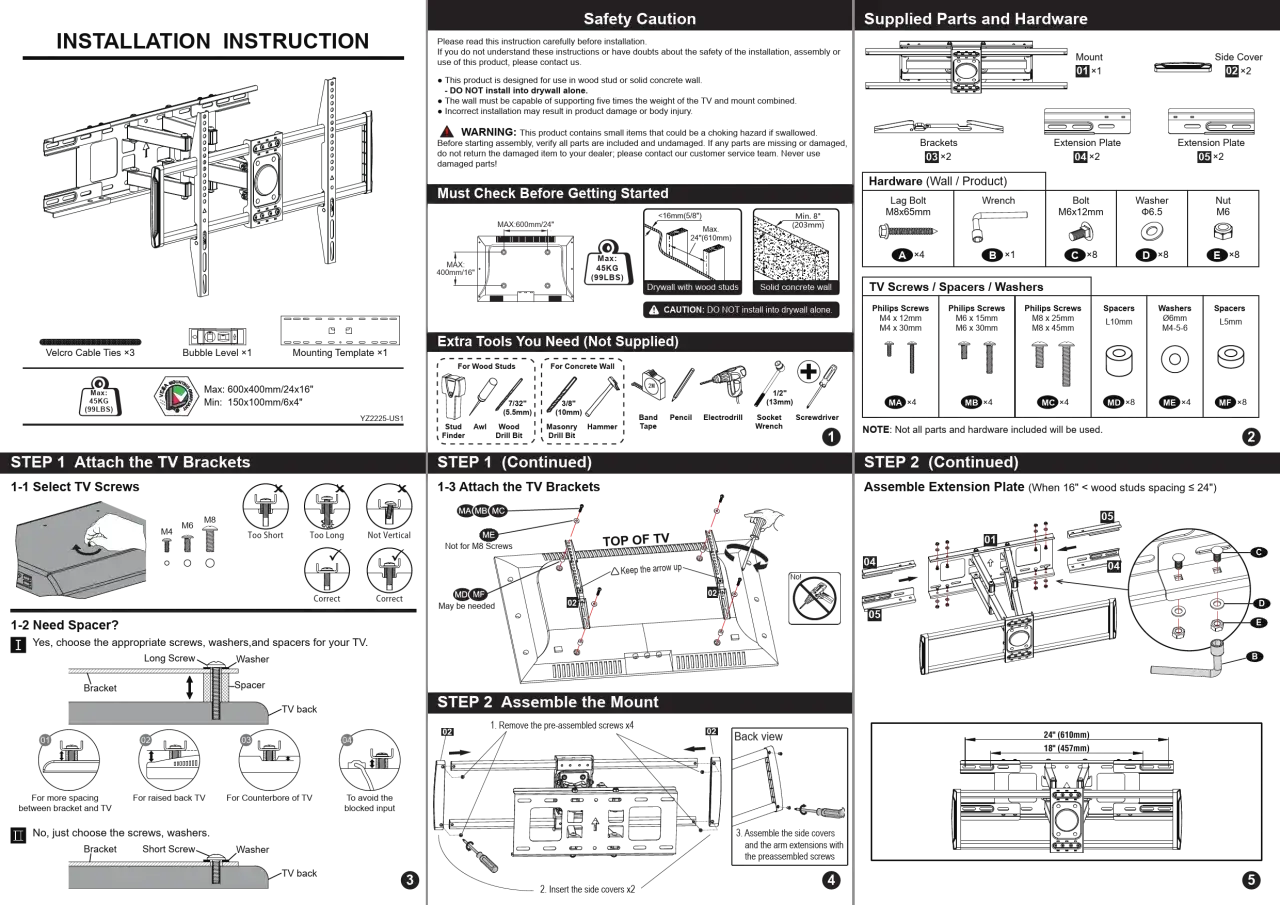
Install the hardware with a clean sequence
The actual job is straightforward when the prep is right. I like to assemble the TV-side rails first, test the wall plate position with tape or a helper, and only then commit to holes. For larger screens, a second person is not optional in my book. It keeps the panel steady and makes it easier to confirm level and latch engagement.
- Attach the TV rails or brackets to the back of the television and verify the VESA pattern lines up cleanly.
- Hold the wall plate at the marked height and confirm level before any drilling.
- Pre-drill pilot holes sized for the fasteners and wall type.
- Fasten into studs with the supplied lag bolts, or use masonry anchors on brick or concrete.
- Tighten evenly, but do not over-crush the drywall or strip the fasteners.
- Hang the TV, lock the safety screws or clips, and test the tilt or swing range before letting go.
I am conservative with screws and anchors because I want the mount to survive real use, not just the first day. If the bracket feels like it needs force to fit, something is wrong: either the hole pattern is off, the wall plate is misaligned, or the hardware is not meant for that wall. When the mounting sequence is clean, the next challenge is making the rest of the setup disappear without creating a service nightmare.
Keep cables, power, and accessories under control
Clean cable management is where a lot of wall-mounted TVs either look finished or look improvised. I usually separate the options into three groups. Surface raceways are the easiest and cheapest, in-wall kits create the cleanest look, and an external console or shelf works best when the room needs easy access to devices.
If you want the cords hidden inside the wall, I prefer a code-compliant in-wall power kit or a licensed electrician rather than improvising with a standard extension cord. That approach keeps the setup cleaner and safer. It also makes future service easier, which matters more than people think once HDMI cables, streaming boxes, and soundbars start changing over time.
- Surface raceway works well when you want a clean line without opening the wall.
- In-wall cable kit is best when the room layout is settled and you want the least visual clutter.
- Console storage is the easiest answer when the TV shares the wall with gaming systems, routers, or a soundbar.
For a stand-based setup, cable control is easier but storage can get messy fast. The trick is leaving enough slack for service and enough clearance for ventilation. Once that is handled, most of the real risk comes from a handful of avoidable mistakes.
The mistakes that cost people time, money, or drywall
The failures I see most often are not exotic. They are small judgment errors that stack up. The good news is that every one of them is preventable if you slow down before the first hole goes in.
- Trusting drywall alone. Drywall is not the structural element; it is the finish surface.
- Matching by screen size only. A TV can be the right diagonal and still have the wrong VESA pattern or weight.
- Mounting too high. The room may look dramatic on paper, but the neck strain usually wins in real life.
- Using the wrong fasteners. Screw length, anchor type, and wall material all need to match.
- Skipping the service loop. If the HDMI cable has no slack, future device swaps become a headache.
- Not checking what runs behind the wall. Electrical lines, plumbing, and HVAC elements deserve respect.
The one error I correct most often is also the simplest: people rush to make the screen level without first confirming the wall is actually the right wall. When the wall is unusual or the TV is expensive, I usually recommend bringing in a pro instead of gambling on a perfect-looking but weak install.
When paying a pro is the better move
There is nothing wrong with hiring help, especially when the wall is complicated. In the U.S., recent pricing for standard TV mounting often lands roughly in the $150 to $350 range, and the total climbs when the job includes concealed wiring, masonry, fireplace placement, or extra electrical work. That is not cheap, but it is also a lot less expensive than repairing drywall, replacing a damaged TV, or calling an electrician after the fact.
I would lean toward a professional installer if any of these are true:
- The wall is brick, stone, plaster, or another material that is less forgiving than standard drywall.
- The screen is large, heavy, or awkward to lift safely with one helper.
- You want in-wall wiring, a new outlet, or a very clean finish.
- The mount has to land in a narrow space, corner, or fireplace surround.
- You are not sure where pipes, wiring, or studs actually are.
In other words, I treat pro installation as a risk-management decision, not a luxury. If the job feels more like structural work than furniture assembly, that is usually the right instinct.
The setup I would choose in a typical U.S. living room
For most living rooms, I would choose a tilt or fixed mount on two solid studs, place the screen so the center lands near seated eye level, and pair it with a low console for storage under the display. That gives the room a clean look without sacrificing a place for remotes, game consoles, or a soundbar. If cable concealment matters, I would use either a surface raceway or a proper in-wall power solution rather than trying to hide everything with loose cord bundles.
That combination is not flashy, but it tends to age well. It respects the wall, keeps the equipment reachable, and avoids the common trap of making the TV look good on day one while turning the rest of the room into a maintenance problem. If I had to reduce the whole process to one rule, it would be this: decide how the room should work before you decide how to fasten the screen, and the installation will feel deliberate instead of improvised.