Learning how to level ground starts with a simple choice: are you fixing a few low spots, reshaping a lawn, or correcting drainage before a patio, fire pit, or seating area goes in? I walk through the full process here, from measuring slope and choosing fill material to compacting the soil and avoiding the mistakes that create puddles later. The goal is not just a flatter surface; it is a surface that stays usable after rain, foot traffic, and seasonal settling.
The essentials before you start moving soil
- Drainage comes first. A flat yard that holds water is a fix that will fail.
- Use fill dirt for bulk shape, topsoil for planting layers, and compost when you need to improve soil quality, not just height.
- Small lawn dips can usually be repaired by hand; larger grade changes need compaction in layers and sometimes machinery.
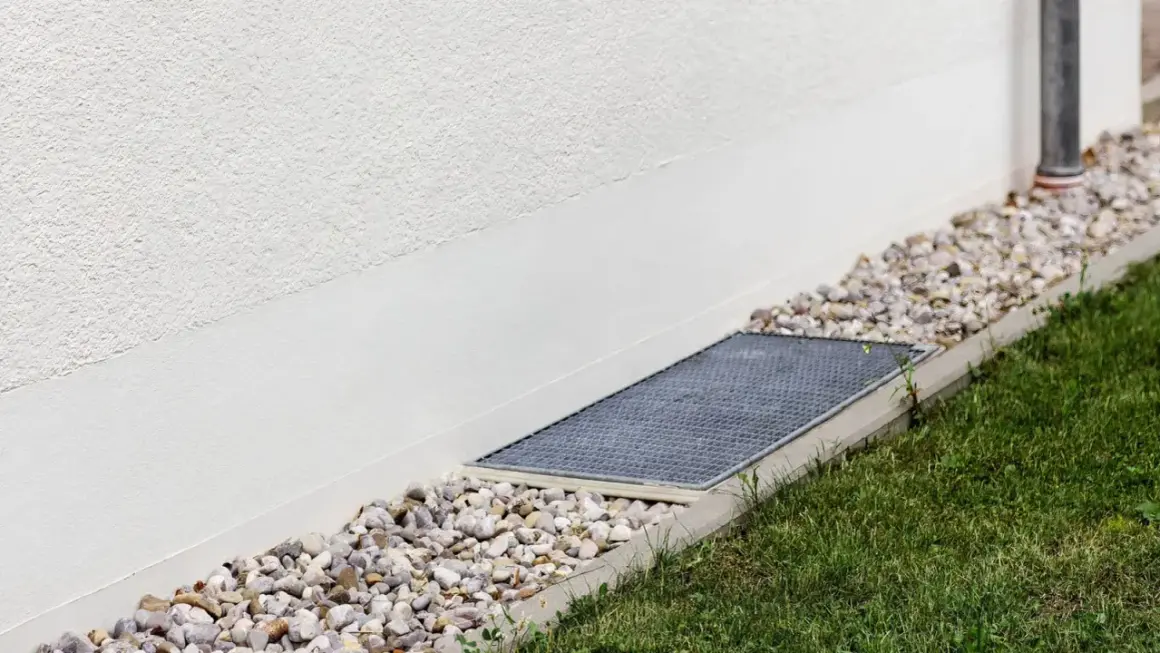
- Near a house, keep the final grade sloping away from the foundation instead of dead flat.
- Measure before you haul soil so you do not overfill, bury roots, or build a bump that settles unevenly.
First decide whether you need leveling, grading, or drainage work
I do not treat every uneven yard the same way. A shallow dip in turf, a washout after heavy rain, and a slope that sends water toward the foundation are three different problems, even if they all look like “bad ground” at first glance. If I sort that out early, I can choose the right material and avoid doing the job twice.
| What you are seeing | What it usually means | Best approach |
|---|---|---|
| Small low spots in an otherwise healthy lawn | Minor settlement, mower ruts, or old erosion | Spot leveling or light topdressing |
| Deep holes, ruts, or bare depressions | Soil loss or compaction below the surface | Fill, compact, then topsoil and reseed or sod |
| Water pooling after storms | The grade is trapping runoff | Regrade the area and fix drainage paths |
| Soil sloping toward the house | Risk of runoff against the foundation | Correct the slope before any cosmetic leveling |
| Soft, muddy ground that keeps sinking | Wet subsoil or a drainage problem below grade | Address drainage first, then finish the surface |
That distinction matters because a lawn can look smooth and still be wrong. If water cannot leave the area cleanly, the surface will move again, settle again, and eventually fail again. Once I know which bucket the job falls into, the right tools and fill choices become much easier to narrow down.
Choose the right tools and materials
I keep the tool list practical. You do not need every landscaping gadget on the market, but you do need the right combination of measuring, moving, leveling, and compacting tools. For most jobs, the difference between a clean result and a frustrating one is not brute force; it is using the right tool at the right stage.
| Tool or material | What it does | When I use it |
|---|---|---|
| String line or laser level | Shows high and low points across a larger area | Any project where the eye alone is not accurate enough |
| Line level or water level | Helps compare elevations over distance | Yards with vegetation, slopes, or obstructed sight lines |
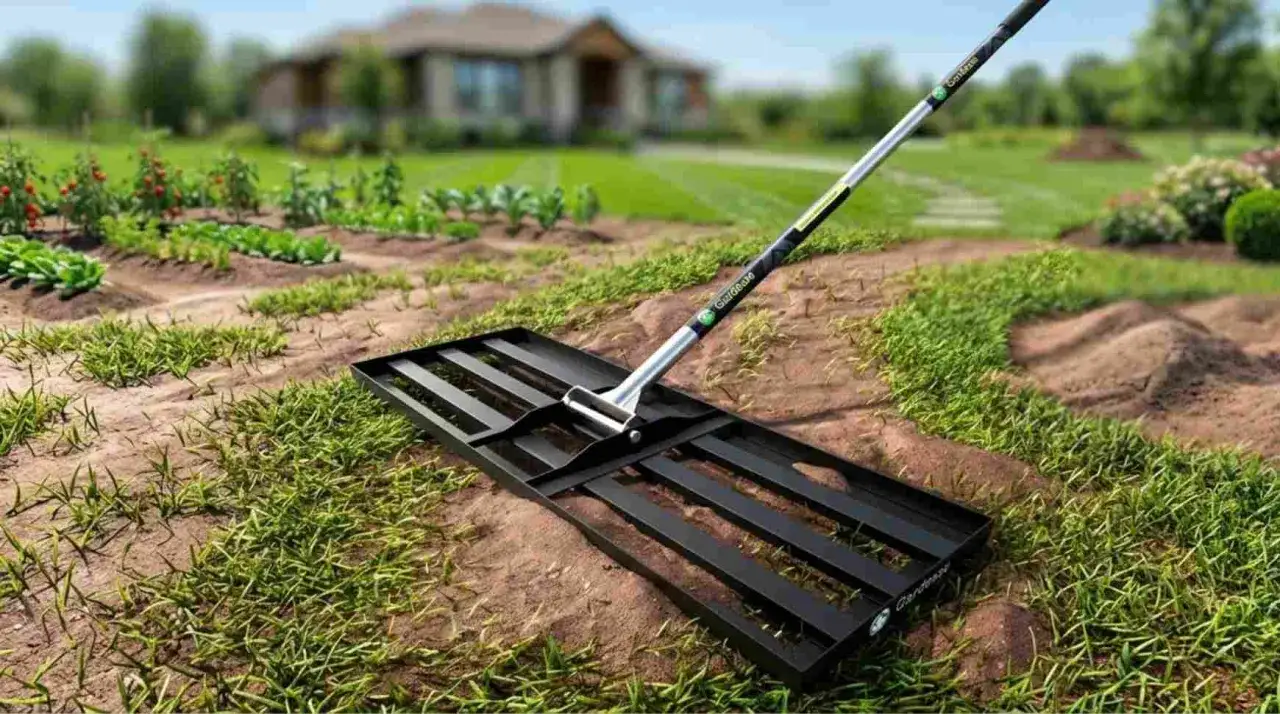
| Landscape rake | Moves soil quickly and smooths the surface | Spreading fill and feathering transitions |
| 2x4 screed board | Pulls material to a consistent height | Final shaping on small pads, beds, and filled areas |
| Hand tamper or plate compactor | Settles soil so it does not sink later | Any fill deeper than a thin topdressing |
| Fill dirt | Builds bulk shape and raises grade | Deep low spots, backfill, or base shaping |
| Topsoil | Supports grass and planting | The top layer over fill or as a repair layer |
| Compost | Improves structure and fertility | Thin lawn topdressing or poor soil improvement |
| Sand | Can help in limited topdressing situations | Only when the soil mix and drainage call for it; I do not rely on sand alone in heavy clay lawns |
For home lawns, I usually prefer a screened topsoil-and-compost blend for light leveling, while fill dirt belongs underneath where plants will not root directly. Illinois Extension is clear that sand alone is not a good way to improve clay soil in a home lawn, and that warning matches what I see in the field: a bad soil layer can create more problems than it solves.
Before any digging, I also call 811 to locate utilities. That step is boring, but it is the one that keeps a “simple” grading project from becoming a repair bill.
With the tools and materials sorted, the next question is budget and quantity, because the amount of soil you move changes both the price and the method.
What the work usually costs and how much material to order
In the U.S., small leveling jobs can stay affordable if the slope is minor and access is easy. Once a yard needs regrading, compaction, or drainage work, labor becomes the bigger cost driver. I like to estimate both the material bill and the hidden cost of moving that material around the property.
| Project type | Typical 2026 U.S. ballpark | What usually pushes it higher |
|---|---|---|
| Small spot leveling | $500 to $1,000 if hired out | Bad access, wet soil, or lots of reseeding |
| Average backyard regrade | $1,000 to $5,000 | Steeper slope, more fill, or drainage corrections |
| Grading around a house | $500 to $3,000 | Foundation slope correction and compaction |
| Land grading by area | $0.40 to $2.00 per square foot | Large elevation changes and equipment needs |
| Topsoil delivered | $10 to $50 per cubic yard | Delivery distance and screening quality |
| Compost | $25 to $75 per cubic yard | Organic quality and local supply |
| Grass seed | $0.25 to $0.70 per square foot | Seed blend and coverage rate |
| Sod | $1 to $2 per square foot | Grass type and installation labor |
For material quantity, I use a simple estimate: square feet x average depth in inches / 324 = cubic yards. If a 12-by-20-foot area needs an average of 3 inches of fill, that is about 2.2 cubic yards, and I would usually order 2.5 yards to account for settling and waste. The deeper the fill, the more important compaction becomes, because loose soil always shrinks after the first few storms.
Now that the numbers are on the table, the actual leveling process becomes much easier to organize.
Use the small-area method for dips, ruts, and lawn repairs
For minor unevenness, I start with the least disruptive method first. That usually means a light topdressing on turf, a bit more fill in a deeper rut, or a full cut-and-fill repair if the depression goes below the root zone. The trick is to make the correction small enough that the surface can absorb it without smothering grass or creating a soft patch that settles again.
For shallow dips in existing turf
Mow the grass a little shorter than usual, rake away debris, and spread a thin layer of screened topsoil or compost blend over the low area. I keep each pass light, usually no more than about a half inch at a time, so the grass blades can still breathe and keep growing. Then I use the back of a rake or a leveling rake to work the material into the depression and water it in lightly.
For holes and ruts that go below the root zone
If the ground has dropped enough that the turf is hanging over an edge, I cut and lift the sod, add fill in thin lifts, and compact each lift before adding more. A 2x4 makes a good screed board here, because it lets me pull the surface flush with the surrounding grade instead of guessing by eye. Once the base is firm, I return the sod or seed the area and keep it evenly moist while it reestablishes.
Read Also: Landscape Timbers - Build Borders That Last
For a compacted base under pavers or a patio edge
I do not build patio support on loose topsoil. For hardscape, I want a compacted subgrade and a stable base that will not shift under load. That means excavating to the correct depth, compacting the native soil, then rebuilding the surface in controlled layers so the finished pitch sheds water instead of trapping it. The exact base depth depends on the project, but the principle is always the same: stable underneath, finished finish on top.
Once the surface is reset, the next step is to deal with bigger changes in slope, because those need a different workflow than a small lawn repair.
Regrade larger areas in layers, not one deep dump
When a yard needs real reshaping, I switch from patch repair to grading. That is where you strip, build, compact, and re-shape the land so the final surface follows the drainage path you actually want. If the area is large enough to feel like earthmoving instead of lawn care, it probably needs a more structured approach.
| Method | Best for | Main limitation |
|---|---|---|
| Topdressing | Minor lawn dips and shallow settling | Too light for meaningful grade changes |
| Cut and fill | Rebalancing high and low areas in a yard | Needs compaction and careful slope control |
| Swale | Moving runoff across a property | Consumes space and changes the landscape layout |
| Retaining wall or terrace | Steeper slopes and level outdoor living zones | Higher cost and more design sensitivity |
My rule is simple: if I need to raise or lower a large section by more than about a foot, I stop thinking in terms of a weekend lawn project and start thinking in terms of a proper regrade. At that point, the real question is not just “can I make it level?” but “can I make it level without causing erosion, settlement, or a drainage failure somewhere else?”
That is why big grading jobs often start with the topsoil stripped off and stockpiled, the rough grade set first, and the final soil returned only after the shape is correct. It is slower than dumping material across the whole area, but it produces a cleaner, more stable result. When the yard’s slope is part of the design, you also get a better foundation for patios, paths, and planting beds.
Keep water moving away from the house
This is the part I refuse to treat as optional. A flat surface right up against a house is a problem, not an improvement, because water needs a direction to travel. Around foundations, I want a slope that carries moisture away instead of letting it sit and soak back into the wall.
The University of Minnesota Extension recommends that soil around a foundation slope away at a minimum of 1 inch per foot for at least 6 feet. I use that as a practical homeowner benchmark when I am restoring grade near a house, because it is steep enough to move water but still realistic to build without tearing up the whole yard.
Gutters and downspouts matter just as much. If roof runoff dumps straight beside the house, even good grading can be overwhelmed. I extend discharge points well away from the foundation, and if the site cannot physically support the needed slope, I move to swales, drains, or other runoff controls rather than pretending the grade alone will solve it.
One detail people miss is that patios, sidewalks, and driveways should also shed water away from the structure. A beautiful hardscape that slopes inward is still a drainage mistake. Once the water plan is right, the project becomes much more durable, which leads straight into the errors that undermine a level surface later.
Avoid the mistakes that make a leveled yard fail later
Most bad results come from a short list of repeatable mistakes. I see them often enough that I can usually predict them before the first shovel goes in. The good news is that they are all avoidable if you slow down long enough to check the basics.
- Adding too much fill at once. Deep loose soil settles unevenly, so I build in lifts and compact as I go.
- Working wet soil. Saturated ground compacts poorly and turns into a lumpy mess when it dries.
- Using the wrong material for the job. Fill dirt is fine for bulk shaping, but plant roots need topsoil and a workable structure above it.
- Burying the root flare or siding. Soil piled too high against trees or a house creates long-term damage.
- Ignoring drainage. A level patch that traps water is still a failed patch.
- Skipping utility checks. A surface project is not worth hitting gas, water, electric, or irrigation lines.
- Forgetting seasonal settlement. Fresh fill always moves a little, especially after the first heavy rain.
When I correct a yard, I am less interested in making it look perfect on the day of the job and more interested in making it behave correctly six months later. That means I would rather stop, compact, and recheck than race to a finished look and pay for it later.
The last pass before seeding, sodding, or building on it
The last pass is usually the most underappreciated one. Before I seed, lay sod, set pavers, or turn the space into an outdoor living area, I walk the surface, check the slope from several directions, and look for any soft spots that still give underfoot. If a board rocks, a puddle lingers, or the surface still feels springy, I fix that before moving on.
For lawn projects, this is also the point where I decide whether I need another light topdressing after settlement. For hardscape, it is where I confirm that the base is firm and the final pitch still sends water away from the structure. For planting beds, I make sure the final soil is loose enough for roots but not so airy that it collapses as soon as it rains.
That is the part of the job I would keep in mind if I were doing this for a client, a patio project, or my own backyard: a level surface is only useful when it is paired with the right drainage, compaction, and finish for the space it needs to support. If you get those three things right, the yard works harder for you instead of against you.