Cleaning the toilet tank is less about making the bathroom look tidy and more about protecting the parts that control every flush. Inside that reservoir, mineral scale, rust, and biofilm can build up around the flapper, fill valve, and bolts, and once that happens, a simple wipe-down is no longer enough. This guide shows a safe, practical way to clean the tank, choose the right cleaner, and tell the difference between dirt and a part that needs replacing.
What you need to know before opening the tank
- Turn off the water, flush the tank empty, and protect the floor before you start.
- Use the mildest cleaner that can handle the problem: soap for grime, vinegar for light scale, or a tank-safe product for heavier buildup.
- Never mix bleach with vinegar, ammonia, or rust removers. That is a safety hazard, not a small caution.
- Avoid bleach tablets and harsh abrasives unless the toilet manufacturer specifically says they are safe for the tank parts.
- If the toilet still runs, leaks, or smells after cleaning, the issue is probably mechanical, not cosmetic.
What is actually inside the tank and why it gets dirty
When I open a toilet tank, I do not think of it as an empty container. I treat it like a working plumbing assembly. The water inside sits against rubber, plastic, and metal parts every day, so it is a natural place for sediment, hard-water film, rust, and biofilm to collect. In homes with hard water, that buildup can show up faster and leave white crust, reddish streaks, or a slimy film around the walls and hardware.
The most important parts to inspect are the flapper, chain, fill valve, float, flush valve, and tank bolts. If those parts stay clean and flexible, the toilet usually works better and lasts longer. If they get coated in scale or deteriorate from the wrong cleaner, you can end up with a running toilet, a weak flush, or a leak that looks like a cleaning problem but is really a parts problem. Once you understand that, the rest of the job becomes much more straightforward.Choose the cleaner that matches the mess
I always match the cleaner to the type of buildup. That keeps the job safer and usually saves time. A tank with dust and light grime does not need the same treatment as one with rust stains or mineral crust. If your toilet has a built-in cleaning system, follow that system’s instructions instead of treating it like a standard tank. Some designs use a separate reservoir for the cleaner, which changes what is safe to use.
| Cleaner | Best for | Why it works | Watch out for |
|---|---|---|---|
| Mild dish soap and warm water | General grime, dust, and light film | Safe for most tanks and parts | Will not remove heavy mineral scale |
| White vinegar | Light hard-water deposits, odor, and mineral haze | Helps loosen scale without aggressive scrubbing | Do not mix with bleach; check old rubber parts first |
| Tank-safe commercial cleaner | Stubborn scale or rust | Formulated for toilet components | Read the label carefully, especially for septic systems |
| Bleach-based products | Disinfection only, and only if the manufacturer allows it | Can sanitize when used exactly as directed | Never combine with acids or ammonia; overuse can age rubber parts |
For most standard tanks, I prefer to start with the least aggressive option and move up only if the buildup demands it. That approach is slower than dumping in a strong chemical, but it is also how you avoid wrecking a flapper that still had years of life left. From there, the prep work is what keeps the job clean and controlled.
Prepare the tank safely before you scrub
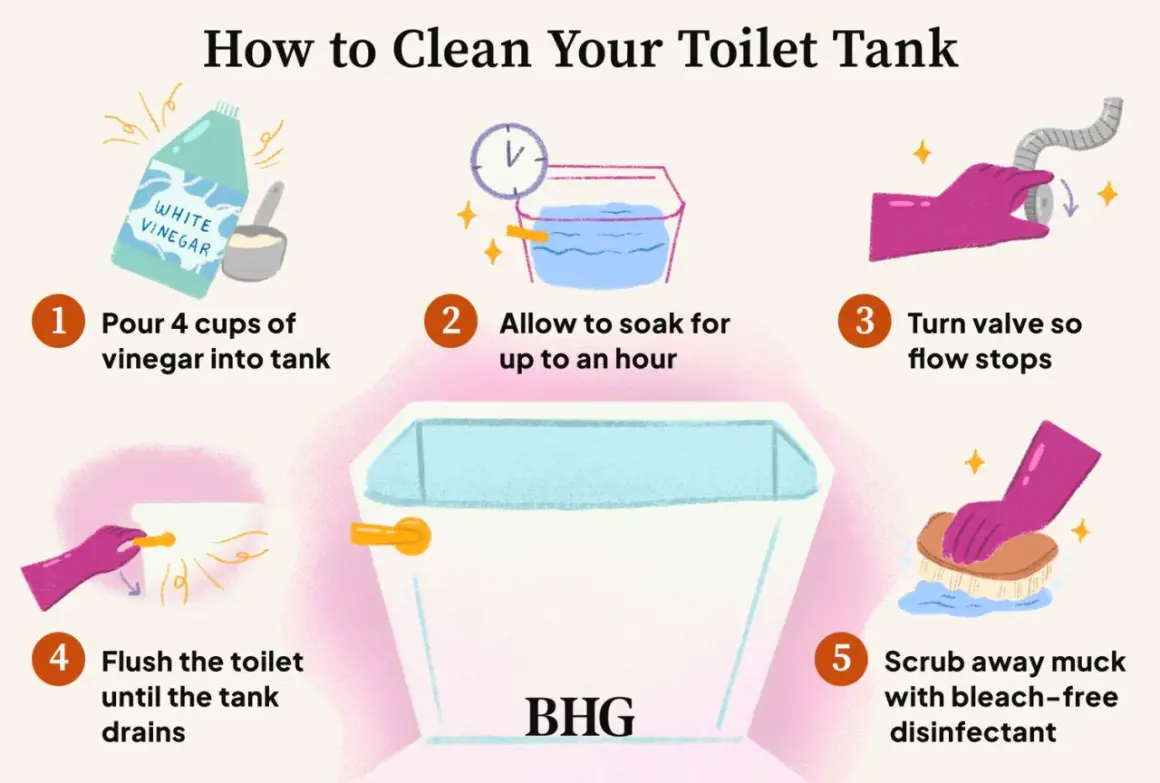
Before I touch any cleaner, I shut off the water supply at the valve behind or beside the toilet and flush the tank until it is mostly empty. I hold the flush lever down so as much water as possible leaves the tank, then I sponge out the rest or use a wet vac if the tank still has a shallow pool at the bottom. A towel under the tank and another under the lid help catch drips and protect the floor.
This is also the moment to inspect the parts. If the flapper already looks cracked, warped, or sticky, I would rather replace it after the cleaning than scrub around it and hope for the best. I also look at the chain, fill valve, and overflow tube. If one of them is loose, bent, or heavily corroded, cleaning alone will not solve the underlying issue.
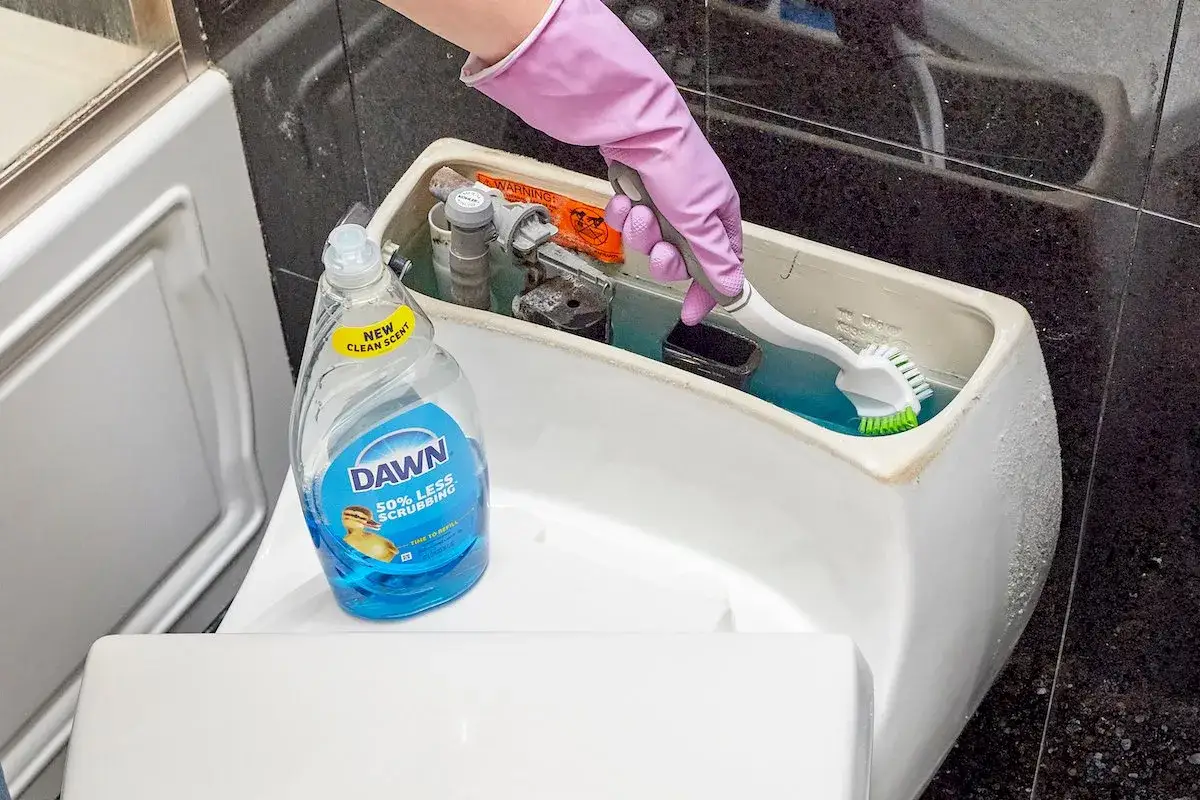
I also wear gloves and, if I am using anything stronger than soap, basic eye protection. It sounds minor, but it makes the task less annoying and a lot safer. Once the tank is drained and inspected, the actual cleaning goes quickly.
Clean the tank step by step
For a normal deep clean, I work in this order. The goal is to remove buildup without forcing cleaner into places it does not belong.
- Remove the tank lid and set it on a towel where it cannot chip.
- Wipe out loose debris with a damp microfiber cloth or sponge.
- Apply the cleaner you chose. For general grime, use warm water with a little dish soap. For light mineral buildup, use white vinegar if your tank parts and manufacturer allow it.
- Let the cleaner sit long enough to loosen the buildup. For vinegar, an overnight soak of up to about 12 hours is often enough on standard tanks with sound rubber parts.
- Scrub the sides, bottom, and corners with a soft nylon brush or non-scratch sponge. I stay away from metal scrub pads and anything abrasive.
- Pay special attention to the areas around the bolts, the base of the fill valve, and the underside of the lid, where grime tends to hide.
- Rinse thoroughly with clean water, then turn the supply back on and let the tank refill.
- Flush the toilet a few times and watch the parts in motion. The flapper should close cleanly, the fill valve should stop when the tank reaches the correct level, and the water should not keep running.
If the water still looks cloudy or the tank still smells after the first pass, I repeat the mildest part of the process instead of jumping straight to a harsher chemical. That usually tells me whether I am dealing with surface residue or something more stubborn. When stains are more aggressive, the next section matters more than brute force.
Handle rust, hard water, and lingering odors the right way
Rust and hard-water scale are the two problems that most often make a tank look worse than it is. White crust usually means mineral deposits. Reddish-brown staining usually points to iron or rust. A musty odor usually comes from stagnant water, biofilm, or a tank that has not been cleaned in a long time. Each one needs a slightly different approach.
| What you see | What it usually means | Best next move |
|---|---|---|
| White, chalky buildup | Hard-water scale | Use white vinegar or a tank-safe descaler and let it sit before scrubbing |
| Reddish streaks or orange spots | Rust or iron staining | Use a rust remover made for toilets and rinse thoroughly afterward |
| Black film or slippery residue | Biofilm or mildew | Scrub with soap first, then sanitize only if the product is safe for tank parts |
| Musty smell with no obvious stain | Stagnant water or hidden buildup | Clean the tank more often and check the flapper, fill level, and lid fit |
For stubborn mineral buildup, I am comfortable using vinegar in a standard tank when the components are in decent shape. If the rubber parts are old or brittle, I shorten the contact time and inspect them afterward because older seals can become more sensitive to acidic cleaners. For households with heavy hard water, a water softener or whole-house filtration system often does more long-term good than any one cleaner, because it reduces the problem at the source.
One thing I never do is mix cleaners to “make them stronger.” That shortcut is where people get into trouble. The next section is worth reading even if you already know your way around a bathroom, because most damage comes from the wrong product choice rather than the scrubbing itself.
Avoid the mistakes that damage parts
Most toilet tank damage happens because someone tries to clean faster, not better. The worst mistake is mixing products. Bleach should never be combined with vinegar, ammonia, or rust removers. That is a real inhalation hazard, and it has nothing to do with how dirty the tank is. If you ever smell a sharp chemical odor after combining cleaners, leave the area and get fresh air immediately.
- Do not use bleach tablets or drop-in cleaners in a standard tank unless the toilet manufacturer specifically says they are safe for the tank parts.
- Do not scrub with steel wool, wire brushes, or anything that can scratch porcelain or plastic components.
- Do not force the flapper, chain, or fill-valve parts while cleaning. They break easily when they are already old.
- Do not leave a strong cleaner in the tank longer than the label or manufacturer allows.
- Do not assume a dirty tank is the whole problem if the toilet keeps running after cleaning.
I am also cautious with septic systems. In a septic home, I stick to the mildest effective cleaner and avoid unnecessary disinfecting. The tank itself is not the septic system, but excess harsh chemicals still add avoidable stress to plumbing and drain health over time. Once you steer clear of these mistakes, the remaining question is whether cleaning is enough at all.
When the tank needs a repair instead of another cleaning
Some problems look like tank dirt at first glance but are really worn parts or a failing seal. That is why I always test the toilet after cleaning. If the refill never stops, the flapper may not be seating correctly. If water appears on the floor, the supply line, tank bolts, or gasket may be leaking. If the flush is weak even after the tank is clean, the fill valve or rim jets may need attention.
| What keeps happening | Likely cause | What I would do next |
|---|---|---|
| Toilet keeps running | Flapper, chain, or fill-valve problem | Adjust or replace the worn part |
| Water on the floor | Loose bolts, bad gasket, or supply-line leak | Shut off the water and inspect the connections |
| Weak flush after cleaning | Restricted fill valve or clogged rim jets | Clean the affected parts or replace the valve if needed |
| Persistent sewage smell | Vent, seal, or drain issue beyond the tank | Call a plumber |
| Cracked tank or corrosion around hardware | Structural damage | Stop DIY cleaning and get professional help |
That distinction matters because a new flapper can fix a running toilet for a few dollars, while repeated cleaning will not. I would rather replace a bad part early than keep scrubbing a tank that is leaking because of age, pressure, or wear. Once the mechanism is sound again, maintenance becomes much easier.
Keep the tank cleaner between deep cleans
My baseline is a deep tank cleaning twice a year. In homes with hard water, visible scale, or an older toilet, I shorten that interval and check it every 3 to 4 months. That does not mean a full overhaul each time. Often, I am just opening the lid, looking at the water line, and making sure the flapper and fill valve still look healthy.
- Wipe the tank lid and exterior when you do regular bathroom cleaning.
- Keep the bathroom ventilated so condensation does not encourage film and odor.
- Watch for new mineral spots after every few weeks if your water is hard.
- Use one cleaner at a time and rinse fully before switching products.
- Replace aging rubber parts before they fail, not after.
The cleanest tank is not the one filled with the strongest chemical. It is the one where the water stays clear, the moving parts stay flexible, and the flush works without resistance. If you keep an eye on the parts instead of just the stain, you will spend less time fighting the same problem over and over.